In late June 2026, an omega block parked itself over Central Europe and refused to move. Meteorologists call it a heat dome: a stagnant high-pressure system that traps hot, dry air beneath it and compresses it downward, day after day, with nowhere to escape. Germany recorded a new national high of 41.7°C at Coschen, breaking a record set only a day earlier at Saarbrücken. France logged its hottest day on record, with an average national temperature of 30°C and local highs above 43°C. The Czech Republic hit 41.9°C at Doksany, the highest reading its official network had ever registered. Slovakia’s own meteorological institute, SHMÚ, issued repeated high-temperature warnings from 19 June onward as the same heat dome pushed east across the Danube basin.
Table of Contents
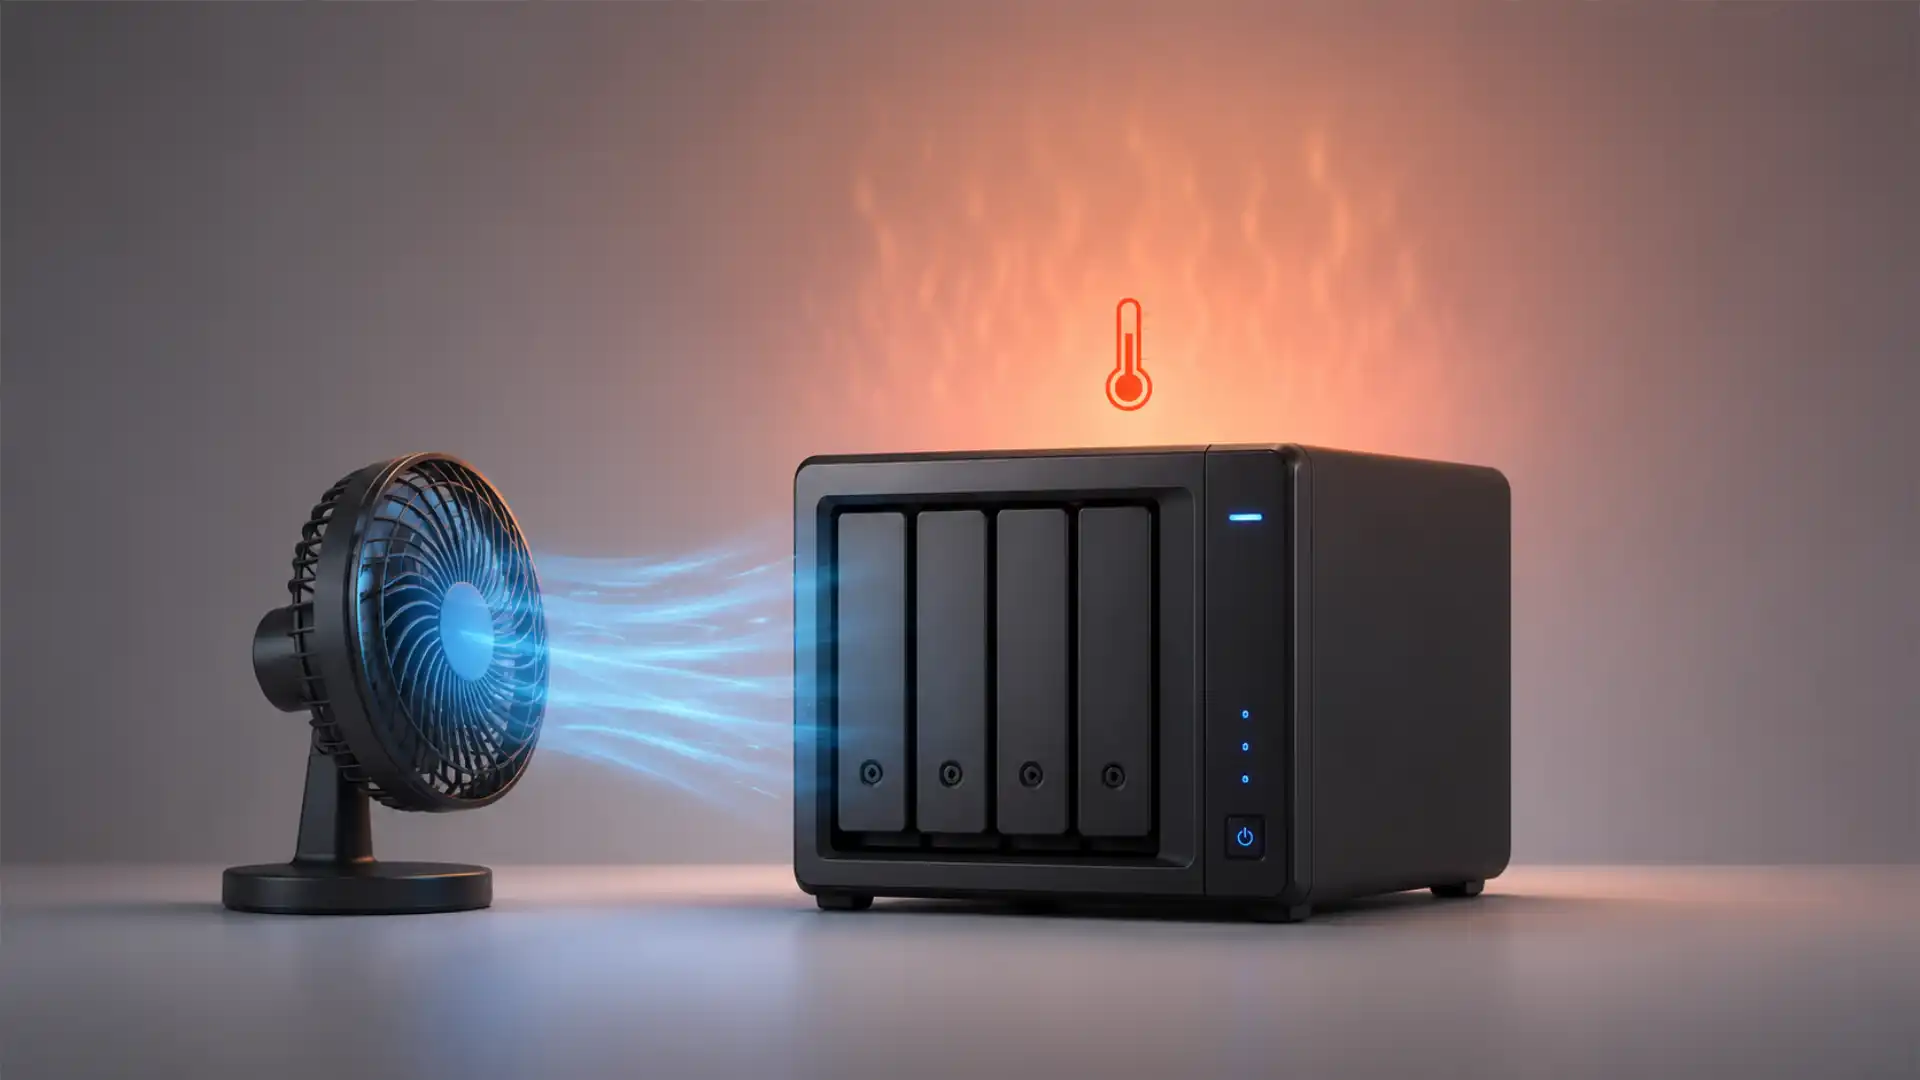
The heatwave that turned home electronics into a real problem
None of this is abstract if you happen to keep a small server running somewhere in your home. A Raspberry Pi tucked behind a router, a NAS sitting in a cupboard, a mini PC quietly serving files to a household — all of it depends on one assumption that heatwaves break: that the air around the device stays cool enough to carry heat away. Under normal conditions, a room holds somewhere between 18°C and 24°C, and a small computer’s cooling system was designed with that range in mind. During a heat dome, indoor air in an unconditioned room can sit at 30°C, 33°C, sometimes higher for days at a stretch, particularly in the upper floors of a building or in a room that catches afternoon sun.
The problem is not that a Raspberry Pi or a NAS will burst into flames the moment the mercury climbs. Modern hardware is built to protect itself through automatic throttling long before it reaches a genuinely dangerous temperature. The problem is subtler and more persistent: quietly degraded performance, drives running for weeks at temperatures that shorten their working life, batteries in a backup power supply aging at double or quadruple their normal rate, and file systems left vulnerable to corruption if a thermal shutdown happens mid-write. None of these failures announce themselves with a bang. They show up as an oddly slow home automation dashboard, a backup job that silently stopped finishing on time, or a drive that fails eighteen months earlier than the warranty suggested it should.
Only about one in five European households has air conditioning, according to reporting during the same 2026 heatwave — a legacy of a building stock designed to retain heat through long winters rather than shed it during summer. That means the majority of home servers on the continent are running in exactly the conditions this analysis is concerned with: no mechanical cooling in the room itself, rising ambient temperatures outdoors, and a piece of always-on electronics that was never tested against a multi-day, above-40°C event when it left the factory.
This is not a one-off. Climate scientists working with the World Weather Attribution group concluded that a heatwave of this intensity would have been “virtually impossible” this early in the season without the warming that has already occurred, and the World Meteorological Organization has been blunt about the trend: Europe is heating at roughly twice the global average rate. Whatever cooling setup worked for a home server five summers ago is increasingly unlikely to be adequate for the summers ahead. Understanding how heat actually interacts with a Raspberry Pi, a NAS, or a small home server — mechanically, electrically, and in terms of long-term wear — is no longer a niche concern for hobbyists chasing benchmark numbers. It has become ordinary home maintenance.
Inside a Raspberry Pi when the ambient temperature climbs
A Raspberry Pi’s system-on-chip, the single piece of silicon that contains its processor cores and graphics unit, has one internal temperature sensor that the firmware polls continuously. That sensor number is the only one that matters for throttling decisions — not the temperature of the room, not the temperature of the plastic case, not what a cheap USB thermometer reads sitting next to the board. The chip’s own internal reading, retrievable with the vcgencmd measure_temp command, is the ground truth the Raspberry Pi firmware acts on.
What raises that number is the combination of two things: the heat the chip itself generates as a byproduct of switching billions of transistors per second, and the ambient temperature of the air immediately around the board, which sets the baseline the chip has to fight against. A Raspberry Pi idling in a 20°C room might sit at 35–40°C internally. The same board, doing the exact same idle nothing, in a 33°C room during a heatwave, will often sit 8–12°C higher at idle alone — before any workload is even applied. That baseline shift matters enormously, because it eats directly into the thermal headroom available before throttling kicks in.
Under load, the chip’s temperature rises further because of simple physics: running a CPU core at higher frequency and voltage means more electrical current flowing through smaller and smaller transistor gates, and every bit of that current that doesn’t do useful computational work is dissipated as heat. A stress test on a Raspberry Pi 5 can push power draw toward 23 watts on the die itself, and in a hot room with poor airflow, that heat has almost no easy path to escape. The chip’s temperature will climb steeply within the first two or three minutes of sustained load, then plateau once it hits a throttling threshold, because throttling is precisely the mechanism designed to stop that climb from continuing unchecked.
This is worth stating plainly because it contradicts an intuition a lot of people carry over from full-size desktop computers: a Raspberry Pi cannot be permanently destroyed by heat under normal operating conditions, because the firmware will always reduce clock speed and voltage before the silicon reaches a level that would cause immediate physical damage. What heat actually costs you on a Pi is performance, consistency, and — over the following weeks and months — accelerated aging of surrounding components that don’t have the same built-in protection: the power supply circuitry, the microSD card or SSD, and anything plugged into the USB ports drawing current through the same hot board.
The practical consequence during a heatwave is that a Raspberry Pi acting as a home server — running a Pi-hole DNS filter, a small Home Assistant instance, a Samba file share, or a Git server — will simply get slower and less responsive the hotter the room gets, and it will do so automatically, without any error message or obvious warning beyond a small thermometer icon that most headless server setups never even display. If you don’t monitor temperature directly, the first sign of a problem is often just that things feel sluggish, and by the time that’s noticeable, the board has usually already been throttling for hours or days.
Soft throttling and hard throttling, and where the line actually sits
Raspberry Pi’s official documentation defines the danger zone precisely, and the numbers are worth having memorized rather than guessed at. When the core temperature sits between 80°C and 85°C, the ARM cores are progressively throttled back. If the temperature reaches 85°C, both the ARM cores and the GPU are throttled together, more aggressively. Below 80°C, on current-generation boards, there is no forced throttling at all — the chip runs at whatever frequency the workload and power budget allow.
This creates two distinct behaviors that get talked about interchangeably online but are functionally different. “Soft throttling” describes the gradual, proportional reduction in clock speed as temperature climbs through the 80–85°C band — the system is still fully responsive, just measurably slower, and the reduction scales with how far past 80°C the chip has drifted. “Hard throttling” at 85°C is a harder ceiling: both compute and graphics cores get capped simultaneously, and the practical effect on something like a compile job or a machine learning inference task can mean a job that should take thirty minutes stretching past an hour.
Older boards had different numbers. The Raspberry Pi 3B+ introduced a temperature-based frequency step that many users didn’t expect, dropping from 1.4GHz to 1.2GHz once the chip crossed 70°C, specifically to buy more thermal headroom before the 80°C soft-throttle point. Firmware changes over the years have shifted these exact numbers more than once, which is part of why online forum threads about “the real throttle temperature” often contradict each other — they were sometimes written years apart, describing genuinely different firmware behavior on genuinely different silicon.
One command exposes the full throttling history rather than just the current state. Running vcgencmd get_throttled returns a hexadecimal bitmask; a returned value of 0x0 means no throttling event, current or historical, has ever been recorded since boot. A nonzero value needs decoding bit by bit — under-voltage detected, ARM frequency capped, currently throttled, soft temperature limit active — and several of those bits persist as “has happened since boot” flags even after the underlying condition clears, which is exactly the kind of detail that trips people up when they check the value once, see it’s clean, and assume the board has never been stressed.
The single detail that catches almost everyone off guard the first time they read the specification closely: there is a temperature effect happening below 80°C that get_throttled will not report at all. Raspberry Pi engineers have confirmed on their own forums that a form of soft-throttling can begin to shave clock speed slightly before the officially documented 80°C soft limit, without setting the bit that get_throttled checks for. Benchmarks run close to that boundary — 76°C, 78°C — sometimes show performance a few percent below what raw frequency numbers would predict, with no corresponding flag raised anywhere in the standard monitoring tools. For a home server, this matters less as an absolute number and more as a reason not to treat 79°C as “still fine” with total confidence; the safety margin the specification implies is thinner in practice than the documentation alone suggests.
The takeaway for anyone running a Pi through a heatwave is to build a mental map with three zones rather than one hard line: comfortably below 70°C, where performance is fully available and stable; a caution zone from roughly 70°C to 80°C, where nothing is throttled yet but headroom is shrinking fast; and the 80–85°C throttling band, where the system is actively protecting itself at the cost of the very workload you’re asking it to run. A heatwave’s job, mechanically speaking, is to push a board that normally lives in the first zone into the second and third simply by raising the floor everything else is measured from.
Idle temperature versus load temperature in a hot room
The gap between idle and load temperature on a Raspberry Pi is not fixed — it compresses as ambient temperature rises, and that compression is one of the least intuitive parts of how heat behaves in a hot room. In a 20°C room, a Pi 4 might idle around 38°C and climb to 65–70°C under a sustained CPU stress test, a 30°C swing that gives a clear, comfortable margin below the 80°C soft-throttle line. In a 33°C room during a heatwave, the same board might idle around 48–50°C — the idle number rises almost one-for-one with the ambient temperature increase — and the same stress test can now push it to 78–82°C, because the chip is starting from a higher baseline and the surrounding air offers less of a temperature differential to dump heat into in the first place.
This is a direct consequence of how passive and even active cooling actually works: heat transfer from a hot chip to the surrounding air happens faster when the temperature difference between the two is larger. A heatsink or fan moves heat away from the chip by exploiting that differential — the bigger the gap between chip temperature and ambient air temperature, the more effectively a given amount of airflow can carry heat away per second. Raise the ambient temperature and you don’t just add a fixed offset to every reading; you reduce the efficiency of every single piece of cooling hardware attached to the board, simultaneously. A heatsink that comfortably handled a sustained load in spring can fall meaningfully short of the same job in July, without a single component changing.
For a home server, this idle-versus-load relationship translates into a specific practical risk: intermittent workloads that used to be harmless become dangerous during a heatwave precisely because the recovery period between load spikes shrinks. A Pi running Pi-hole might idle at a safe temperature for most of the day, then spike during a nightly backup job, a media transcode, or a burst of network traffic. In a cool room, that spike rises from a low baseline and has plenty of headroom before hitting 80°C. In a hot room, the same spike starts from an already-elevated baseline, reaches the throttling threshold sooner, and — critically — takes longer to cool back down afterward, because the room-temperature air it’s exhausting into offers less of a cooling gradient during the recovery phase too.
This is why anecdotal reports of a Pi that “was fine all winter” suddenly showing throttling icons and sluggish response during a summer heatwave are not really surprising once the mechanism is understood. The board and its workload haven’t changed at all; only the ambient temperature floor has moved, and that floor is doing more work in determining maximum safe load than most casual setups ever account for. Anyone monitoring a home server through a hot spell should watch idle temperature specifically, not just peak load temperature, because a rising idle baseline is the earliest and most reliable warning sign that the room itself — not the workload — has become the limiting factor.
The thermal design differences between Pi 3, Pi 4, and Pi 5
Not every Raspberry Pi model faces a heatwave with the same margin for error, and the differences come down to real changes in silicon process and power draw across generations rather than marketing distinctions. The Raspberry Pi 3, built on a 40nm manufacturing process, draws relatively little power and, correspondingly, generates relatively little heat — it is, by a meaningful margin, the easiest of the mainstream models to keep within safe temperature limits using nothing more than a stick-on passive heatsink, even during sustained load.
The Raspberry Pi 4 moved to a 28nm process, which on its own would have reduced heat output at equivalent performance, but the board more than offset that gain by running a considerably faster CPU and adding a Gigabit Ethernet controller integrated directly into the system-on-chip, both of which add real, sustained heat load. The Pi 4 also introduced dynamic voltage and frequency scaling in a more sophisticated form than earlier boards — the firmware actively reduces voltage supplied to specific internal blocks whenever they aren’t running at full speed, treating the chip’s own thermal mass as a budget to be spent carefully rather than a fixed limit to avoid. In practice, this means a Pi 4 handles brief bursts of load gracefully but needs an actual heatsink, not just a token one, to sustain anything demanding for more than a few minutes in a warm room.
The Raspberry Pi 5 is where the thermal conversation changes most sharply. Its higher-performance CPU and correspondingly higher power draw mean active cooling — a fan, not just a heatsink — is described by Raspberry Pi’s own documentation as strongly recommended even for moderate workloads, a notably different tone from the “cooling is optional” framing that accompanied earlier boards. The official Active Cooler for the Pi 5 is firmware-controlled directly: below 50°C the fan does not spin at all, at 50°C it engages at roughly 30% speed, climbing through 50%, 70%, and finally 100% speed as temperature rises through 60°C, 67.5°C, and 75°C respectively, with a five-degree hysteresis band so the fan doesn’t flicker on and off right at each threshold. That fan curve alone tells you how the Raspberry Pi Foundation itself assesses the thermal reality of the Pi 5: a board that idles comfortably but needs meaningful airflow well before it gets anywhere near the 80°C throttle point.
The practical implication for anyone running a home server through extended heat is that model generation should directly inform which cooling investment is worth making. A Pi 3 running Pi-hole with a passive heatsink probably survives a heatwave with only a modest performance dip. A Pi 4 running the same workload benefits noticeably from active cooling once room temperature crosses into the low thirties. A Pi 5 running anything more demanding than the lightest home automation tasks should be treated, for the duration of a heatwave, as a board that genuinely needs a working fan — not as an optional upgrade, but as the difference between stable operation and hours of throttled performance every single day the heat persists.
Passive heatsinks and their real limits in a heatwave
A passive heatsink works by increasing the surface area available for heat to transfer from the chip into the surrounding air through natural convection — no moving parts, no noise, no power draw, just metal shaped to expose more surface than a flat chip package ever could on its own. For light, intermittent workloads, this is often genuinely sufficient, and it’s why the stick-on aluminum or copper heatsinks sold in every Raspberry Pi starter kit exist at all: they reduce idle temperature by roughly 5–10°C and load temperature by 8–15°C compared with a completely bare board, according to testing widely cited in cooling guides.
The limitation that matters specifically during a heatwave is that passive cooling depends entirely on ambient air being cool enough to accept the heat the heatsink is trying to shed. Natural convection — warm air rising away from the fins, cooler air moving in to replace it — works because there’s normally a meaningful temperature gradient between the heatsink surface and the surrounding room. When room temperature itself climbs into the low thirties, that gradient shrinks, and a passive heatsink that performed well all spring can become measurably less effective without anything about the hardware changing. The heatsink isn’t broken; the physics it relies on has simply lost some of the temperature differential it needs to move heat efficiently.
This is compounded by the fact that many stick-on Pi heatsinks are surprisingly small relative to the heat a Pi 4 or Pi 5 can generate under real load — adequate for a Pi Zero or a lightly used Pi 3, genuinely marginal for anything running continuous services on newer boards. A heatsink sized correctly for a cool room’s ambient conditions isn’t automatically sized correctly for a heatwave’s conditions, because the margin that made it “enough” in spring was thinner than it looked, borrowed entirely from a lower baseline temperature that a heat dome removes.
There’s a second, less discussed limitation: passive heatsinks depend on some air movement around them even without a dedicated fan, whether from a room’s ambient convection currents, a nearby window fan, or simple placement choices. A Raspberry Pi with a passive heatsink sealed inside a closed, unventilated case sitting on a shelf inside a cupboard gets essentially none of that assistance — the heat has to escape the heatsink fins, then escape the case, then escape the enclosed space, with no forced movement helping at any of those three stages. In a normal room this chain of small inefficiencies is usually forgivable. During a heatwave, each stage in that chain loses efficiency simultaneously, and the cumulative effect is considerably larger than the sum of its individual parts would suggest.
The honest conclusion for anyone relying on passive cooling through a heatwave is not that it stops working entirely, but that its safety margin — which was already the trade-off made in exchange for silence and zero power draw — narrows to the point where a workload spike, a few extra background processes, or simply a particularly hot afternoon can push a board into the throttling band that would never have been reached under the same workload in cooler weather.
Active cooling fans and what changes when you add one
Adding even a small fan changes the cooling equation in a way that’s easy to underestimate from spec sheets alone, because a fan doesn’t just move air — it fundamentally changes the type of heat transfer happening at the heatsink surface, from natural convection to forced convection, and forced convection is dramatically more efficient at removing heat per unit of time. A heatsink that struggles in still, 33°C air can perform close to its cool-weather baseline once even modest airflow is introduced across its fins, because forced air constantly replaces the boundary layer of warmed air clinging to the metal, restoring the effective temperature differential that natural convection alone had lost.
This is precisely why Raspberry Pi’s official guidance shifts from “heatsinks are not necessary to prevent overheating damage” to actively recommending an active cooling solution for peak performance — the built-in throttling mechanism already protects the silicon from damage regardless of cooling choice, so the case for a fan has always been about sustained performance rather than survival. During a heatwave, that distinction collapses somewhat: sustained performance and avoiding hours of daily throttling become the same practical goal, because throttling itself, while not damaging the chip, degrades every service running on the board for as long as the hot spell continues.
Fan noise is the recurring objection, and it’s a legitimate one for a device often placed in a living space rather than a dedicated server closet. Community testing has repeatedly found that price and noise output correlate poorly — some well-known “silent” 40mm fans have turned out louder in practice than larger, slower-spinning alternatives, because smaller fans generally need to spin faster to move an equivalent volume of air, and rotational speed is one of the biggest single drivers of audible fan noise. A larger, slower fan run at reduced voltage — many hobbyists run a 60mm 12V fan at 5V specifically for this reason — can deliver comparable airflow at a small fraction of the noise, at the cost of slightly more physical space inside or around the case.
Power headroom is the other constraint that catches people off guard, particularly on the Pi 5. A board drawing up to 23 watts on the official 27W USB-C power supply leaves only around 4 watts of margin for anything else attached — USB peripherals, HATs, add-on boards — and pushing sustained load hard enough to need active cooling in the first place is exactly the scenario most likely to also draw on that same limited headroom elsewhere. A fan itself typically draws well under a watt, so it isn’t the constraint on its own, but a heatwave that’s pushing a board toward higher sustained current draw is also the moment least forgiving of an underpowered or marginal power supply, and the two problems tend to arrive together rather than separately.
The practical upshot is that a fan is close to the highest-value single upgrade available for a heat-stressed home server, provided it’s chosen for actual airflow rather than marketing claims about silence, and provided the power supply feeding the board has genuine margin left over once the fan and any other peripherals are drawing current alongside the CPU under load.
PWM fan control and the official Raspberry Pi cooling logic
Pulse-width modulation, or PWM, controls fan speed not by varying voltage continuously but by rapidly switching full voltage on and off, with the proportion of “on” time — the duty cycle — determining the effective average speed the fan spins at. This matters for home server builders because the frequency of that switching directly affects whether a fan is audibly quiet or produces an irritating buzz: switching below roughly 20kHz falls within the range of human hearing and often produces a distinct whine, while switching above that threshold, commonly around 25kHz, moves the noise out of audible range entirely, leaving only the mechanical airflow noise itself, which most people find far less bothersome.
The Raspberry Pi 5’s official Active Cooler is controlled directly by firmware rather than left to a fixed always-on or always-off state, and the fan curve is worth understanding in detail because it reveals how conservatively the board’s own designers think about the temperature ranges involved. No fan movement at all below 50°C keeps the board silent during normal browsing-and-idle-adjacent workloads. A jump to 30% speed at 50°C provides a gentle first response. Further steps to 50% at 60°C, 70% at 67.5°C, and full speed at 75°C create a curve that ramps up steadily well before the 80°C soft-throttle threshold, giving the fan time to actually influence the outcome rather than reacting only once throttling has already begun. A five-degree hysteresis band on the way back down prevents the fan from rapidly cycling on and off right at each threshold boundary, which would otherwise be both annoying and mechanically harder on the fan’s bearings over time.
Earlier boards using a PoE HAT — the Power over Ethernet add-on that lets a Pi 4 draw both power and network connectivity through a single Ethernet cable — control their small integrated fan through a similar but separately configurable mechanism, using parameters like poe_fan_temp0 and poe_fan_temp1 in the boot configuration file to set the temperatures at which the fan turns on and reaches full speed. Users have long complained that the default 50°C activation point causes the fan to cycle on and off constantly under normal light use, and raising that threshold — trading a slightly higher sustained idle temperature for fewer audible fan-speed changes — is a common and reasonable adjustment for a home server that isn’t under heavy continuous load.
For anyone assembling a DIY cooling setup rather than relying on an official accessory, a basic script reading the CPU temperature via the /sys/class/thermal/thermal_zone0/temp filesystem path and adjusting a GPIO-controlled PWM fan accordingly is a well-documented and achievable project, and it offers one real advantage over fixed hardware curves: the thresholds can be tuned specifically for a heatwave, lowering the “fan on” temperature during an extended hot spell so the fan engages earlier and more gradually, trading a small amount of extra noise and power draw for a wider safety margin exactly when the ambient baseline has already eaten into the board’s normal thermal cushion.
Case design choices that trap heat instead of releasing it
The single most consequential decision in a Raspberry Pi’s cooling outcome is often made before any heatsink or fan enters the picture at all: the case. A sealed, solid plastic case with no vents — chosen for aesthetics, or simply because it was the one that came bundled with a starter kit — creates a small enclosed volume of air around the board that has no path to exchange with the room’s air except through whatever thermal conductivity the plastic itself offers, which for most consumer-grade ABS or polycarbonate cases is close to negligible.
Heat generated by the chip has to cross several barriers before it reaches room air that can actually carry it away: the chip package itself, any heatsink attached to it, the air gap inside the case, the case walls, and finally the room air outside. Every one of those barriers adds thermal resistance, and a sealed case adds the largest single resistance in that chain for a huge number of consumer Pi setups, because it traps a small pocket of already-warmed air right next to the board with essentially no way for that air to be replaced. In a cool room, this trapped-air effect is a real but survivable inefficiency. In a heatwave, when the room air itself starts warmer, the trapped air inside a sealed case runs correspondingly hotter still, compounding rather than merely adding to the ambient problem.
Vented cases solve part of this by allowing at least some passive air exchange between the case interior and the room, relying on natural convection to slowly cycle warmed air out through top vents and pull cooler air in through side or bottom openings. This works reasonably well for light loads in moderate ambient conditions, and poorly for sustained loads in a hot room, for exactly the same reason passive heatsinks lose effectiveness as ambient temperature rises — the convective airflow driving the exchange depends on a temperature differential that heat itself is actively working to erode.
Open-frame mounts — boards left entirely exposed, sometimes on a purpose-built stand, sometimes just resting on a surface with no enclosure at all — sidestep the case-as-barrier problem entirely, at the obvious cost of physical protection from dust, spills, and accidental contact. For a home server tucked away somewhere out of casual reach, this trade-off often favors openness far more than aesthetics-driven case shopping tends to assume: a completely exposed board with a decent heatsink frequently outperforms a sealed, enclosed board with an expensive heatsink, simply because the exposed board never has to fight its way through an extra layer of trapped, pre-warmed air before reaching the room.
The case decision that matters most during a heatwave specifically is less about heatsink quality and more about ensuring nothing between the chip and the room is working against the cooling effort already in place. A vented case with an active fan pulling air through it in one deliberate direction, rather than relying on passive convection through whatever gaps happen to exist, closes most of the gap between a well-cooled open-frame setup and the convenience and dust protection an enclosure provides.
Vertical mounting and airflow paths around a small board
Raspberry Pi’s own documentation recommends mounting the board vertically rather than flat for a specific, physically grounded reason: it improves natural convection airflow across the heatsink and board surface, giving a modest but genuinely measurable improvement in heat dissipation compared with the same board lying flat on a shelf. The mechanism is simple — warm air rises, and a vertically mounted board oriented so its heatsink fins run in the same direction as that natural upward air movement lets convection assist the cooling process rather than working against it or having no clear direction at all.
A flat-mounted board, by contrast, often has its heatsink fins pointing straight up with no lateral escape path, and any warmed air sitting directly above the fins has to be displaced before fresh, cooler air can take its place — a slower and less efficient exchange than the continuous lateral flow a well-oriented vertical mount enables. This is a small effect in a cool room where every cooling method has ample margin to spare. In a heatwave, where every degree of headroom has already been narrowed by rising ambient temperature, small effects stack up, and vertical mounting is one of the few genuinely free adjustments available — it costs nothing beyond a mounting bracket or stand, and most official and third-party cases already support it as an option.
Airflow paths matter just as much beyond the board itself, particularly for anyone running more than one small server device in the same physical space. A cluster of Raspberry Pi boards, a NAS, and a network switch stacked closely together on the same shelf creates a shared thermal environment where each device’s exhaust heat becomes another device’s intake air, and the cumulative effect can raise the effective ambient temperature around every device in the stack well above whatever the room thermometer reads a meter away. Spacing devices apart, even by just a few centimeters, and orienting any active cooling fans to draw fresh air from outside the immediate cluster rather than recirculating warmed air within it, addresses a heat problem that has nothing to do with any individual board’s own cooling hardware and everything to do with the shared airspace those boards are forced to share.
The general principle worth carrying forward is that airflow direction should be deliberate rather than accidental. A fan blowing air across a heatsink accomplishes little if the warmed air it displaces has nowhere obvious to go and simply recirculates back toward the intake within the same enclosed shelf or cupboard. Establishing a clear intake side and a clear exhaust side — even informally, by noticing which direction warm air naturally seems to accumulate and orienting fans to push it further along that same path rather than fighting it — turns a collection of individually adequate cooling components into a system that actually performs as well as its parts suggest it should.
Metal cases acting as heatsinks, and where that helps or hurts
Some Raspberry Pi cases are designed specifically to function as an oversized heatsink in their own right, using a solid metal enclosure — typically aluminum — with internal contact points or thermal pads that transfer heat directly from the chip package into the case walls themselves, turning the entire enclosure into a large passive cooling surface far bigger than any small stick-on heatsink could provide. Products in this category, often associated with fanless silent-computing designs, can genuinely outperform a conventional small heatsink-plus-fan combination for moderate workloads, precisely because total surface area in contact with room air matters enormously for passive heat dissipation, and a full case simply offers vastly more of it than a coin-sized heatsink ever could.
The caveat that matters specifically for a heatwave is the same one that applies to every passive cooling method discussed so far: a metal case relies on the temperature differential between the case surface and the surrounding room air to shed heat through natural convection, and that differential shrinks as room temperature rises. A metal-case Pi that comfortably handles sustained load in a 21°C office can run measurably hotter performing the identical task in a 33°C room, for exactly the same underlying reason a stick-on heatsink underperforms in the same conditions — the physics governing heat transfer to ambient air doesn’t distinguish between a heatsink that happens to also be the case and a heatsink that’s a separate small component.
There’s a secondary consideration specific to metal-case designs that’s easy to overlook: because the entire case functions as the heat dissipation surface, placement matters more than it does for a conventionally cased and separately heatsinked board. Tucking a metal-case Pi into a cupboard, behind other equipment, or anywhere that restricts air circulation around its exterior surfaces defeats much of the design’s purpose, since the large surface area advantage only pays off if that surface actually has unobstructed room air to exchange heat with. A metal case sitting in open air on a desk will consistently outperform the identical case wedged into a confined, poorly ventilated space, by a margin considerably larger than the equivalent placement difference would produce for a conventional plastic-cased board with a small internal heatsink.
For home server use through an extended heatwave, a well-placed metal case can be a genuinely low-maintenance solution — no fan to fail, no dust-clogged intake vents to clean, no moving parts drawing extra current from an already-stressed power supply. The trade-off is that its performance ceiling under heavy, sustained load in genuinely hot ambient conditions is still lower than an actively cooled equivalent, because no amount of passive surface area fully substitutes for the forced convection a fan provides once ambient temperature has already eaten into the available thermal margin.
Dust accumulation and its slow effect on cooling performance
Dust is one of the least dramatic and most consistently underestimated threats to cooling performance in a home server, precisely because its effect accumulates gradually over months rather than arriving as a sudden, obviously attributable failure. Fine particulate matter settling on heatsink fins, inside case vents, and across fan blades reduces the effective surface area available for heat exchange and restricts the volume of air a fan can actually move per rotation — testing cited in cooling guides for hot, dusty climates has found dust buildup on heatsink fins can reduce thermal efficiency by up to 40%, a figure large enough that it can single-handedly turn an adequately cooled setup into a marginal one without any other variable changing at all.
The mechanism is straightforward once stated: a heatsink’s entire purpose is exposing maximum surface area to moving air, and a layer of dust coating those fins acts as an insulating barrier between the metal and the air meant to carry heat away from it, while simultaneously narrowing the physical gaps between fins that airflow needs to pass through cleanly. A fan struggling to pull air through a partially clogged intake vent also has to work harder to move the same volume of air, which on cheaper fans can mean either reduced actual airflow at the same rotational speed or increased noise as the fan spins faster trying to compensate for the restriction — neither outcome desirable during a heatwave when every degree of margin already matters.
The insidious part of dust accumulation is its timing relative to heatwave season. A cooling setup that was performing adequately through a dust-free spring can have accumulated months of gradual buildup by the time the year’s first serious heat arrives, meaning the cooling hardware faces its most demanding test of the year in exactly the condition it’s least prepared for. A quick inspection and cleaning — compressed air across heatsink fins and fan blades, a check of intake vents for visible buildup — takes only a few minutes and is one of the highest-value, lowest-cost maintenance tasks available before a heatwave hits, precisely because it restores cooling capacity that was quietly lost over an extended period without any single dramatic event marking the decline.
Environments with construction activity nearby, homes with pets, or simply older buildings with less effective air filtration tend to accumulate dust considerably faster than a clean, sealed modern apartment, and anyone running a home server in those conditions should treat pre-heatwave cleaning as a seasonal task worth scheduling deliberately rather than waiting for an obvious sign of trouble, because by the time reduced cooling performance is obvious through thermometer readings alone, a meaningful fraction of the summer’s hottest days may already have passed with the server running well outside the margin its hardware was actually capable of providing.
NVMe SSDs and the thermal throttling most owners never notice
NVMe solid-state drives have become common in home server builds — mini PCs, small NAS units, and even some Raspberry Pi configurations using a PCIe HAT — and they bring a thermal behavior that catches many owners off guard because it happens silently, with no fan, no thermometer icon, and no obvious external symptom beyond a performance drop that’s easy to attribute to something else entirely. NVMe drives run hot under sustained load specifically because of how they achieve their speed: fast data transfer through the PCIe interface requires a powerful multi-core controller managing error correction, wear leveling, and queue handling, all of which generate heat as a direct byproduct of the very throughput that makes NVMe attractive in the first place.
Under demanding, sustained workloads — a large backup job, a bulk file transfer, sustained database writes — NVMe controller temperatures can climb into the 70–80°C range, the point at which most drives’ built-in thermal protection engages and throttles read and write speeds specifically to bring the temperature back down, protecting long-term reliability at the direct cost of immediate performance. Testing on a bare drive with no heatsink and no airflow has shown controller temperatures spiking dramatically within the first minute of a sustained stress test, with NAND flash memory itself — the actual storage medium — climbing into the low seventies shortly after, a temperature range where data integrity margins begin to narrow even though outright failure is not imminent.
The ambient temperature connection is the same one that runs through every other component discussed so far: a drive that manages sustained load comfortably in a 22°C environment with a case fan providing modest airflow will run measurably hotter performing the identical task once room temperature climbs into the low thirties during a heatwave, because the drive’s own cooling — whatever heatsink or airflow it has — is fighting against a higher starting point and a smaller available temperature differential to work with. A home server that has never once triggered NVMe thermal throttling during normal use can begin doing so during a sustained heatwave simply because the ambient floor has shifted, with no change to the workload itself.
A heatsink specifically sized for the drive — even a basic aftermarket aluminum unit, let alone a more capable design with an integrated small fan — measurably delays or prevents throttling under sustained load, and many motherboards now include this as standard equipment precisely because the problem is common enough to warrant a built-in solution. For a home server assembled without much attention to storage cooling specifically, checking whether the NVMe drive has any thermal solution at all, and adding one if it doesn’t, is a comparatively cheap and easy intervention that addresses a heat-related performance problem most owners never think to look for, because the symptom — a backup job that finishes slower than expected — rarely gets traced back to drive temperature as the underlying cause.
Hard drives, NAS enclosures, and the temperatures that actually matter
Spinning hard drives used in home NAS setups carry manufacturer-specified maximum operating temperatures that sit considerably higher than the numbers experienced home lab operators actually consider safe for sustained use — a gap that trips up a lot of people who check the spec sheet, see a number like 60°C or 65°C listed as the maximum, and conclude that anything below that figure is fine to run indefinitely. The manufacturer’s maximum operating limit and a sensible sustained-operation target are two different numbers, and treating them as interchangeable is one of the more consequential mistakes a home server owner can make.
Real-world reporting from NAS owners consistently draws a distinction between what a drive technically tolerates and what actually preserves its working life. One widely discussed account described drives sitting between 48°C and 52°C for months inside a poorly ventilated closet, with repeated spikes to 55°C, before one of the drives failed — well within the manufacturer’s stated maximum, and yet still, in the owner’s own retrospective assessment, clearly too hot for sustained operation. After relocating the same NAS to an open, well-ventilated spot in a living room, drive temperatures settled into the 30–40°C range, occasionally touching 45°C under heavy load, with a corresponding and immediately noticeable drop in fan speed and noise. The hardware itself never changed; only its access to unobstructed airflow did.
Community consensus among experienced home lab operators tends to converge on keeping sustained hard drive temperatures below roughly 45°C where practical, treating anything consistently above that as a factor that measurably shortens working life even if it doesn’t trigger any immediate warning from the NAS software itself, which typically won’t flag a problem until temperatures approach the manufacturer’s much higher official maximum. Western Digital’s own documentation for its Red Plus line of NAS-oriented drives frames mean time between failure assumptions around a 40°C drive temperature baseline, with reliability derating progressively above that point up to a stated 65°C ceiling — official confirmation that the manufacturer’s own reliability modeling treats 40°C as closer to the sensible operating target than the much higher absolute maximum most spec sheets foreground.
A closed cabinet, a shelf inside a cupboard, or any enclosed space without dedicated airflow reproduces the exact failure pattern in the anecdote above, and a heatwave compounds the problem in the same way it compounds every other cooling scenario in this analysis: an enclosed space that already ran warm in cooler months runs correspondingly hotter once outdoor and indoor ambient temperatures both climb, pushing drives that were already sitting in the concerning 45–50°C range into territory closer to 55°C or beyond for the duration of the hot spell. The practical response is the same one that solved the anecdotal case: open placement with real clearance — commonly recommended as at least 10cm of clearance behind the unit and 5cm on each side — rather than a closed cabinet, and separation from other heat-generating devices like routers, other mini PCs, or UPS units that would otherwise share and compound the same confined airspace.
Mini PCs and x86 home servers compared with single-board computers
A growing share of home server builds now use small x86 mini PCs — many built around Intel’s low-power N-series processors — rather than a Raspberry Pi, and the thermal calculus differs in ways worth understanding separately rather than assuming everything said about Pi cooling simply transfers over. These mini PCs typically draw more total system power than a Raspberry Pi, often somewhere in the 10–25 watt range under load depending on the specific chip and attached storage, but they also usually ship with more deliberate cooling engineering: a proper heatsink sized for the actual thermal design power of the chip, in some cases a small quiet fan, and a metal chassis that itself contributes meaningfully to heat dissipation in a way most Raspberry Pi cases, chosen more for size and price than thermal engineering, typically do not.
The result is a mixed picture rather than a straightforward “better” or “worse” comparison. A well-designed mini PC often has more thermal margin built in from the factory than a Raspberry Pi in a basic case, simply because its manufacturer designed the cooling solution around the specific chip’s actual power draw rather than relying on a generic stick-on heatsink sized more by convention than by careful thermal calculation. But that margin is not unlimited, and the same ambient-temperature-erodes-everything principle applies just as directly: a mini PC’s fan and heatsink were sized against an assumed typical room temperature, and a heatwave pushing ambient air well above that assumption narrows the margin exactly as it does for a Raspberry Pi, just from a more comfortable starting position.
Storage is often where mini PC home servers face their sharpest heat exposure, because many are built around one or more NVMe drives rather than the microSD cards or external USB drives common on Raspberry Pi setups, and NVMe drives — as covered earlier — have their own thermal throttling behavior that operates independently of whatever cooling the CPU itself receives. A mini PC with an adequately cooled processor can still suffer storage-related slowdowns during a heatwave if its NVMe drive lacks a dedicated heatsink, a detail easy to overlook because storage cooling gets far less attention in product marketing and setup guides than CPU cooling does.
For someone choosing between platforms specifically with heatwave resilience in mind, the honest comparison is that a mini PC generally offers a higher absolute performance ceiling and often a more thoughtfully engineered stock cooling solution, at the cost of higher power draw and, correspondingly, more total heat generated that the surrounding room still has to absorb — while a Raspberry Pi offers lower peak performance and lower total heat output, but frequently ships with cooling hardware that assumes a far more forgiving ambient environment than a heatwave actually provides. Neither platform is inherently heatwave-proof; both simply fail differently, and understanding which specific component is the weak link in a given build matters more than any broad platform-level generalization.
Multi-board clusters and the compounding heat problem they create
Raspberry Pi clusters — several boards mounted together, often for learning distributed computing, running Kubernetes at home, or simply as a hobby project — create a thermal environment that’s meaningfully different from a single board’s cooling problem, because the boards share the same confined airspace and each one’s exhaust heat becomes a contribution to every neighboring board’s intake air. A cluster of four or eight Raspberry Pi boards stacked in a compact rack, each individually equipped with an adequate heatsink that would perform fine in isolation, can collectively raise the ambient temperature inside the rack enclosure well above the room’s actual temperature, simply through the combined heat output of every board operating simultaneously in a shared, often only lightly ventilated space.
The compounding effect here is genuinely additive in a way that surprises people who cooled each board correctly on its own terms but didn’t account for the cluster as a shared thermal system. A single Pi 4 generating a few watts of heat in an open room barely nudges the surrounding air temperature. Eight of them stacked together in a compact case, each generating a similar amount, collectively produce enough heat to measurably raise the temperature of the trapped air inside the enclosure, which then becomes the effective “ambient” temperature each individual board’s own cooling has to work against — a self-reinforcing problem where every board’s cooling challenge gets harder specifically because of the heat its neighbors are also producing.
This matters disproportionately during a heatwave because the baseline the cluster starts from is already elevated by the room’s own higher-than-normal temperature, and the cluster’s internal compounding effect then stacks on top of that already-reduced margin. A cluster that ran warm but stable through a mild spring can cross into sustained throttling across multiple boards simultaneously once room temperature climbs, and because every board is affected by the same shared airspace, the failure mode tends to be system-wide rather than isolated to one weak component — a distinctly different troubleshooting picture than a single-board setup, where identifying and fixing one hot component usually resolves the issue.
Addressing cluster-specific heat requires thinking about airflow at the enclosure level rather than the individual-board level. A dedicated intake fan pulling fresh room air directly into the cluster enclosure, and a separate exhaust path venting warmed air back out rather than letting it recirculate within the same confined space, does more to solve a multi-board thermal problem than upgrading any individual board’s own heatsink, because the shared-airspace effect described above will simply undermine per-board cooling improvements until the enclosure-level airflow itself is addressed. For anyone running a home lab cluster through an extended heatwave, checking the temperature of boards in the middle of the stack specifically — not just the ones on the outer edges with more direct access to room air — often reveals the clearest evidence of exactly where the compounding effect is hitting hardest.
Room placement and why a closet is the worst possible location
Physical placement is, by a wide margin, the single highest-leverage decision available to anyone trying to keep a home server cool through a heatwave, and it costs nothing beyond the inconvenience of finding a new spot for the equipment. A closet or built-in cupboard — a genuinely common choice, since it keeps cables and blinking lights out of sight — is close to the worst possible location precisely because closets are built to store things, not to dissipate the continuous heat output of always-on electronics, and they typically offer no meaningful air exchange with the rest of the room at all.
A NAS or server sitting inside a closed cupboard door creates an enclosed microclimate that can run substantially hotter than the room outside it, and this gap widens rather than narrows during a heatwave, because a closet with poor air exchange traps the modest but continuous heat output of the electronics inside it, and that trapped heat has nowhere to go once the room’s own ambient temperature has already risen and reduced the temperature differential available to drive whatever passive air exchange might otherwise occur through door gaps or vents.
One frequently cited real-world account described a Synology NAS in exactly this situation: months of drive temperatures sitting between 48°C and 52°C inside a closet, well within the manufacturer’s official maximum but clearly too warm for sustained health, culminating in a drive failure. Moving the same NAS to an open spot on a side table in a living room, with no other change to the hardware or workload, dropped drive temperatures into the 30–40°C range and visibly reduced fan speed and noise — a striking illustration of how much of a home server’s effective thermal performance is determined by placement decisions made once at setup time and then never revisited, rather than by anything about the hardware’s own cooling capability.
The general placement principles worth following are straightforward even without precise measurement: open air trumps enclosed space every time; elevated positions with airflow on multiple sides outperform a device resting flush against a wall or wedged between other objects; a spot away from direct afternoon sun through a window matters more during a heatwave than at any other time of year, since solar heating through glass can raise a surface’s temperature considerably above the room’s own air temperature; and separation from other heat-generating devices — routers, other servers, UPS units — prevents the same compounding effect described for multi-board clusters from occurring incidentally between otherwise unrelated pieces of equipment simply because they happen to share a shelf.
For anyone whose home server currently lives in a closet, a cupboard, or any enclosed space, relocating it — even temporarily, for the duration of a heatwave — is very likely the single most effective intervention available, ahead of any heatsink upgrade, fan purchase, or software-level throttling adjustment, because it addresses the ambient temperature the equipment has to fight against in the first place rather than trying to improve how efficiently the equipment fights against whatever ambient temperature it’s been placed into.
Airflow physics in a small room without air conditioning
A room without air conditioning relies entirely on whatever natural or fan-assisted air movement is available to prevent heat from simply accumulating, and understanding the basic physics involved helps explain why some intuitive fixes work far better than others. Warm air is less dense than cool air and rises; this is the same principle behind the recommendation to mount a Raspberry Pi vertically, scaled up to room level. A room with a heat source near the floor and an opening — a door, a window, a gap under a door — positioned higher up allows some natural stack-effect ventilation, where warm air exits near the top and is replaced by cooler air drawn in lower down. A sealed room with no height differential in its openings gets none of this natural assistance and depends entirely on mechanical air movement to prevent stagnation.
A standard oscillating or box fan does not lower a room’s air temperature at all — it only moves air, which matters because moving air accelerates the two ways a server actually sheds heat: convection at its case surfaces and evaporation of any moisture on the surrounding surfaces. For a home server specifically, a fan aimed to create a consistent air current across and around the equipment achieves a meaningful practical benefit even without changing the room’s underlying temperature, because it continuously replaces the boundary layer of warmed air immediately surrounding the device with room-temperature air, in exactly the same way a fan attached directly to a heatsink does at a smaller scale.
Cross-ventilation — air entering from one side of a room and exiting from another, rather than a single fan simply stirring air in place — is considerably more effective than a fan alone in a sealed room, because it actually exchanges warmed indoor air for outdoor air rather than just recirculating the same finite volume of air repeatedly. During a heatwave, this only helps meaningfully during the cooler parts of the day — early morning, sometimes late evening — since opening windows during peak afternoon heat simply invites even hotter outdoor air inside. A common and effective pattern is ventilating aggressively during the coolest available hours and then sealing the room, closing blinds against direct sun, and relying on fan-assisted air movement alone through the hottest part of the day, treating the room somewhat like a thermal battery that’s cooled down early and then insulated against reabsorbing heat until conditions improve again.
Rooms on upper floors or under a roof exposed to direct sun face a specific and often underestimated additional heat load: radiant heat absorbed by the roof and upper walls during the day continues radiating into the room for hours afterward, well past the point outdoor air temperature itself has started dropping in the evening. A home server placed in an attic space or top-floor room during a multi-day heatwave is fighting not just elevated ambient air temperature but genuine radiant heat load from the structure itself, and no amount of fan-driven air movement within that room fully compensates for a location that’s absorbing far more solar heat than a ground-floor or shaded room ever would. Where relocating the server itself isn’t practical, closing blinds or curtains against direct sun during peak hours reduces this radiant contribution meaningfully, even though it does nothing for the air temperature problem on its own.
Fans, air conditioners, and evaporative coolers compared for this use case
Choosing a cooling appliance for the room a home server lives in, rather than for personal comfort specifically, involves trade-offs that don’t always match the priorities most buying guides assume, because a server doesn’t care about the same things a person sitting in the room does. A simple electric fan is the cheapest and lowest-power option, and as covered above, it does genuinely help by continuously replacing the warmed air boundary layer around equipment — but it cannot lower the room’s actual air temperature, which means during a sufficiently severe heatwave, a fan alone eventually reaches a ceiling of effectiveness no matter how well it’s positioned.
A refrigerant-based air conditioner, whether a portable unit or a fixed split system, is the only option among the three that actually removes heat from the room rather than merely redistributing or accelerating air movement, and it does so while simultaneously removing moisture from the air as a byproduct of the cooling cycle — a detail that matters considerably for electronics specifically, since lower humidity reduces the risk of condensation forming on cool surfaces, a topic explored in detail in the next section. Air conditioning is also the most effective option in genuinely extreme heat and works identically well regardless of the room’s starting humidity level, unlike the alternative below.
Evaporative coolers — sometimes called swamp coolers or air coolers — work by passing air through water-soaked pads, and the evaporation of that water absorbs heat from the air passing through, producing a real cooling effect at a fraction of an air conditioner’s energy consumption. The critical limitation, and the reason this option needs to be evaluated carefully rather than assumed universally useful, is that evaporative cooling’s effectiveness depends heavily on the ambient relative humidity: below roughly 30% relative humidity, evaporative cooling is highly effective and can produce a dramatic temperature drop; between 30% and 50%, the effect noticeably weakens; above roughly 50%, the cooling effect becomes marginal, and the appliance’s main remaining contribution is simply adding moisture to already humid air, which is directly counterproductive for a room housing electronics.
This humidity dependence makes evaporative cooling a genuinely poor choice for anyone in a climate where heatwaves tend to coincide with elevated humidity — increasingly common as ocean temperatures warm and feed more moisture into the same weather systems producing extreme heat — while remaining a legitimately efficient, low-cost option in drier continental climates, where 2026’s heat dome events over parts of Central and Eastern Europe have in fact combined high temperature with relatively low humidity on many of the hottest days. The decision genuinely depends on local conditions rather than having a single universally correct answer, which is precisely why checking current relative humidity, not just temperature, matters before choosing which appliance to invest in for a server room specifically.
Cooling appliance comparison for a home server room
| Method | Actual temperature drop | Effect on humidity | Best suited for |
|---|---|---|---|
| Electric fan | None (moves air only) | No effect | Mild heat, any humidity, low budget |
| Evaporative cooler | Meaningful below 40% RH | Increases humidity | Dry climates, moderate heat |
| Refrigerant air conditioner | Significant, room-wide | Decreases humidity | Severe heat, any humidity |
The table above simplifies a genuinely important decision down to the two variables that matter most for equipment specifically rather than personal comfort: how much actual cooling is achieved, and what that method does to humidity, since electronics are considerably more sensitive to rising moisture than a person sitting in the same room would notice through comfort alone. For a room housing a home server through a serious heatwave, an air conditioner’s dehumidifying side effect is frequently as valuable as its cooling effect, for reasons the next section covers directly.
Humidity, dew point, and the condensation risk cooling can create
Dew point is the temperature at which air, cooled without changing its moisture content, becomes fully saturated and begins condensing that moisture into liquid water on any surface it touches — the exact phenomenon visible on a cold drink left out on a humid day, and the same principle that governs whether cooling a piece of electronics creates a genuine moisture risk. The critical detail often missed is that condensation risk depends on the relationship between a surface’s temperature and the surrounding air’s dew point, not on absolute temperature alone — a surface can be perfectly warm by everyday standards and still be below the dew point if the surrounding air is humid enough, and conversely a much colder surface poses no condensation risk at all in sufficiently dry air.
This becomes directly relevant to home server cooling in two specific scenarios during a heatwave. The first is aggressive air conditioning of a room containing electronics: an AC unit set to run considerably colder than the humid outdoor air, in a room where warm, moisture-laden air is still finding its way in through gaps or brief door openings, can create surface temperatures on server casings or drive housings that dip below the incoming air’s dew point, particularly right at the moment the AC first engages after a period of warmer conditions and the equipment’s own surfaces haven’t yet equilibrated to the new, colder ambient temperature. The second, less obvious scenario involves any evaporative cooling method that raises indoor humidity substantially: an evaporative cooler pushing relative humidity up toward 60% or higher, combined with any surface in the room that runs cooler than the surrounding air — the metal case of an actively cooled server, for instance, right at its air intake where fresh, cooler air first meets the case — can create localized dew point conditions even without any refrigerant-based cooling involved at all.
The consequences of even mild condensation on electronics are genuinely serious rather than cosmetic: moisture increases the risk of short circuits, accelerates corrosion on exposed contacts and connectors, and can compromise the electrical resistivity of components not designed to tolerate any liquid water at all. Unlike heat, which modern hardware is built to tolerate through throttling, condensation offers no equivalent built-in protection mechanism — a short circuit caused by condensation can cause immediate and sometimes permanent damage, in sharp contrast to the graceful, reversible performance degradation that excessive heat alone typically produces.
Practical mitigation is more about avoiding the specific conditions that create the risk than about any dedicated hardware. Avoiding sudden, dramatic temperature swings — cooling a room gradually rather than blasting air conditioning to its coldest setting the moment a heatwave breaks — reduces the chance of any surface dipping suddenly below the ambient dew point before it’s had time to equilibrate. Keeping equipment away from evaporative coolers, or at minimum away from the direct airstream of one, avoids the localized high-humidity pocket that appliance creates right around its own output. For anyone in a genuinely humid climate running air conditioning specifically to protect electronics, monitoring relative humidity alongside temperature — inexpensive combined temperature-and-humidity sensors are cheap and widely available — provides the information needed to judge condensation risk directly, rather than guessing based on temperature readings alone, which by themselves say nothing about whether a dew point boundary is actually being approached.
UPS batteries and the accelerated aging heat causes
An uninterruptible power supply protecting a home server against brief outages or brownouts contains a battery — almost always lead-acid chemistry in consumer UPS units, sometimes lithium-ion in newer models — and that battery’s chemistry is considerably more heat-sensitive than almost any other component discussed so far, in a way that doesn’t manifest as an immediate, visible problem but instead as a slow, cumulative loss of the exact capability the UPS exists to provide: backup runtime when it’s actually needed.
The widely cited rule of thumb from major UPS manufacturers, including Schneider Electric’s APC brand, states that for every 10°C rise in operating temperature above roughly 25°C, a lead-acid battery’s expected lifespan is cut roughly in half. A battery rated for five years of service at a stable 25°C environment may realistically last only two to two-and-a-half years if it consistently operates around 35°C, and considerably less than that — some estimates suggest under a year and a half — at sustained temperatures near 40°C, a range genuinely achievable inside a poorly ventilated equipment cupboard during a multi-day heatwave, especially if the UPS itself is stacked near other heat-generating equipment.
The mechanism behind this accelerated aging is straightforward chemistry: heat speeds up the internal chemical reactions that both charge and discharge the battery, and that acceleration cuts both ways — it increases the self-discharge rate, meaning the battery loses its stored charge faster even when just sitting idle, and it accelerates internal corrosion of the battery’s electrode materials, both of which directly reduce the number of charge-discharge cycles the battery can reliably sustain before its capacity degrades below a useful threshold. In extreme, sustained cases, this same accelerated chemical activity can trigger thermal runaway — a self-reinforcing cycle where internal heat generation from degraded chemistry itself raises temperature further, which in turn increases the rate of degradation, a genuinely dangerous failure mode, though one that in practice requires considerably more extreme and sustained heat exposure than a typical home heatwave alone tends to produce.
The insidious practical consequence for a home server owner is that a UPS silently losing battery capacity during a heatwave gives no warning through normal operation — it continues supplying power exactly as expected during the brief self-tests most UPS units perform periodically, and the reduced runtime capacity only becomes apparent during an actual extended outage, which is, unhelpfully, exactly the scenario a heatwave itself is statistically more likely to cause in the first place, given the added strain extreme heat places on regional power grids from widespread simultaneous air conditioning demand. A UPS battery that quietly lost forty percent of its rated backup runtime over a single severe heatwave, entirely because of ambient heat exposure with no other change to the hardware, may only reveal that loss during the very outage event the UPS was purchased to protect against.
Placement principles for a UPS during a heatwave mirror those already covered for other equipment — open air rather than an enclosed cupboard, separation from other heat sources, and ideally the coolest available spot in whatever room the home server occupies, since the UPS battery is, by a meaningful margin, the single most heat-sensitive component in a typical home server setup, more so than the server hardware itself, which at least benefits from active thermal protection the battery chemistry simply does not have.
Power consumption, heat output, and the link between the two
Every watt of electrical power a home server draws from the wall is eventually converted into heat, with only a small fraction going toward the useful computational or storage work the device actually performs — this is a direct consequence of thermodynamics rather than a design flaw, and it means power consumption figures, often quoted purely in terms of electricity cost, double as a fairly reliable proxy for how much heat a given device is contributing to its surrounding room. A Raspberry Pi 5 drawing up to 23 watts under sustained load is, in effect, a small 23-watt heater running continuously for as long as that load persists, and a mini PC or small NAS drawing 30–50 watts is a correspondingly larger heater doing the same thing.
This becomes directly relevant to home server placement during a heatwave because a room already struggling to shed the outdoor heat entering through walls, windows, and the roof gains an additional, entirely internal heat source from every piece of always-on electronics inside it, and the cumulative effect across a router, a NAS, a couple of Raspberry Pi boards, a UPS, and a network switch — a fairly typical home lab collection — can add up to a genuinely noticeable contribution to a small room’s overall heat load, particularly in a poorly insulated space with limited natural ventilation. A room can be measurably warmer than an equivalent unused room in the same building, purely as a result of the electronics running inside it, a self-inflicted heat load that compounds directly with whatever heat a heatwave is already adding from outside.
This relationship also explains why reducing unnecessary workload during a heatwave — pausing a resource-intensive backup schedule, deferring a large file transfer, temporarily disabling a rarely used service — genuinely helps cooling outcomes beyond just reducing the immediate risk of throttling on the device performing that specific task. Lower sustained CPU and drive activity across the board means lower total power draw across the entire home server setup, which means a smaller ongoing contribution to the room’s overall heat load, benefiting every other piece of equipment sharing that same room even if the workload reduction happened on just one device.
For anyone assessing which piece of home server equipment contributes most to a room’s heat problem, checking each device’s actual power draw under typical operating conditions — many smart plugs and inexpensive power meters make this trivial to measure directly rather than relying on manufacturer maximum ratings, which often significantly overstate real-world sustained draw — provides a genuinely useful, quantified sense of where the largest heat contribution is coming from, information that’s considerably more actionable during a heatwave than a vague sense that “everything in this room feels warm.”
Undervoltage, brownouts, and heat-related electrical stress
Extreme heat places considerable strain on regional electrical grids, primarily through the enormous simultaneous demand spike created by widespread air conditioning use, and that grid strain can manifest at the household level as voltage sag — a brief or sustained drop in supplied voltage below its nominal level, sometimes severe enough to register as a genuine brownout rather than a momentary fluctuation. A Raspberry Pi is particularly sensitive to undervoltage compared with many other home electronics, because its power budget is already tightly managed by design, and a voltage drop that other devices tolerate without any visible effect can trigger the Pi’s own undervoltage detection, visible as a lightning bolt icon and, more importantly, as a get_throttled flag indicating the firmware has reduced clock speed specifically in response to insufficient supply voltage.
This creates a compounding effect worth understanding clearly: undervoltage-triggered throttling and heat-triggered throttling are mechanically distinct — one responds to supply voltage, the other to chip temperature — but during a genuine heatwave, both are considerably more likely to occur simultaneously than either is in isolation, because the same grid conditions producing voltage sag are the direct consequence of the same regional heat event pushing a board’s own thermal margins. A Raspberry Pi drawing current close to its power supply’s actual capacity, already running warmer than usual because of elevated ambient temperature, is exactly the scenario in which even a modest voltage sag from grid strain is most likely to push it over an undervoltage threshold it would have tolerated comfortably under normal supply conditions.
A cheap or marginal USB power supply compounds this risk considerably. Official Raspberry Pi power supplies are engineered with genuine voltage regulation margin specifically to tolerate real-world fluctuation without triggering false undervoltage detection, while inexpensive third-party supplies — particularly older ones designed for lower-power previous-generation boards and repurposed for a newer, more power-hungry model — often have far less margin, meaning the exact same grid-level voltage sag that a quality supply absorbs without issue can push a marginal supply’s output low enough to trigger undervoltage throttling on its own, entirely independent of any temperature-related throttling happening simultaneously.
The practical response during a heatwave, when grid strain is a genuine and elevated possibility, is straightforward: verifying that any USB-powered home server hardware is running on a supply rated with real margin above the device’s actual peak draw, rather than one sized to the device’s nominal or average consumption figures, and treating any observed undervoltage flags during a heatwave as a signal worth investigating specifically — since an undervoltage event happening at the same time as elevated ambient temperature is easy to misattribute entirely to heat when the actual proximate cause may be a strained grid pushing a marginal power supply past its own tolerance, a distinction that matters because the fix for each problem is different even though the symptom, throttled performance, looks identical either way.
Monitoring tools and commands that reveal a heat problem early
Waiting for a home server to feel sluggish before checking its temperature means the problem has usually already been active for some time, and the earliest, most actionable warning signs are available through simple, well-documented commands that most default operating system installations already support without any additional software. On Raspberry Pi OS specifically, vcgencmd measure_temp returns the chip’s own internal temperature sensor reading directly, communicating with the GPU rather than relying on the same upstream Linux kernel temperature reporting path that the documentation itself notes can be inaccurate on Raspberry Pi hardware — a detail worth knowing because some generic Linux monitoring tools reading temperature through the standard kernel path can report numbers that don’t precisely match what the firmware’s own throttling logic is actually acting on.
Checking accumulated throttling history rather than just current temperature is equally important, and vcgencmd get_throttled provides exactly that, returning a value where 0x0 indicates a completely clean history since boot, while any nonzero value requires decoding — current under-voltage, current throttling, current frequency capping, and separate historical flags indicating each of those conditions occurred at some point since boot even if it has since cleared. Running this command once, seeing a clean result, and assuming the system has never been thermally stressed during the period being investigated is a common mistake; checking it immediately after a suspected stress period, before an unrelated reboot clears the historical flags, is the only way to reliably capture what actually happened.
For any NAS or NVMe-equipped mini PC, drive temperature monitoring through S.M.A.R.T. data — Self-Monitoring, Analysis, and Reporting Technology, a standard built into essentially all modern hard drives and SSDs — provides direct access to current temperature alongside historical minimum and maximum readings the drive itself has recorded, information that’s typically surfaced through a NAS’s own management dashboard without requiring any command-line interaction at all, and worth checking specifically during a heatwave rather than only when a problem is already suspected.
Setting up any form of continuous logging, even something as simple as a cron job appending a temperature reading to a text file every few minutes, transforms occasional manual checks into a genuine historical record that reveals patterns invisible to spot-checking alone: whether idle temperature has been creeping upward day by day as a heatwave progresses, whether a particular time of day consistently produces the highest readings, and whether a specific workload reliably triggers throttling that a casual glance at current temperature would never happen to catch in the act. A week of logged temperature data collected during a heatwave provides considerably more useful information for deciding whether a cooling upgrade is actually necessary than any number of individual spot checks, because it captures the pattern rather than a single moment that may or may not be representative of the problem’s actual severity.
For anyone without the inclination to script anything themselves, a wide range of existing lightweight monitoring dashboards — some purpose-built for Raspberry Pi specifically, others more general-purpose system monitoring tools already commonly installed on home servers for other reasons — can surface exactly this information with minimal setup effort, and enabling temperature logging as part of whatever monitoring is already in place is a low-effort addition that pays for itself the first time a heatwave-related slowdown needs to be diagnosed after the fact rather than caught in real time.
Automated shutdown scripts and safe failure behavior
A home server left completely unattended during a heatwave — which describes most real-world setups, since few people are watching a temperature dashboard continuously during a multi-day hot spell — benefits enormously from an automated safety mechanism that acts before a genuinely dangerous condition develops, rather than relying entirely on the hardware’s own built-in throttling, which protects the chip itself but does nothing to protect a filesystem from corruption if power is lost unexpectedly or nothing to prevent a struggling drive from continuing to accumulate thermal stress indefinitely.
A simple monitoring script checking CPU or drive temperature at a regular interval and triggering a graceful shutdown once a defined threshold is crossed provides a meaningfully different safety profile than relying on hardware throttling alone, because a controlled shutdown closes open files properly, unmounts filesystems cleanly, and avoids the specific risk that concerns anyone running important data on a home server: an unclean power loss or forced shutdown occurring in the middle of an active write operation, which can corrupt not just the file being written at that moment but, in some filesystem configurations, considerably more of the surrounding data structure as well.
Setting a sensible threshold requires balancing two competing concerns. A threshold set too conservatively low triggers unnecessary shutdowns during ordinary, harmless temperature spikes that would have resolved on their own within minutes, creating exactly the kind of unreliable, frequently-down server that defeats the purpose of running one in the first place. A threshold set too close to the hardware’s actual danger zone leaves little practical margin between “shutdown triggered” and “throttling or undervoltage already occurring,” providing less real protective benefit than the added complexity would suggest. A reasonable middle ground for most Raspberry Pi setups sits somewhere around 75–78°C — comfortably below the 80°C soft-throttle threshold, giving the script time to act and the shutdown process time to complete cleanly before throttling would have begun regardless, while still well above the range ordinary workloads should ever approach during non-heatwave conditions.
For services where any downtime at all is genuinely undesirable — a home automation hub controlling physical devices, for instance — a tiered response is often more useful than a single hard shutdown threshold: a first tier that pauses or defers non-essential background tasks once temperature crosses a lower warning threshold, reducing the load that’s contributing to the temperature rise in the first place, followed by a genuine shutdown only if temperature continues climbing despite that intervention. This kind of graduated response requires somewhat more scripting effort than a single shutdown trigger, but it avoids the all-or-nothing character of a hard cutoff, keeping a server limping along at reduced capacity through a temperature spike that a single-threshold approach would have simply taken offline entirely.
Whatever specific implementation is chosen, the underlying principle worth internalizing is that hardware throttling protects the silicon, not the data sitting on the drive attached to it, and a home server owner who has never experienced a heat-related unclean shutdown may simply not yet have encountered a heatwave severe enough, combined with cooling inadequate enough, to reach that specific failure mode — a combination this analysis suggests is becoming measurably more likely as both heatwave frequency and severity continue trending upward across the years ahead.
Overclocking and why it becomes dangerous during a heatwave
Overclocking a Raspberry Pi — running its CPU at a higher frequency and often a correspondingly higher voltage than the factory default — trades increased performance for increased heat output, a trade-off that’s manageable, sometimes even comfortably so, under favorable ambient conditions, and considerably less forgiving once a heatwave has already consumed a meaningful fraction of the board’s normal thermal margin before any overclock is even applied.
The core problem is that overclocking and heatwave conditions both consume the exact same limited resource: the temperature gap between current operating temperature and the 80°C soft-throttle threshold. A board overclocked to run comfortably at, say, 2.4GHz instead of its stock 1.8GHz might sit at a perfectly reasonable 65°C under sustained load in a 20°C room — a genuine, sustainable performance gain with real thermal margin still in reserve. The identical overclock, in a 33°C room during a heatwave, can push that same sustained load close to or past the throttle threshold, at which point the overclock itself becomes actively self-defeating: the firmware throttles clock speed back down in response to the heat the overclock itself is generating, and the end result can be lower actual sustained performance than simply running at stock settings would have delivered in the first place, since throttling doesn’t smoothly settle at “just under the limit” but can meaningfully undercut it depending on how aggressively the thermal protection engages.
This makes overclocking a particularly poor choice specifically during a heatwave, even for users who have successfully run the identical overclock reliably for months under normal seasonal conditions, because the overclock’s stability was implicitly validated against a thermal environment the heatwave has since changed. A configuration that has “always worked fine” is not a permanent guarantee once the ambient assumption it was validated under no longer holds, and testing cited in cooling guides for hot climates explicitly recommends against overclocking a Raspberry Pi 5 in ambient conditions above roughly 35°C without active cooling specifically for this reason — the potential benefit is negated, and in the worst case actively reversed, by the additional heat the overclock itself contributes on top of an already elevated ambient baseline.
For anyone running an overclocked home server through a genuine heatwave, temporarily reverting to stock clock speeds for the duration of the hot spell is a low-effort, fully reversible adjustment that removes one of the more controllable variables contributing to thermal stress, and it’s worth doing proactively rather than waiting to discover through observed throttling that the existing overclock configuration and the current ambient conditions are no longer compatible with each other in the way they clearly were just a few weeks earlier in cooler weather.
Long-term component wear from repeated thermal cycling
A single heatwave, survived without any dramatic failure, does not necessarily mean a home server has emerged from the experience unaffected, because some of the most consequential heat-related damage accumulates gradually across repeated cycles of heating and cooling rather than manifesting as an immediate, attributable event during any one specific hot spell. Thermal cycling — the repeated expansion and contraction of materials as temperature rises and falls — places mechanical stress on solder joints, connector contacts, and any interface where two different materials with slightly different rates of thermal expansion are physically bonded together, and while a single cycle produces negligible stress on its own, the cumulative effect across dozens or hundreds of cycles over a device’s operating life is a well-documented contributor to eventual electronic component failure, distinct from and additional to any purely thermal damage occurring at peak temperature itself.
A home server that experiences daily heat cycling through an extended heatwave — running warm through the afternoon, cooling somewhat overnight, then heating up again the following day — accumulates considerably more thermal cycling stress across a two-week hot spell than the same device would typically experience across an entire ordinary season of more stable, moderate temperatures. This doesn’t mean any specific component is guaranteed to fail as a direct result of one heatwave, but it does mean the cumulative wear budget of components with finite fatigue tolerance — solder joints in particular, which is why intermittent, heat-related connection failures sometimes appear months after the heat event that likely contributed to them, rather than during the event itself — gets consumed measurably faster during a summer with frequent, severe heatwaves than during a milder one.
Repeated throttling events themselves, while not damaging in the way sustained overheating past the throttle point would be, still represent repeated thermal cycling of the chip package specifically, since a board oscillating in and out of the throttling band as load and ambient temperature fluctuate throughout a hot day is experiencing more frequent temperature swings at the chip level than one operating at a stable temperature comfortably below the throttle threshold throughout. This is one of the less appreciated arguments for investing in adequate cooling before a heatwave rather than simply tolerating throttling as an acceptable inconvenience: reducing how often a board crosses in and out of the throttling band reduces cumulative thermal cycling stress at the chip level, independent of and in addition to the more obvious immediate performance benefit of avoiding throttling in the first place.
For hard drives specifically, repeated significant temperature swings have been associated in reliability research with elevated failure rates compared with drives maintained at a more stable temperature, even when the stable temperature is itself somewhat higher than the peak of the swinging temperature’s average — stability itself appears to matter almost as much as the absolute temperature achieved, a nuance easy to miss when focusing purely on peak temperature numbers during a heatwave and worth factoring into any decision about whether a cooling intervention’s main value lies in lowering peak temperature, stabilizing temperature across the day, or, ideally, achieving both simultaneously.
Practical setup for a home server room during extended heat
Bringing the individual pieces covered throughout this analysis together into a coherent setup means addressing the problem in the order that delivers the largest benefit for the least effort first, rather than jumping straight to the most expensive or technically involved intervention available. Placement comes first and costs nothing beyond the inconvenience of moving equipment: relocating anything currently living in a closet, cupboard, or enclosed cabinet to an open space with clearance on multiple sides, away from direct sun through a window, and separated from other heat-generating devices addresses more of the underlying problem than any subsequent hardware upgrade will, for the reasons covered in the placement-specific sections above.
Cleaning existing cooling hardware — clearing dust from heatsink fins, fan blades, and case vents — comes next, both because it’s nearly free and because it restores capacity that may already have quietly degraded well before any heatwave-specific intervention is even considered. Verifying that any USB-powered board is running on a power supply with genuine margin above its actual peak draw, rather than a marginal or repurposed older supply, addresses the undervoltage-and-heat compounding risk covered earlier, and is worth checking specifically before a heatwave rather than discovering the issue mid-event through unexplained throttling.
Component-specific temperature thresholds worth checking against during setup
| Component | Comfortable sustained range | Concerning range |
|---|---|---|
| Raspberry Pi (any model) CPU | Below 70°C | Above 80°C (soft-throttle) |
| NAS or desktop hard drive | Below 45°C | Above 50-55°C sustained |
| NVMe SSD controller | Below 60°C | Above 70-80°C (throttle) |
| UPS battery ambient | 20-25°C | Above 35°C sustained |
The table above consolidates the specific thresholds discussed throughout this analysis into a single reference, useful precisely because these numbers come from different sources and different components, and having them side by side makes clear how much lower the sensible target ranges sit compared with the much higher absolute maximums manufacturers typically list, and which manufacturer maximum most casual monitoring mistakenly treats as the meaningful number to watch.
With placement, cleaning, and power supply margin addressed, the remaining decision is whether active cooling — a fan on the Raspberry Pi or mini PC itself, and separately, room-level cooling through an appropriately chosen fan, evaporative cooler, or air conditioner based on local humidity conditions — is actually necessary given the specific workload and the severity of the heatwave being planned for. For a lightly loaded Pi-hole or home automation instance, the earlier interventions alone may be entirely sufficient. For anything running sustained, demanding workloads — a NAS performing scheduled backups, a home server running containerized services continuously — active cooling at both the device and room level is worth treating as a reasonable baseline expectation for the hottest weeks of the year, rather than an emergency response reserved for when a problem has already become obvious.
Finally, setting up temperature logging and, where the workload justifies it, an automated safe-shutdown threshold closes the loop by ensuring that whatever margin the physical setup provides is actually being monitored, rather than assumed, and that a genuine failure mode — heat-related data corruption from an unclean shutdown — has a defense in place even if every other precaution turns out, during a particularly severe event, to have been insufficient on its own.
What to do when a heatwave arrives with no time to prepare
Not every home server owner has the luxury of preparing before a heatwave arrives; forecasts sometimes give only a day or two of warning, and sometimes a hot spell simply arrives faster or more severely than predicted. For anyone facing an already-hot room with no time for a considered setup, a short list of immediate, low-effort actions delivers a meaningful share of the total available benefit even when applied at the last minute.
Reducing workload immediately is the single fastest lever available, because lower load means lower heat output right away, with no hardware changes required at all. Pausing or deferring any scheduled backup jobs, bulk file transfers, or resource-intensive background tasks for the duration of the worst heat reduces both the peak temperature the equipment reaches and the total heat contribution to the room, buying time for other measures to take effect or simply reducing the total exposure until conditions improve.
Relocating equipment, even to a genuinely makeshift open spot rather than a carefully chosen ideal location, still captures most of the placement benefit covered earlier — moving a NAS out of a closet and onto an open table, even temporarily and inelegantly, addresses the single largest lever available faster than ordering any cooling hardware ever could. Pointing any existing household fan directly at the equipment, even a fan intended for personal comfort rather than purchased with this use in mind, provides genuine forced-convection benefit immediately, at zero additional cost or delay.
Checking current temperature readings through the commands and tools covered earlier establishes a baseline immediately, which matters even under time pressure because it distinguishes a genuinely urgent situation — a board already sitting at 78°C at idle, with essentially no margin left — from a merely uncomfortable one that’s still well within safe operating range and doesn’t require dramatic intervention. Acting on an assumption of danger without checking actual temperatures risks either under-reacting to a genuinely urgent situation or over-reacting with unnecessary service disruption to a situation that didn’t actually require it.
If temperatures are already firmly in the throttling or concerning range despite these immediate steps, and no better cooling option is available on short notice, a temporary, deliberate reduction in service scope — shutting down non-essential services entirely for the duration of the worst heat, rather than letting everything continue running in a degraded, throttled state — is often the more sensible choice than accepting hours of poor performance across every service simultaneously, since a smaller number of services running well tends to be more useful in practice than a larger number all running poorly at once, and it reduces cumulative thermal cycling and heat-related wear across the whole event rather than just its peak.
Realistic scenarios for the next few summers
The 2026 heatwave that prompted this analysis was, according to climate attribution researchers, an event that would have been essentially impossible this early in the season without the warming already accumulated in the climate system, and the World Meteorological Organization’s own framing of Europe as the fastest-warming continent on the planet, heating at roughly twice the global average rate, suggests this particular event is better understood as an early instance of an increasingly common pattern rather than an isolated anomaly unlikely to recur soon.
For anyone maintaining a home server, the practical planning implication is straightforward: treating heatwave-adequate cooling as a one-time setup task, completed once and then left unrevisited, is increasingly likely to prove insufficient within just a few years, as both the frequency and peak severity of heat events this analysis has focused on continue trending in the same direction they have for the past several summers. A cooling setup validated against last year’s worst heatwave may simply not be validated against next year’s, if next year’s turns out to run several degrees hotter or last several days longer, a pattern several of 2026’s national temperature records — broken not by a fraction of a degree but by a full degree or more in multiple countries — already illustrate concretely.
This doesn’t necessarily mean every home server owner needs to invest in room-level air conditioning specifically for the sake of a Raspberry Pi or NAS; for many setups, the low-cost interventions covered throughout this analysis — better placement, adequate device-level active cooling, dust management, power supply margin, and basic monitoring — provide sufficient resilience against the heat events likely over the next several summers without requiring a major investment. But it does mean the assumption that “it survived last summer, so it’ll be fine” deserves periodic reassessment rather than permanent trust, specifically because the ambient conditions that assumption was validated against are themselves shifting, year over year, in a direction that consistently narrows rather than widens the margin any given cooling setup actually has to work with.
The broader pattern connecting every section of this analysis is that heat doesn’t damage well-designed modern hardware directly, in the dramatic, sudden way intuition sometimes suggests; it works instead through a series of narrower margins, compounding effects, and accelerated aging processes that are individually modest but collectively meaningful, applied consistently across every component in a typical home server setup for as long as elevated ambient conditions persist. Understanding those mechanisms specifically — rather than relying on a vague sense that “it’s hot, so it’s probably fine as long as nothing obviously breaks” — is what actually separates a home server that quietly loses a few years of hard drive life and UPS battery capacity every summer from one that doesn’t, and that difference compounds across years in a way that a single summer’s experience rarely reveals on its own.
Business impact for people running client work or self-hosted services from home
A meaningful share of home server operators are not purely hobbyists; freelancers running a self-hosted development environment, small agencies running internal tools on a home NAS, and independent developers hosting client-facing services from a home connection all have a direct financial stake in uptime that a purely personal home lab setup doesn’t carry in the same way. For this group, heatwave-related throttling or an unclean thermal shutdown isn’t just an inconvenience to be tolerated until cooler weather arrives — it’s downtime with a real cost attached, whether that cost is a missed deadline, a client-facing service degrading during business hours, or hours spent recovering a corrupted database after an unclean shutdown mid-write.
The sectors most exposed to this risk share a common characteristic: they rely on continuous availability from infrastructure that was originally sized and budgeted as a personal or small-scale project rather than as business-critical equipment, which means the cooling and redundancy investment that would be considered standard practice in even a modest commercial server room — dedicated climate control, redundant power, proactive monitoring with alerting — is frequently absent entirely from a home setup serving an identical practical function. A freelance web developer running client staging environments on a home Raspberry Pi cluster faces genuine business risk from a heatwave in a way that’s easy to underestimate specifically because the infrastructure looks and feels like a hobby project even when its actual role has quietly become closer to production.
Small businesses using a home-based NAS for shared file storage, accounting software, or point-of-sale backups face a related but distinct risk profile: the data itself, rather than service uptime, is the primary exposure, and the hard drive temperature and thermal cycling concerns covered earlier translate directly into elevated risk of drive failure during exactly the period — a multi-day heatwave — when replacement hardware sourcing and any necessary data recovery work also becomes harder to schedule quickly, since the same heat affecting the server is affecting technicians, couriers, and every other part of the support chain simultaneously.
Independent developers and small agencies self-hosting services that would, in a larger organization, run in a properly climate-controlled data center face a specific version of this exposure worth naming directly: the false confidence that comes from a service having run reliably for months or years without any heat-related incident, precisely because that track record was established under ambient conditions a genuine heat dome event can exceed for the first time in the service’s operating history, with no prior incident to have revealed the gap beforehand. For anyone in this position, the practical response isn’t necessarily migrating to commercial cloud hosting — plenty of self-hosted setups remain entirely reasonable choices — but it does mean treating heatwave resilience specifically as a business continuity question worth budgeting modest time and money toward, rather than folding it into general “server maintenance” and hoping existing habits happen to cover it.
The professional risk extends to a less obvious group as well: consultants and contractors who deploy IoT devices, monitoring equipment, or small edge-computing servers into other people’s homes or business premises, where a Raspberry Pi or similar small server may be running unattended in a location the deploying professional doesn’t control and can’t easily inspect for the placement and dust issues covered throughout this analysis. Building explicit heatwave-resilience guidance into deployment documentation for this kind of equipment — recommended placement, minimum cooling hardware, and a clear escalation path if temperature alerts fire — shifts a genuinely underappreciated category of operational risk from something discovered reactively during the first serious heat event to something planned for deliberately before deployment.
Insurance and liability considerations when equipment overheats
Home insurance policies covering electronics and, separately, any data or business-interruption losses stemming from equipment failure rarely address heat-related degradation as a distinct category, and the practical consequence is that a hard drive failure or UPS battery failure attributable to sustained heat exposure during a documented heatwave sits in a genuinely ambiguous position between “normal wear and tear,” which most policies explicitly exclude, and “sudden accidental damage,” which many policies do cover, without a clean, universally applicable answer as to which category any specific claim actually falls into.
This ambiguity matters most for anyone running equipment with business or professional stakes attached, where a heat-related failure translates into a data loss or downtime claim with real financial consequences beyond simply the cost of replacing the failed hardware itself. A freelancer whose home-hosted client environment goes down during a documented regional heatwave, causing a missed deadline with contractual consequences, faces a genuinely different claims landscape than a hobbyist whose personal media server drive fails during the same event — the professional-use case is more likely to intersect with business interruption coverage, professional liability considerations, or client-facing contractual obligations that a purely personal setup never encounters.
Documentation becomes disproportionately valuable specifically because of this ambiguity. Temperature logs covering the period leading up to a failure — the kind of monitoring data covered earlier in this analysis — provide concrete evidence distinguishing a heat-attributable failure from one caused by an unrelated manufacturing defect or ordinary component aging, information that matters considerably if a claim is ever contested, and information that’s essentially impossible to reconstruct after the fact if no logging was in place at the time. For anyone running equipment with genuine financial stakes attached, the modest effort of maintaining continuous temperature logs pays a second dividend beyond the operational monitoring benefit already covered: it creates a contemporaneous record that could matter considerably if a heat-related failure ever needs to be substantiated to an insurer, a client, or in the more serious case, in a dispute over responsibility for a service outage.
There’s a further consideration specific to anyone hosting services or storing data on behalf of others from home equipment: data protection obligations in many jurisdictions require reasonable technical measures to protect stored personal data, and a documented pattern of running storage hardware at sustained temperatures known to elevate failure risk, without any mitigating action taken despite that knowledge being reasonably available, could weaken a defense that reasonable care was taken if a heat-related failure results in a data loss incident affecting someone else’s information. This is a genuinely underexplored corner of home server operation — most guidance on data protection compliance focuses on encryption, access control, and backup practices, with physical operating environment rarely addressed explicitly — but the underlying principle, that reasonable technical measures should reflect known and foreseeable risks, applies just as directly to thermal management as it does to any more commonly discussed security control.
None of this is intended to suggest home server operators need to treat every heatwave as a looming legal or insurance crisis; for the large majority of purely personal setups, the practical stakes remain modest and the interventions covered throughout this analysis remain the right proportional response. But for the specific subset of readers running client-facing services, business-critical data, or professional deployments from home equipment, the intersection between heatwave risk and the broader questions of coverage, liability, and compliance is worth at least one deliberate review, rather than an assumption that ordinary equipment insurance or standard data protection practices already account for a risk they were never specifically designed around.
Regional climate differences and why the same advice doesn’t fit every country
A single set of cooling recommendations cannot fit every climate equally well, because the two variables that matter most for choosing between cooling methods — absolute temperature and relative humidity — vary enormously across the regions where home servers actually run, and treating advice calibrated for one climate as universally applicable is a common and consequential mistake. The evaporative cooling guidance covered earlier is the clearest illustration: genuinely effective and efficient in the dry continental heat common across parts of Central and Eastern Europe during a heat-dome event, and correspondingly far less useful in the humid heat more typical of coastal Western Europe, Southeast Asia, or the southeastern United States, where the same appliance that performs well in Vienna or Prague can actively make conditions worse in Lisbon, Mumbai, or Miami.
Housing stock itself varies just as consequentially as climate. Northern and Central European buildings were historically designed around retaining heat through long winters — thick insulation, small windows, limited passive ventilation — a design philosophy that becomes a direct liability during a heatwave, since the same insulation trapping winter warmth traps summer heat with equal effectiveness, and it’s a meaningful part of why the 2026 heatwave hit indoor temperatures in these regions so hard despite outdoor temperatures that, in absolute terms, are unremarkable in far hotter climates elsewhere. A home server owner in this kind of building faces a genuinely different baseline problem than one in a building specifically designed for a hot climate, where deep eaves, cross-ventilation, and lighter building materials are standard features rather than afterthoughts.
Grid reliability during heat events also varies considerably by region and directly affects which risks covered in this analysis matter most in a given location. Regions with grid infrastructure well-adapted to high air conditioning demand experience the undervoltage and brownout risks covered earlier only rarely; regions where grid capacity is more marginal relative to peak summer demand — whether due to infrastructure age, underinvestment, or simply demand growing faster than capacity — face a meaningfully elevated version of that specific risk, independent of and additional to the direct thermal risk every region faces roughly in proportion to actual temperature.
For a Slovak reader specifically, the relevant baseline is a temperate continental climate historically built around moderate summers, now experiencing heat events — SHMÚ’s own repeated warnings through the same period covered at the start of this analysis — that increasingly resemble conditions the local housing stock, and the cooling habits built around it, were never designed to handle routinely. The practical lesson generalizes beyond any single country: cooling advice should be calibrated against local humidity, local building design, and local grid reliability specifically, rather than imported wholesale from a guide written with a different climate’s typical conditions implicitly assumed, and the most useful single action any reader can take beyond the specific recommendations in this analysis is checking current and forecast humidity alongside temperature for their own location before choosing between the appliance options compared earlier, rather than defaulting to whichever option happens to be most commonly recommended online without regard to whether that recommendation’s assumptions actually match local conditions.
Historical perspective: how home computing cooling expectations have shifted
Home computing cooling expectations have moved through several distinct phases that are worth understanding specifically because each phase left behind assumptions that persist in casual advice long after the hardware and climate conditions that justified them have changed. Early home computers of the 1980s and 1990s drew modest power and generated correspondingly modest heat, and cooling was rarely a serious design consideration for anything beyond the largest desktop towers — a small home computer simply didn’t produce enough heat for ambient room temperature to matter much either way, and the entire question of climate resilience for home computing equipment barely existed as a category of concern.
The rise of always-on home servers and network-attached storage through the 2000s and 2010s changed this gradually rather than suddenly, as broadband internet made always-on home services genuinely practical for the first time, and as storage capacity and drive count in typical home NAS setups grew steadily. This period established most of the placement and airflow conventions still commonly repeated today — keep it in a well-ventilated spot, avoid enclosed cabinets — advice that was calibrated against the ambient temperature ranges and heat output typical of that era’s hardware, running in buildings and climates that, at the time, rarely produced the kind of sustained multi-day extreme heat now becoming more common.
The Raspberry Pi’s own launch in 2012, and its subsequent adoption as inexpensive home server hardware for exactly the kind of lightweight always-on services this analysis has focused on throughout, initially reinforced a “cooling barely matters” assumption, because the earliest boards drew very little power and rarely approached any concerning temperature even with zero cooling hardware at all. Each subsequent generation of Pi has quietly eroded that original assumption — the shift from “heatsinks are optional” framing around the Pi 3 era to “active cooling strongly recommended even for moderate workloads” framing for the Pi 5 traces a direct line from genuinely minimal cooling requirements toward genuinely necessary ones, even before any climate-driven ambient temperature increase is factored in at all.
Layer the climate trend on top of that hardware trend and the compounding nature of the current moment becomes clear: home server hardware has been getting hotter, generation over generation, at roughly the same time ambient room temperatures during summer heat events have been trending upward as well, meaning the comfortable safety margin that characterized home server cooling through most of the 2010s has been narrowing from both directions simultaneously — hotter hardware, hotter rooms — even though most casual advice repeated online hasn’t fully caught up with either trend individually, let alone both together. Understanding this history helps explain why advice that felt adequate even five or six years ago can feel meaningfully insufficient today, without any single dramatic change having occurred, and it argues for treating current cooling guidance, including the recommendations in this analysis, as something that will itself need periodic revisiting as both hardware and climate trends continue in the directions they’ve each been moving.
Cost comparison of the interventions covered in this analysis
Weighing the practical value of every intervention discussed throughout this analysis against its actual cost helps prioritize effort sensibly, particularly for anyone facing a heatwave with a limited budget and needing to decide where a modest amount of money or time delivers the largest realistic benefit. Relocating equipment out of an enclosed cupboard costs nothing beyond a few minutes of effort and, based on the real-world evidence covered earlier — drive temperatures dropping from the 48–52°C range to 30–40°C purely through better placement — delivers a disproportionately large benefit relative to its zero financial cost, making it the clear first priority for anyone facing a heatwave with no budget at all available for hardware.
Basic maintenance — cleaning dust from existing heatsinks, fans, and vents — similarly costs close to nothing, requiring only a can of compressed air or a soft brush, and restores cooling capacity that testing has shown can degrade by as much as 40% through dust accumulation alone, meaning this maintenance step frequently delivers a benefit comparable to some paid hardware upgrades, purely by recovering capacity that was already present in the existing hardware before dust degraded it.
A basic active cooling fan for a Raspberry Pi or small NAS represents the next tier of cost, typically a genuinely modest expense, and delivers a substantial, measurable improvement in sustained thermal performance specifically because it changes the underlying heat transfer mechanism from natural to forced convection, as covered in detail earlier — this remains one of the best-value single purchases available for anyone running hardware where placement and cleaning alone haven’t fully resolved a heat concern. A quality replacement power supply with genuine voltage margin, addressing the undervoltage risk covered earlier, sits in a similar modest-cost tier and provides a specific, targeted benefit against a specific, identifiable risk rather than a general improvement.
Room-level cooling represents the largest cost tier by a considerable margin, and the earlier comparison between fans, evaporative coolers, and refrigerant air conditioners maps fairly directly onto a corresponding cost gradient — a simple electric fan sits at the low end, an evaporative cooler in the middle, and a portable or fixed air conditioner at the high end, both in upfront purchase cost and in ongoing electricity consumption. The value of this largest expenditure category depends heavily on whether room-level cooling is being purchased primarily for the equipment’s benefit or primarily for human comfort with the equipment’s benefit as an incidental side effect — for a lightly loaded Raspberry Pi running Pi-hole, room-level air conditioning purchased purely for the hardware’s sake is difficult to justify economically given the much cheaper device-level interventions available; for a household already planning to purchase cooling for human comfort during increasingly severe heatwaves, the equipment benefit becomes a genuine bonus on spending that would likely have happened anyway.
The overall pattern worth taking away is that the cost-to-benefit ratio of these interventions is strongly front-loaded: the cheapest and easiest actions — placement, cleaning, basic device-level fans — deliver the largest share of the total available benefit, while progressively more expensive interventions deliver progressively smaller marginal improvements relative to their cost, at least for the lightly-to-moderately loaded home server workloads this analysis has focused on throughout. This doesn’t mean room-level cooling is never worthwhile, but it does mean working through the low-cost tier fully before considering the higher-cost tier is the financially sensible sequence for the large majority of home server setups, rather than defaulting straight to the most expensive available option out of a sense that bigger spending must produce proportionally bigger results.
Open questions climate and hardware data can’t yet answer
Several genuinely open questions remain even after working through the mechanisms and mitigations covered throughout this analysis, and it’s worth being explicit about where the available evidence runs out rather than presenting more certainty than currently exists. The precise long-term reliability impact of the kind of repeated, severe heatwave exposure now becoming more common in regions like Central Europe is not yet backed by extensive multi-year field data specifically for small home server hardware, because this pattern of heat exposure is itself relatively recent — the manufacturer reliability figures and community-reported failure patterns cited throughout this analysis were largely generated under climate conditions less extreme and less frequent than what 2026’s heat dome events represent, meaning some extrapolation into more severe territory is unavoidable, and should be treated as a reasonable inference rather than a directly measured certainty.
Whether hardware manufacturers will meaningfully revise their own thermal design assumptions in response to this climate trend, building in more cooling margin by default for consumer-grade small server hardware, remains genuinely uncertain. The Raspberry Pi Foundation’s own shift toward recommending active cooling more strongly for the Pi 5 than for earlier boards suggests at least some directional awareness of rising thermal demands, whether driven primarily by increased chip performance, climate trends, or some combination of both, but it’s not yet clear whether this represents a deliberate response to changing ambient conditions specifically or simply a byproduct of pursuing more raw performance generation over generation, with heat output as an accepted side effect rather than a climate-aware design decision.
The interaction between grid reliability trends and heatwave frequency also remains an open and consequential question specific to the undervoltage and brownout risk covered earlier. Whether regional grid infrastructure investment keeps pace with growing peak summer demand as heatwaves become more frequent and severe, or whether the gap between demand growth and infrastructure investment widens instead, will directly determine whether the undervoltage risk profile described in this analysis remains a relatively minor, occasional concern or becomes a considerably more significant and frequent factor in home server reliability over the coming years — and this is fundamentally a question about infrastructure investment and policy decisions rather than one that hardware or climate data alone can resolve.
Finally, the humidity trend accompanying rising temperatures deserves more attention than it currently receives in most cooling guidance, including much of what’s been covered in this analysis. Warmer air holds more moisture, and some climate research suggests future heatwaves may increasingly combine high temperature with elevated humidity rather than the relatively dry heat that characterized several of 2026’s most extreme readings — a shift that would directly affect the evaporative-cooling-versus-air-conditioning calculus covered earlier, potentially narrowing the climates where evaporative cooling remains a sensible choice even as the number of climates experiencing severe heat expands. This analysis has worked from currently available evidence and currently observed conditions; readers revisiting this topic in future summers should treat the specific climate assumptions here as a snapshot of 2026 conditions rather than a permanently fixed baseline, and should weigh new humidity and temperature data as it becomes available against the general mechanisms described throughout, which are likely to remain valid even as the specific numbers they’re applied to continue shifting.
Choosing between off-the-shelf cooling kits and a DIY approach
Anyone deciding how to actually implement the cooling improvements covered throughout this analysis faces a practical choice between buying a purpose-built kit — an official Active Cooler, a branded case with integrated fan, a commercial NVMe heatsink — and assembling something from generic parts, and the right answer genuinely depends on the specific board, workload, and how much time the person is willing to spend tuning a solution rather than simply installing one.
Official and branded cooling accessories carry a real advantage that’s easy to undervalue: they’ve typically been validated against the exact fan curve, mounting geometry, and thermal load the specific board actually produces, which means less guesswork and a lower chance of a mismatch between cooling capacity and actual heat output. The Raspberry Pi 5’s official Active Cooler, with its firmware-integrated fan curve described earlier, is a clear example of this advantage in practice — the thresholds at which the fan spins up were chosen by the same organization that designed the chip’s thermal behavior, rather than guessed at by a third party working from public specifications alone. For anyone who wants a solution that works correctly the first time with minimal adjustment, official accessories remain the lower-risk choice, generally at a modest price premium over generic alternatives.
A DIY approach — a generic 12V fan wired through a simple transistor circuit or a basic PWM controller, a stress-tested heatsink chosen independently rather than bundled with a case — offers genuine advantages of its own, particularly for anyone specifically optimizing for heatwave resilience rather than accepting whatever thresholds a stock product ships with. Building a custom fan-control script means the “fan on” temperature can be deliberately lowered during a forecast heatwave and returned to normal afterward, a level of situational tuning no off-the-shelf product currently offers, since commercial fan curves are fixed at the firmware or hardware level and designed as a reasonable general-purpose compromise rather than something end users are expected to adjust seasonally.
Cost also favors the DIY route for anyone comfortable with basic wiring and a bit of scripting: a generic 60mm or 80mm case fan, a simple heatsink, and a small resistor or PWM controller typically cost meaningfully less than an equivalent branded kit, and the larger fan sizes available in the generic aftermarket — as covered earlier, larger fans running at reduced voltage often achieve better noise-to-airflow ratios than the smaller fans bundled with compact official accessories — can outperform a stock solution specifically on the noise dimension that matters most for equipment living in a shared household space rather than a dedicated server closet.
The honest trade-off is reliability of outcome versus flexibility of outcome. A branded, validated cooling accessory is more likely to work correctly with zero tuning and zero risk of a wiring mistake causing an unrelated electrical problem. A DIY setup offers more control — including the heatwave-specific tuning described above — at the cost of requiring the builder to actually get the implementation right, verify it under real load with a thermometer rather than assuming it works as intended, and accept personal responsibility for any wiring error that a commercial product’s design and testing process would otherwise have caught before it ever reached a customer.
For most readers, a sensible middle path exists: start with whatever official or well-reviewed branded accessory suits the specific board, since it removes the largest source of implementation risk, and layer a simple software-level temperature-logging and alerting script on top of that hardware — a purely software addition that requires no wiring changes at all — to gain the situational awareness that lets a heatwave be anticipated and responded to, even without the full custom fan-curve tuning a from-scratch DIY build would allow. This combination captures most of the reliability benefit of a branded solution and a meaningful share of the situational flexibility a DIY approach offers, without requiring the builder to take on the electrical implementation risk that a from-scratch fan-control circuit would introduce.
Whichever path is chosen, the single detail worth verifying regardless of source — official accessory or generic part — is actual measured performance under the specific workload the server runs, rather than trusting a product’s marketed specifications alone. A stress test run deliberately in the hottest part of a hot day, with temperature logged throughout using the commands and tools covered earlier in this analysis, reveals whether a given cooling choice actually delivers the margin needed for the specific hardware and workload involved, and that direct verification matters more than any general reputation, whether official or third-party, a specific product happens to carry.
Wireless equipment and network gear during extended heat
Routers, network switches, and powerline adapters rarely get the same cooling attention as a server itself, largely because they’re marketed and perceived as simple, low-maintenance appliances rather than as computing devices with their own thermal limits — yet a router pushed into thermal distress during a heatwave produces a failure mode that looks nothing like an obvious hardware problem and everything like an ordinary, frustrating connectivity issue: intermittent Wi-Fi dropouts, unexplained speed degradation, or a device that reboots itself at seemingly random intervals throughout the hottest part of the day.
Consumer routers typically have no active cooling and often ship in cases with minimal ventilation, an acceptable design choice under moderate ambient conditions and a genuinely limiting one once room temperature climbs well above what the device was tested against. Because a router sits at the center of a home network, its thermal struggles during a heatwave can masquerade as problems with the internet connection itself, a misdiagnosis that sends people troubleshooting their internet service provider or their Wi-Fi channel configuration when the actual cause is a small plastic box quietly overheating on a shelf, often stacked directly beneath or beside other heat-generating equipment for the simple reason that routers and modems are frequently placed near other networking gear as a matter of cabling convenience rather than thermal planning.
The same placement principles covered throughout this analysis for servers apply just as directly to networking equipment, and arguably matter more given how little native cooling most routers include: open air rather than an enclosed media cabinet, separation from other devices generating their own heat, and — specifically for routers, which are commonly placed on top of other equipment purely for space reasons — avoiding stacking a router directly on top of a warm device like a modem, a NAS, or a UPS, since the router’s underside vents, where most passive convection cooling occurs, become directly blocked by whatever heat-radiating surface sits immediately beneath it.
For anyone whose home server setup depends on a stable network connection to function as intended — remote access, cloud backup synchronization, or simply reliable local access from other devices in the house — a router struggling with heat can undermine the value of an otherwise well-cooled server sitting right next to it, making router placement and, where a specific unit runs hot enough to justify it, a small supplementary fan aimed generally across the networking equipment shelf, a genuinely worthwhile addition to a heatwave preparation checklist that’s easy to overlook entirely when attention is focused primarily on the more obviously computationally intensive parts of a home server setup.
Warranty terms and what heat-related claims actually look like in practice
Component warranties rarely mention ambient operating temperature explicitly in the plain-language summary most consumers actually read, but the detailed terms and conditions for hard drives, SSDs, and UPS batteries typically do specify an operating temperature range, and operating outside that range, even briefly, can technically void coverage for a subsequent failure — a detail most home server owners never look up until after a drive has already failed and a warranty claim is being considered.
In practice, manufacturers rarely have any way of knowing after the fact whether a failed drive spent time above its rated operating temperature, since consumer hard drives log only a rolling window of recent SMART temperature history rather than a complete lifetime record, meaning the technical possibility of a voided warranty due to heat exposure is, for most home users, more of a theoretical risk than one that manufacturers actively pursue or verify during ordinary claims processing. This is worth knowing precisely because it removes some of the anxiety around occasional heat exposure without removing the underlying reliability argument for keeping temperatures reasonable — a claim being unlikely to be technically denied is a different thing entirely from heat exposure being harmless to the drive’s actual working life, and the reliability case made throughout this analysis stands independently of whatever a warranty department would or wouldn’t catch.
For UPS batteries specifically, the warranty situation tends to be more straightforward and less forgiving, since battery degradation from heat exposure is a well-understood and expected failure mode that most UPS manufacturers explicitly exclude from coverage as ordinary wear, treating a battery replacement after the stated service interval as routine maintenance rather than a warrantable defect regardless of what accelerated that particular unit’s aging. This makes the earlier point about UPS batteries being the most heat-sensitive component in a typical home server setup doubly relevant from a purely financial perspective: a battery that ages twice as fast due to sustained heat exposure isn’t just a reliability risk during the next outage, it’s also a cost that falls entirely on the owner to absorb through earlier-than-expected replacement, with essentially no warranty recourse available regardless of how clearly heat exposure can be documented as the contributing cause.
The practical lesson from all of this is not that warranty terms should drive cooling decisions on their own — the reliability and data-safety arguments covered throughout this analysis remain the primary reasons to take heat seriously regardless of what any warranty department would ultimately decide — but that anyone assuming a warranty provides a safety net against heat-related component failure should read the actual operating temperature specification for their specific hardware at least once, so that assumption can be replaced with an accurate understanding of where the real financial exposure sits, rather than carried forward as an unexamined and, in the case of UPS batteries specifically, largely incorrect assumption.
Common questions about cooling home servers and Raspberry Pi boards during a heatwave
A Raspberry Pi begins soft throttling, gradually reducing ARM core frequency, once the chip’s internal temperature reaches 80°C. At 85°C, both the ARM cores and the GPU are throttled together more aggressively. These thresholds are set in firmware and cannot be raised by the user, only lowered.
Under normal conditions, no. The built-in throttling mechanism reduces clock speed and voltage specifically to prevent the chip from reaching a temperature that would cause direct physical damage. The realistic risks from heat are degraded performance, accelerated wear on connected components like drives and power supplies, and data corruption from an unclean shutdown, rather than direct chip destruction.
Run vcgencmd measure_temp in a terminal or over SSH. This reads the chip’s internal sensor directly and is considered more accurate than generic Linux temperature reporting paths on Raspberry Pi hardware.
vcgencmd get_throttled returns a value showing whether under-voltage, frequency capping, or thermal throttling is currently active, and separately, whether any of those conditions have occurred at any point since the last boot. A result of 0x0 means a completely clean history since boot.
For light, intermittent workloads on a Pi 3 or lightly used Pi 4, a passive heatsink is often sufficient even during moderate heat. For a Pi 5, or any board running sustained, demanding workloads, active cooling through a fan is strongly recommended, particularly once room temperature climbs above the low thirties Celsius.
Yes, modestly. Vertical mounting improves natural convection airflow across the heatsink compared with a flat orientation, since warm air rises more freely along vertically oriented fins. The effect is small but genuinely measurable, and it costs nothing beyond a mounting bracket.
Manufacturer maximum operating temperatures represent an absolute ceiling, not a target for sustained operation. Most experienced home lab operators aim to keep hard drives below roughly 45°C for sustained use, since consistently running closer to the stated maximum accelerates wear even though it doesn’t cause immediate failure.
This is one of the least favorable placement choices available. Closets typically have poor air exchange with the rest of the room, allowing heat to accumulate well above the surrounding room temperature. Open placement with clearance on multiple sides consistently produces lower operating temperatures than any enclosed cabinet.
Only in dry climates. Evaporative coolers lose effectiveness sharply above roughly 50% relative humidity, and in humid conditions they primarily add moisture to the air, which increases condensation risk around electronics rather than helping. A refrigerant-based air conditioner works consistently regardless of humidity level.
It’s possible in specific circumstances: if a room is cooled aggressively while humid outdoor air is still entering, surfaces on the equipment can temporarily drop below the surrounding air’s dew point. Gradual cooling rather than an abrupt temperature drop reduces this risk substantially.
Lead-acid UPS batteries age considerably faster in heat; a commonly cited rule of thumb holds that battery lifespan is cut roughly in half for every 10°C increase in sustained operating temperature above about 25°C. This degradation happens silently and often isn’t apparent until the battery is called on during an actual power outage.
It’s considerably riskier than during cooler weather. An overclock validated as stable during moderate ambient conditions consumes thermal margin that a heatwave has already reduced, and the overclock can become self-defeating once throttling engages in response to the extra heat it generates. Reverting to stock clock speeds for the duration of a severe heatwave is a reasonable precaution.
Reduce workload immediately by pausing non-essential background tasks, move any enclosed equipment to open air even temporarily, point an existing household fan at the equipment, and check actual temperature readings before deciding whether further action is needed.
Yes. Dust accumulation on heatsink fins and inside case vents has been measured reducing thermal efficiency by up to 40% in some testing. A few minutes with compressed air on heatsinks, fans, and vents before the hottest part of the year restores capacity that may have been lost gradually over preceding months.
For any home server holding important data, yes. Hardware throttling protects the chip itself but does nothing to protect a filesystem from corruption during an unclean shutdown. A script triggering a graceful shutdown around 75–78°C, comfortably below the 80°C throttle threshold, provides a meaningful additional layer of protection.
Yes, and often silently. NVMe controllers can reach 70–80°C under sustained heavy load, the point at which most drives throttle read and write speeds automatically. A basic aftermarket or motherboard-integrated heatsink measurably delays this throttling under sustained workloads like large backups or file transfers.
Effectively, yes, when housed together. Boards mounted closely in a shared enclosure raise the trapped air temperature around every board through combined heat output, which then becomes the effective ambient condition each individual board’s own cooling has to work against, compounding the challenge beyond what any single board would face on its own.
Not automatically. Mini PCs often ship with more deliberately engineered cooling for their specific power draw, but they also typically draw and dissipate more total heat. Storage cooling, particularly for NVMe drives, is a common weak point in mini PC builds that gets less attention than CPU cooling.
Climate researchers have described the intensity of recent European heatwaves as increasingly likely under continued warming, and organizations including the World Meteorological Organization have characterized Europe as warming roughly twice as fast as the global average. Treating heatwave-resilient cooling as an occasional concern rather than a recurring seasonal consideration is increasingly unlikely to match the actual trend.
Author:
Jan Bielik
CEO & Founder of Webiano Digital & Marketing Agency

This article is an original analysis supported by the sources cited below
Frequency management – Raspberry Pi Documentation Official Raspberry Pi documentation describing thermal throttling thresholds, DVFS behavior, and firmware-managed fan control across board generations.
Heating and cooling Raspberry Pi 5 Official Raspberry Pi article explaining Pi 5 thermal behavior and the recommendation for active cooling under sustained workloads.
Raspberry Pi 5 thermal throttling at 80C or 85C? – Raspberry Pi Forums Community and staff discussion clarifying the distinction between soft throttling near 80°C and hard throttling at 85°C on Pi 5.
Does the Raspberry Pi 4 throttle at 60 C or 70 C? Forum thread with Raspberry Pi engineering staff confirming throttle points and correcting community misconceptions about Pi 4 thermal behavior.
Pi3+ throttling back at 60C instead of 70C with new Raspbian Official explanation of the Pi 3B+ temperature-based frequency stepping introduced to extend thermal headroom before hard throttling.
Changing the CPU throttle temperature set point (CM4) Forum discussion of Compute Module thermal configuration and real-world customer heat-related deployment issues.
Raspberry Pi Temperature Guide: How to Check, Throttling Limits & Cooling Tips – SunFounder Practical guide covering monitoring commands, throttling thresholds, and cooling hardware options across Pi generations.
Raspberry Pi Temperature: Limits, Monitoring, Cooling, and More – RaspberryTips Consumer-facing explainer on Raspberry Pi temperature monitoring, safe ranges, and typical idle-versus-load behavior.
Raspberry Pi Overheating Fix: Cooling and Throttling Guide – Zbotic Cooling guide focused on extreme-heat climates, covering PWM fan control, humidity and dust considerations, and overclocking risk in hot ambient conditions.
Take your NAS out of the closet – it might be cooking your drives – XDA Developers First-person account of NAS drive temperatures and failure linked to enclosed closet placement, and the improvement from relocating to open airflow.
Heat – how hot can the room w/the synology get? – SynoForum Community discussion of practical NAS operating temperatures and the gap between manufacturer maximums and sensible sustained targets.
HDD temperatures – how critical are they… really? – TrueNAS Community Home lab discussion of hard drive temperature specifications, warranty implications, and airflow troubleshooting for NAS builds.
How to Fix a NAS Running Hot: Temps, Causes and Fixes – UGREEN NAS Practical guide to NAS temperature thresholds, placement clearances, and diagnosing bay-related versus drive-related heat issues.
What is the Right Temperature Set Point for My Electrical Enclosure? – Electronics Cooling Technical explainer on condensation risk and dew point management for cooled electrical enclosures.
The dew point: why is it important in electrical enclosures? – Fandis Blog Explanation of dew point mechanics and condensation risk relevant to any cooled electronics environment.
Evaporative Cooling and Humidity: When It Works Best – Rosanna Heating and Cooling Breakdown of evaporative cooler effectiveness across relative humidity ranges compared with refrigerant air conditioning.
Portable Evaporative Air Cooler Vs AC: Which Cools Better In Humid Climates? – Active Air Direct comparison of evaporative cooling and portable air conditioning performance for equipment-relevant environments under varying humidity.
How Temperature Affects Battery Life in UPS Systems – ACDC Integrated Electrical Solutions Technical breakdown of the relationship between ambient temperature and lead-acid UPS battery lifespan, including the doubling-per-10°C rule of thumb.
UPS Summer Heat: Is Your System Ready for the Season? Practical guidance on UPS battery heat exposure during summer conditions and manufacturer-cited degradation rules of thumb.
Recommendations for prolonging the life of your UPS battery – Schneider Electric Blog Schneider Electric and APC guidance on temperature-related UPS battery aging and mitigation practices.
Does an NVMe SSD need a heatsink? – Seagate Manufacturer explanation of NVMe thermal throttling behavior, typical temperature ranges under load, and heatsink benefits.
SSD cooling: Do M.2 NVMe SSDs need a heatsink? – Kingston Technology Kingston’s technical guide to NVMe thermal throttling causes, airflow troubleshooting, and heatsink effectiveness.
How NVMe SSD thermal throttling works – HAGIWARA Solutions Detailed technical explanation of NVMe thermal management thresholds and measured heatsink performance impact.
Aluminum vs Copper Heat Sink: The Definitive Practical Guide – PTSMAKE Engineering comparison of copper and aluminum heatsink thermal performance, weight, and cost trade-offs.
Copper vs Aluminium Heat Sinks: The Practical Guide – Heatell Detailed thermal conductivity and material property comparison between copper and aluminum heatsink construction.
2026 European heatwaves – Wikipedia Consolidated reference on the sequence, records, and regional impact of the 2026 European heatwave events referenced throughout this analysis.
Record-breaking heat spreads through Europe – World Meteorological Organization Official WMO reporting on national temperature records broken across Europe during the June 2026 heatwave, with regional detail by country.
Europe’s record-breaking heatwave: what you need to know – Euronews Coverage of the omega block weather pattern driving the 2026 heatwave, national records, and the low prevalence of air conditioning across European housing.
Germany records new all-time temperature high as Europe heatwave moves east – Al Jazeera Reporting on the eastward progression of the June 2026 heat dome across Germany, Poland, and neighboring countries, including grid and infrastructure strain.
| Citing this article? Brief excerpts are welcome. Please credit Webiano.digital, name the author where stated, and include a link to https://webiano.digital and to this original article. Full or substantial republication requires prior written permission. Read our Copyright and Content Use Policy. |