
A camera body that will not power on at 6 a.m. does not cost you the price of the repair. It costs you the shoot. The crew is booked, the location is confirmed, the client is standing in the car park with coffee, and the one thing that was supposed to work is sitting dead in a bag that let it get crushed under a lens case somewhere between the studio and the set. This is the scenario that transport gear exists to prevent, and it is the reason experienced operators spend real money on cases and bags long before they buy a second lens.
Table of Contents
The real cost of a broken kit on a working day
The equipment side of audio-visual work has never been more capable or more fragile at the same time. Mirrorless bodies pack stabilised sensors on floating mounts. Cinema cameras carry delicate flange assemblies and internal recording media. Wireless audio systems depend on antennas and connectors that bend if you look at them wrong. Gimbals hold precision motors that lose calibration after a hard knock. All of this travels, often several times a week, between a base, a vehicle, an airport, and a location that may be a beach, a building site, or a hotel ballroom. The gear is designed to make images; it is not designed to survive being moved. That job belongs to whatever it is packed inside.
The financial exposure is easy to underestimate. A working solo shooter might carry fifteen to twenty-five thousand euros of equipment in a single backpack. A small crew running two cameras, lighting, and audio can move six figures of gear to a location and back in an afternoon. A rental house sends kits out the door every day that would take months of income to replace. Against those numbers, the cost of proper protection is small, yet it is the line people cut when a budget gets tight. A three-hundred-euro hard case looks expensive next to a forty-euro padded bag until the day the forty-euro bag fails and takes a six-thousand-euro lens with it.
There is a second cost that rarely appears on any invoice: lost time. Damaged gear that still technically functions can waste a day in ways that never get billed. A tripod head with grit in it from a bag that let dust in. A microphone with an intermittent connection because the cable was crushed against a hard edge for three flights. A lens with a fungus bloom because it lived in a humid soft bag that never dried out. None of these produce a dramatic failure. They produce a slow erosion of reliability that makes a shoot harder, slower, and more stressful, and they push the operator toward the quiet belief that this kind of thing is simply normal. It is not normal. It is a packing problem.
The point of this article is to treat transport and protection as a genuine part of the craft, not an afterthought. That means understanding what actually damages gear, what the protection standards printed on cases really mean, how hard cases and soft bags differ in purpose, how foam and interiors work, what the current airline and battery rules demand, and how to assemble a transport system that matches the way you actually work rather than the way a catalogue photo suggests you should. The goal is simple and unglamorous: the gear that leaves your base should arrive able to work, every time, without you thinking about it.
The forces that quietly destroy equipment in transit
Understanding what to buy starts with understanding what the gear is up against. Damage in transit comes from a small number of physical forces, and every case, bag, and foam choice is really an answer to one or more of them.
The first is impact. A dropped bag, a case falling off a tailgate, a hard set-down on concrete, or the moment a baggage handler throws a case onto a conveyor. Impact is sudden and concentrated, and it transfers energy straight into whatever is inside unless something absorbs it first. The danger is not only the drop you see. It is the drop you do not see, the one that happens inside an aircraft hold when a case slides half a metre and stops hard against a bulkhead. Impact protection is the headline job of a hard case, and it is the thing soft bags do least well.
The second is vibration. This one is underrated because it does nothing visible in the moment. A camera riding in a van for three hours on a rough road, or in a cargo hold across an ocean, is being shaken thousands of times. Vibration loosens screws, works connectors free, degrades solder joints over time, and slowly beats delicate mechanisms out of alignment. Gimbals and lenses with fine internal assemblies are especially vulnerable. Vibration is why serious transport foam is engineered to dampen as well as cushion, and why the military test standards that matter include dedicated vibration methods rather than a single drop test.
The third is water and moisture, and these are two separate problems. Liquid water from rain, spray, a spilled drink, or a case set down in a puddle is the obvious one. The subtler threat is humidity. Air that carries a lot of moisture will find its way into a soft bag and sit there against cold metal and glass. Given time and warmth, that is exactly the condition that grows fungus on lens elements and corrodes contacts. A case that keeps liquid water out does nothing about the humid air already sealed inside with the gear, which is a distinction most buyers miss.
The fourth is dust and particulate. Sand on a beach, grit on a construction site, fine dust on a desert road. Particulate works its way into zoom barrels, tripod legs, fan intakes, and any moving part, where it grinds and jams. Dust protection is measured by the same ingress rating system as water, and it is often the more common real-world enemy, because far more shoots happen in dusty conditions than in genuinely wet ones.
The fifth is crushing and compression. Distinct from a sharp impact, this is the steady load of other bags stacked on top in a car boot, an overhead bin, or a cargo pallet. Soft bags with rigid internal structure resist it; unstructured bags do not. A camera at the bottom of a pile in a flexible bag can be under real pressure for hours.
The sixth, easy to forget, is pressure change. An aircraft hold is not pressurised the way the cabin is, and the altitude swing can force a sealed case to resist opening on landing or stress a tight gasket. This is the specific reason quality waterproof cases include a valve, covered later, and why a genuinely airtight seal without one is a liability rather than a feature.
Every buying decision in this article maps back to these six forces. A case or bag is only as good as its answer to the specific forces your work actually exposes gear to, which is why the right choice for a studio photographer who drives to nearby jobs looks nothing like the right choice for a documentary team flying into a monsoon.
Hard cases and soft bags solve two different problems
The most common mistake in buying transport gear is treating hard cases and soft bags as competitors, as if one is simply the tougher version of the other. They are not on the same scale. They solve different problems, and most working setups need both.
A hard case is a container built to survive the worst thing that can happen to it while it is out of your hands. Its whole design assumes the case will be thrown, dropped, stacked under other freight, rained on, and generally treated as cargo. The rigid shell, the sealing gasket, the latches, and the foam interior all exist to make the outside world irrelevant to the gear inside. The defining question for a hard case is: can this survive being checked as luggage, shipped, or handled by people who do not care what is inside? That is why the serious cases carry impact, water, and dust ratings, because those are the conditions they are meant to face.
The cost of that protection is weight, bulk, and slow access. A hard case is heavy, it takes up a fixed volume whether full or empty, and getting to your gear means unlatching, opening a lid, and lifting items out of foam. None of that matters when the case is doing its real job, which is protecting gear during a move. It matters a great deal when you are trying to swap a lens in twenty seconds on a live shoot, which is why nobody works out of a Pelican case on their shoulder.
A soft bag is the opposite trade. It is built for carrying and for access, not for surviving abuse. A good camera backpack distributes weight across your body so you can walk for hours, opens fast so you can reach a body or lens without stopping, and organises gear so you know where everything is. Its protection is real but modest: padded dividers cushion against knocks and keep items from banging into each other, and weather-resistant fabric sheds light rain. What a soft bag does not do is survive being dropped from height, crushed under freight, or submerged. A soft bag protects gear from the ordinary knocks of being carried and used; it does not protect gear from being treated as cargo.
This is why the sensible model for many operators is a two-stage system. Gear travels to the location inside hard cases, in the van or checked or shipped, where the priority is survival. Once on site, the operator works out of soft bags, cubes, or a lightly padded roller, where the priority is speed and comfort. The hard cases sit in the vehicle or a secure corner as base camp; the soft bag is what moves with the shooter. The two are not alternatives. They are stages in the same journey, and confusing their roles leads to either destroyed gear or a miserable working day.
There is a middle category worth naming: the semi-rigid or hybrid bag, and the padded roller. These try to blend protection and access, with structured panels, reinforced bases, and enough padding to survive rough handling short of the true cargo abuse a hard case absorbs. Rolling camera cases sized for overhead bins live here, and for a lot of flying photographers they are the practical compromise, because they protect reasonably well while staying with you in the cabin rather than disappearing into the hold. The compromise is exactly that, though. A cabin roller does not protect like a sealed hard case, and it does not carry like a proper backpack. It sits between the two, and it earns its place only when the specific job rewards that middle position.
Choosing well starts with being honest about which stage of the journey you are actually protecting against, and refusing to let one bag pretend to do a job it was never built for.
Ingress protection ratings and what IP67 really promises
Once you start reading case listings, the same codes appear again and again: IP67, sometimes IP65 or IP68, alongside claims about being waterproof and dustproof. These are not marketing invention. The IP system is a real international standard, and knowing how to read it separates a genuine protection claim from a vague one.
IP stands for Ingress Protection, and the rating is defined under IEC standard 60529. The two digits after the letters carry specific meaning. The first digit rates protection against solids, on a scale up to 6; the second digit rates protection against liquids, on a scale up to 9. A rating of IP67, the number you see most often on serious cases, therefore means two distinct things at once. The 6 means the case is completely dust-tight, with no ingress of particles at all. The 7 means the case can withstand temporary immersion in water, typically defined as one metre depth for thirty minutes, without water getting inside. As several case makers describe it, the first digit addresses dust and the second addresses water, and IP67 confirms both dust-tight construction and short-term immersion capability.
The distinction between the second-digit numbers matters for how you read a claim. IP65 means dust-tight and protected against low-pressure water jets, which is plenty for rain and splashing but not for immersion. IP67 adds the temporary submersion capability. IP68 extends protection to continuous immersion under conditions the manufacturer defines, usually a greater depth or longer time. For audio-visual gear, IP67 is the sweet spot and the de facto professional standard, because it covers the realistic worst case of a case being dropped in water or left out in a downpour, without the extra cost and sealing complexity of an IP68 build that most shooters will never need.
There is an important limit to understand. An IP rating measures only dust and water ingress. It says nothing about impact, vibration, drop survival, or temperature. A case can be fully IP67 rated and still crack if you drop it hard enough, because the rating is silent on mechanical shock. This is exactly why the serious cases carry a second set of claims tied to military test standards, which cover the forces the IP system ignores. Reading only the IP rating and assuming it means a case is tough in every respect is a common and expensive misreading.
It is also worth knowing that IP ratings apply to the case as a system, sealed and latched correctly. A case rated IP67 is only IP67 when the gasket is clean and undamaged and every latch is closed. A speck of grit on the seal, a latch left unclosed, or a gasket that has hardened with age breaks the rating entirely. The number on the box is a laboratory result under ideal conditions; keeping it true in the field is on the operator. Cases that keep their seal after years of use tend to be the ones with continuous moulded gaskets and latches that pull the lid down evenly, rather than thin strips of foam pretending to be a seal.
For most audio-visual buyers, the practical takeaway is short. Treat IP67 as the baseline for any case meant to protect gear that will face weather or be checked as luggage, treat IP65 as adequate for gear that only needs to shrug off rain, and never let an IP number alone convince you a case is drop-proof, because that is a different test entirely.
Military test standards behind the marketing claims
Where the IP rating stops, the military standard begins. The phrase you will see on premium cases is MIL-STD-810, often with a letter suffix such as G or H, and it addresses precisely the forces the IP system ignores: shock, vibration, temperature, altitude, and more.
MIL-STD-810 is a United States Department of Defense standard for environmental engineering and laboratory test methods. It exists so the military can confirm that equipment survives the conditions of transport, deployment, and use in harsh environments, and over decades it has become the reference point for rugged consumer and industrial gear as well. The standard is not a single pass-or-fail test. It is a large collection of individual test methods, each covering a specific environmental stress, and a manufacturer chooses which methods to run. This is the crucial detail buyers miss. A case described as MIL-STD-810 tested might have been tested against one method or a dozen, and the honest question to ask is always which methods, under what conditions.
The methods that matter most for audio-visual transport are the ones covering mechanical and environmental abuse. There is a method for vibration, which in the current edition is Method 514, subjecting equipment to the frequencies and durations that represent transport by road and air. There is a method for shock and drop, confirming the case can be dropped from a defined height onto a hard surface without failing. There are methods for temperature extremes, humidity, sand and dust, salt fog, and solar radiation, each simulating a specific field condition. A case that credibly carries MIL-STD-810 has been put through the relevant subset of these, which is a meaningfully harder bar than any IP rating.
The letter suffix indicates the revision of the standard. MIL-STD-810G and the newer MIL-STD-810H are the versions you will encounter, with 810H being the current revision. The differences between revisions are technical refinements to test procedures rather than dramatic changes in what is tested, so a case tested to 810G is not obsolete, but 810H reflects the latest methodology. One detail specific to transport cases is worth calling out: the newer standard addresses the performance of the automatic pressure equalisation valve, confirming that the valve allows gradual pressure equalisation while maintaining the case’s watertight integrity. That connects the military standard directly to the altitude problem that every case flown as cargo faces.
It helps to keep the two standards in their lanes. The IP rating tells you about dust and water. The military standard tells you about impact, vibration, temperature, and the broader environmental picture. A case that carries both a genuine IP67 rating and credible MIL-STD-810H testing has been validated against the full range of forces described earlier, which is why the top-tier cases advertise both together. A case that carries only one is protecting against only part of the threat.
There is a healthy scepticism to maintain here, because the military-standard claim is easy to abuse. Any manufacturer can run a single mild test method and print MIL-STD-810 on the box. The claim carries real weight only when the maker specifies the methods and conditions. Reputable case brands publish this detail or make it available on request. When a listing simply states a case is military-grade with no supporting specifics, that is a marketing phrase rather than an engineering claim, and it deserves the same suspicion you would give any unsupported superlative.
For audio-visual gear specifically, the practical hierarchy is straightforward. For cases that will be checked as luggage, shipped, or used in genuinely rough field conditions, look for both IP67 and MIL-STD-810H with the shock and vibration methods explicitly covered. For cases that only ride in a controlled vehicle, the full military testing is less critical, and a solid IP-rated case with good foam will do. The standard is a tool for matching protection to real exposure, not a badge to collect for its own sake, and buying more certification than your work demands is simply a way of paying for weight you do not need.
The ATA-300 specification and where flight cases come from
Alongside IP and military ratings sits a third standard with a different heritage and a different job. ATA-300 is the specification behind the large fabricated flight cases and road cases that move lighting rigs, mixing consoles, camera packages, and touring production gear around the world, and its origin explains a lot about why those cases look and behave the way they do.
The specification comes from the airline industry. It was developed by airline packaging engineers and originated as a standard for shipping aircraft parts, and it is maintained under the body now known as Airlines for America. Its purpose is reusable transport: cases that survive being handled as air freight not once but repeatedly, across a long working life. The defining feature of ATA-300 is that it rates cases by how many round trips they are built to survive. Category I cases are designed to withstand a minimum of 100 round trips, while Category II containers are built for a minimum of 10. For a touring production or a rental house sending gear out constantly, that round-trip durability is the whole point, because the case is an investment amortised across hundreds of journeys.
These are a different animal from the moulded plastic cases discussed so far. A classic ATA flight case is fabricated rather than moulded: plywood or composite panels, laminated with a tough exterior surface such as ABS, bound with extruded aluminium edging, reinforced with metal corners, and closed with recessed butterfly latches and spring-loaded handles. The interior is fitted with foam, often layered ester and ether foams cut to cradle a specific piece of equipment, or built out with shock-mounted racks for sensitive electronics. Because they are made to order, they can be sized and configured for almost anything, from a single mixing console to a full rack of broadcast gear on wheels.
The audio-visual world relies on these cases heavily. Tour managers, sound engineers, and lighting crews use ATA cases to move expensive gear across continents, facing constant loading and unloading and rough handling, and the certified build is what keeps the equipment working through it. Broadcast and film teams use them for cameras, monitors, and consoles. The categories of gear that live in custom ATA cases read like an inventory of a production: mixing consoles, wireless microphone systems, lighting control desks, monitors, racks of processing gear, and the awkward large items that no off-the-shelf case fits.
The tradeoff is obvious and accepted: these cases are heavy and large. A fabricated flight case for a console can weigh more than the console. That weight is the cost of Category I durability and of the shock isolation that protects rack-mounted electronics from vibration. Nobody buys an ATA case for a light travel kit; you buy one when gear is going to be handled as freight many times over and the cost of building the case is small against the cost of the gear and the shoots it enables.
For a smaller operation, the relevance of ATA-300 is mostly indirect. You are unlikely to commission a custom flight case for a two-camera kit. Where it becomes real is at the point of scaling up, when a business starts moving lighting packages, multiple camera bodies, and audio gear to venues regularly, and the moulded cases stop being enough. Knowing that ATA-300 exists, and that Category I means a hundred round trips of certified survival, tells you what to ask a case builder for when that day comes, and stops you from mistaking a lightly built display case for genuine transport protection.
Pressure equalisation valves and the altitude problem
One small component separates cases built for air travel from cases that merely look tough: the pressure equalisation valve. It is easy to overlook, usually a small round fitting on the side of the case, but it solves a real problem that a sealed case creates for itself.
A genuinely airtight, waterproof case has a problem the moment it changes altitude. When the case is sealed at ground level and then flown, the air pressure outside drops as the aircraft climbs, while the pressure inside the sealed case stays at ground level. The pressure difference pushes outward on the lid and gasket. On the way back down, the reverse happens: outside pressure rises while the case interior is still at altitude pressure, and the case can become genuinely difficult to open, as if it has been vacuum-sealed shut. Anyone who has fought to unlatch a sealed case after a flight has felt this. Beyond the annoyance, the sustained pressure difference stresses the gasket and the shell.
The valve solves this by allowing air to pass slowly in and out to equalise pressure, while blocking water and dust from passing the other way. It is a one-way-in, one-way-out membrane that lets air molecules through but not liquid or particulate. The result is a case that stays watertight and dust-tight yet never builds up a damaging pressure difference, and that opens normally regardless of the altitude it has just travelled through. The current military test methodology specifically validates this behaviour, confirming that the valve equalises pressure gradually without compromising the case’s watertight seal.
The practical lessons are simple. Any case you intend to fly, especially as checked baggage or cargo, should have a working pressure valve. A fully sealed case with no valve is a liability in the air, not a virtue, because the seal that keeps water out becomes the thing that traps a pressure difference. Some valves are automatic, opening and closing on their own as pressure changes; others are manual, a small screw you loosen before a flight and tighten afterward. Automatic is more convenient and harder to forget. Whichever type, the valve is a wear item like the gasket, and a valve clogged with grime or a gasket gone hard will quietly stop doing its job, so both deserve an occasional check.
Comparing the three protection standards that matter
The table below summarises what each standard actually covers, so a listing that quotes one of them can be read correctly rather than assumed to mean total protection.
| Standard | What it rates | Typical use | What it does not cover |
|---|---|---|---|
| IP67 (IEC 60529) | Dust-tight; temporary water immersion to 1 m for 30 min | Moulded cases facing weather or checked as luggage | Impact, vibration, temperature |
| MIL-STD-810H | Shock, vibration, temperature, humidity, altitude, dust, salt fog | Field-rugged cases; harsh environments | Not a single test; depends on which methods were run |
| ATA-300 Cat I | Reusable durability, minimum 100 round trips as air freight | Fabricated flight and road cases for touring and broadcast | Not a waterproofing rating on its own |
No single standard describes total protection. A case built for the worst conditions carries a genuine IP67 rating, credible MIL-STD-810H testing on the shock and vibration methods, and, if it is a large fabricated case, ATA-300 Category I durability. Reading the standards together, rather than treating any one as a guarantee, is how you judge whether a case matches the abuse your work will subject it to.
Pelican, Peli and the case that defined the category
No brand shaped the protective case market more than Pelican, and no name is more likely to be used as a generic term for a hard case the way people say a photocopier when they mean any copier. Understanding what Pelican built, and why, gives a baseline for judging everything else.
Pelican Products makes the moulded polymer cases that became the reference standard for rugged protection. Outside North America the same cases are often sold under the Peli brand name, which trips up buyers comparing prices across regions; Pelican and Peli are the same company and largely the same products, with the name difference being a matter of trademark geography. In Europe, including Slovakia and the wider region, Peli is the name you will most often see, and it should be read as identical to Pelican for all practical purposes.
The classic Pelican case is instantly recognisable: a thick-walled polymer shell, an o-ring gasket, push-button latches that snap closed with a distinctive click, an automatic pressure valve, and a pluckable foam interior. These cases are built to be waterproof to IP67, crush-resistant, and practically indestructible in normal use, and they carry a lifetime guarantee that reflects that confidence. The Protector line is the original heavy design. The Air line answers the single biggest criticism of the originals by cutting weight substantially while keeping the full watertight seal, which matters enormously for anyone flying with cases, because weight is the constraint that airlines police hardest.
The strengths are consistency and ecosystem. Pelican cases fit together in known sizes, foam and divider options are widely available, third-party foam cutters make custom inserts for every model, and the sheer market presence means replacement parts and accessories are easy to find. For gear that must survive being checked, shipped, or used in the field, a Pelican case is a safe default that will not surprise you.
The weaknesses are also well understood. The push-button latches, while secure, can feel stiff, particularly in cold conditions or for users with limited hand strength, and the standard pluck foam frays over time and offers little flexibility once you have removed the cubes to fit a particular layout. The originals are heavy, which the Air line addresses but does not eliminate. And Pelican’s dominance means you often pay a brand premium over competitors that match the protection.
For an audio-visual operation, the honest position is that Pelican set the standard and remains a completely defensible choice, especially where the priority is proven reliability and easy access to accessories. It is not automatically the best value, and it is not the lightest, and the sections that follow cover the competitors that beat it on specific measures. But if someone asks for a single safe answer to protecting gear that will be handled as freight, a Pelican or Peli case in the right size, with the right foam, remains difficult to fault.
Nanuk, SKB, HPRC and the serious alternatives
Pelican has real competition, and for many audio-visual buyers one of the alternatives is the better choice. The serious rivals match Pelican on core protection while beating it on specific features, and knowing where each pulls ahead lets you buy on merit rather than reputation.
Nanuk is the most direct challenger and the one most often cross-shopped against Pelican. Made in Canada from a resin the company calls NK-7, Nanuk cases meet the same IP67 standard, survive the same drops, and carry the same lifetime warranty. Where they differ is in the details working operators notice. The Nanuk PowerClaw latch slides over a steel wire and tightens the seal as it closes, and it is easier to operate with gloves and needs less force than Pelican’s push-button latches, which is a genuine advantage in cold or awkward conditions. Nanuk also offers the TrekPak divider system, rigid foam-wrapped panels secured by pins that can be reconfigured infinitely, which suits shooters whose kit layout changes often far better than fixed pluck foam. The cases come in bright colour options that make identification easy on a crowded set or baggage carousel, and the fit and finish are excellent. For a lot of photographers and field technicians, Nanuk delivers Pelican-level protection with a more refined, approachable feel.
SKB is the choice with the deepest professional heritage, a long-standing supplier to the music, industrial, and government markets. Its iSeries cases rival Pelican on toughness and are certified to MIL-STD-810H while carrying an IP67 rating, and SKB backs them with strong warranty support. The iSeries uses a patented trigger-release latch for quick access, snap-down handles, and an extensive catalogue of custom foam, rackmount, and organiser options. SKB also collaborates on photographer-specific interiors, and its range extends into the fabricated and rack case territory that a growing production business eventually needs. For an operation that wants one supplier across small moulded cases and larger rack and transport builds, SKB’s catalogue depth is a real draw.
HPRC, an Italian maker, competes on lightweight resin construction and precise moulding, and it is a common pick for drone and cinema kits where weight is scrutinised. Explorer Cases, also Italian, occupies similar ground. Seahorse offers genuine IP67-class cases at lower prices, a route for buyers who want real protection without the premium names. At the budget end, brands such as Eylar and various house-brand cases from large retailers offer water-resistant, foam-lined protection that is fine for gear that rarely leaves a vehicle, though the build quality, seal longevity, and warranty do not match the top tier, and the weight is often higher for the same protection.
There is also a category that abandons foam entirely in favour of reconfigurable dividers. The Magpul DAKA GRID system, borrowed from the firearms world, uses a peg-board interior of movable dividers so a layout can be rebuilt whenever the kit changes, which is compelling for anyone repacking constantly with different gear. For a case that lives with one fixed kit, custom or pluck foam is simpler and cradles better; for a case that changes contents week to week, a divider or GRID system earns its keep.
The honest summary is that protection at the top of this market is broadly equal. Pelican, Nanuk, SKB, HPRC, Explorer, and Seahorse all make cases that will genuinely survive being treated as freight. The decision comes down to secondary factors: latch feel, interior system, weight, colour, warranty terms, and how the case fits the way you actually pack and travel. A buyer who fixates on the brand name is asking the wrong question. The better question is which of these equally protective cases best matches the gloves you wear, the frequency your layout changes, the weight your airline allows, and the budget you are working to. Where possible, handle the latches and open the interior before buying, because the difference between these cases in daily use is felt in the hands, not read on a spec sheet.
Foam is the part most people get wrong
A hard case is only half the protection. The foam inside does the actual work of holding gear still and absorbing shock, and it is the part buyers understand least and skimp on most. A magnificent case with the wrong foam protects gear worse than a modest case with the right foam, because the foam is what stands between a sudden impact and the equipment.
The core principle is that foam has to do two things at once, and they pull in opposite directions. It has to hold each item snugly so nothing moves, because a camera sliding inside a case turns every knock into an impact against the case wall. And it has to cushion, absorbing and dissipating the energy of a drop or vibration so less of it reaches the gear. Generic padding fails at the first job: it cannot stop internal movement, and gear that moves inside its container is gear that is being damaged. A snug, item-specific fit is not a luxury; it is the mechanism by which the foam works at all.
This is why the layout matters as much as the material. A camera body dropped loosely into a foam-lined case with too much space around it will slam side to side and can be damaged even though the case itself is intact. A body cradled in a cavity cut to its shape stays put, and the surrounding foam takes the shock instead. The best-protected kits are the ones where every item has a dedicated, close-fitting cavity, which is exactly what custom-cut foam provides and what a hastily plucked layout with generous margins does not.
The weight of the gear changes what the foam needs to do. A light item like a small camera or a set of filters needs soft foam that cushions without letting the item bottom out. A heavy item like a large lens, a projector, or a cinema body needs firmer, denser foam that provides rigid support and does not simply compress flat under the weight, because foam that bottoms out under a heavy item stops protecting the moment it is compressed. Foam engineers routinely combine densities in a single case for this reason: a firm base layer for structural support with a softer top layer for a snug, scratch-free fit. Matching foam density to the weight and fragility of each item is the difference between foam that works and foam that merely fills space.
There is a subtler point about vibration. Cushioning against a single drop and damping continuous vibration are related but not identical, and the foam that does both well is engineered for it rather than being generic packing foam. This matters most for gear that rides for hours in vehicles or cargo, where vibration, not impact, is the dominant threat. It is also why serious cases for sensitive electronics sometimes use shock-mounted suspension rather than foam alone, isolating the gear from the case shell entirely.
The mistake to avoid is treating foam as an afterthought that comes free with the case. The stock cubed foam that ships with most cases is a starting point, adequate for a fixed kit if you pluck it carefully, but it is rarely the best solution for high-value or complex gear. Foam is the working part of a protective case, and it deserves as much thought as the case itself, because it is the component actually touching your equipment when the case hits the ground.
Polyethylene, polyurethane and choosing the right density
Foam is not one material. The two families used in protective cases behave very differently, and choosing between them is one of the more consequential decisions in protecting audio-visual gear, even though it rarely gets discussed.
Polyurethane foam, usually written PU, is the soft open-cell foam that ships as standard with most cases. Open-cell means air and moisture can move freely through the material, which makes it soft, light, and good at cushioning delicate items. Polyurethane suits lighter, sensitive equipment such as laptops, cameras, and lenses, where the priority is a gentle, cushioning hold rather than rigid support. The tradeoff is that open-cell foam absorbs moisture from the air and can break down over time in humid conditions, and it offers less structural support for heavy items. The familiar pluckable cubed foam that comes with most cases is polyurethane, and its softness is exactly why it frays and compresses with repeated use.
Polyethylene foam, written PE, is the denser closed-cell foam used for heavier and more demanding loads. Closed-cell means air cannot move freely through the material, which makes the foam rigid, high in impact resistance, and, crucially, water-resistant because it does not absorb moisture. Polyethylene provides firm, shock-resistant support for heavy or high-value equipment and resists moisture in a way polyurethane cannot, which is why it is the choice for heavy lenses, projectors, cinema bodies, and anything that will face humid or wet environments. It is firmer to the touch and less cushioning for very delicate light items, which is why the two foams are often combined rather than chosen exclusively.
Within polyethylene there is a premium tier worth knowing. Cross-linked polyethylene, abbreviated XLPE, and its irradiated variant iXLPE are closed-cell foams regarded as the highest quality for protective inserts. They are prized for durability, resilience, a smooth attractive surface, and a soft touch sometimes described as a blend of rubber and foam, with small consistent cells that give a premium finish. For a case that will be opened and closed daily for years, or one where presentation matters as well as protection, cross-linked polyethylene holds up far better than standard cubed polyurethane.
Density is the other variable, and it is chosen to match the weight of the gear. Denser foam takes more pressure to compress the same amount, so heavier items need higher density to avoid bottoming out, while lighter items are better served by softer, lower-density foam that cushions without transmitting shock. This is why a professional foam layout for a mixed kit often uses several densities: a firm high-density base to carry the weight and hold structure, and softer layers where delicate items sit. Getting density wrong in either direction hurts. Too soft under a heavy lens and the foam compresses flat, offering no protection. Too firm under a light body and the foam transmits shock rather than absorbing it.
There is also a specialised category. Anti-static foam protects sensitive electronics from static discharge, relevant for bare circuit boards and some recording media, and conductive and flame-retardant foams exist for particular industrial and defence needs. For most audio-visual gear these are unnecessary, but they are worth knowing exist when a specific piece of equipment calls for them.
The practical guidance is to match foam to the item. Use soft polyurethane for light, delicate gear where cushioning matters most; use dense closed-cell polyethylene, ideally cross-linked, for heavy items and for anything facing moisture; and combine densities in a single case when the kit is mixed. The stock foam that comes with a case is almost always soft polyurethane, which is fine for a light fixed kit but rarely optimal for a heavy or high-value one. Understanding the difference lets you specify the right insert rather than accepting whatever the case happened to ship with.
Pick and pluck, custom CNC and modular divider systems
Having chosen the foam material, the next decision is how it is cut and configured. There are three main approaches, and they suit very different working patterns.
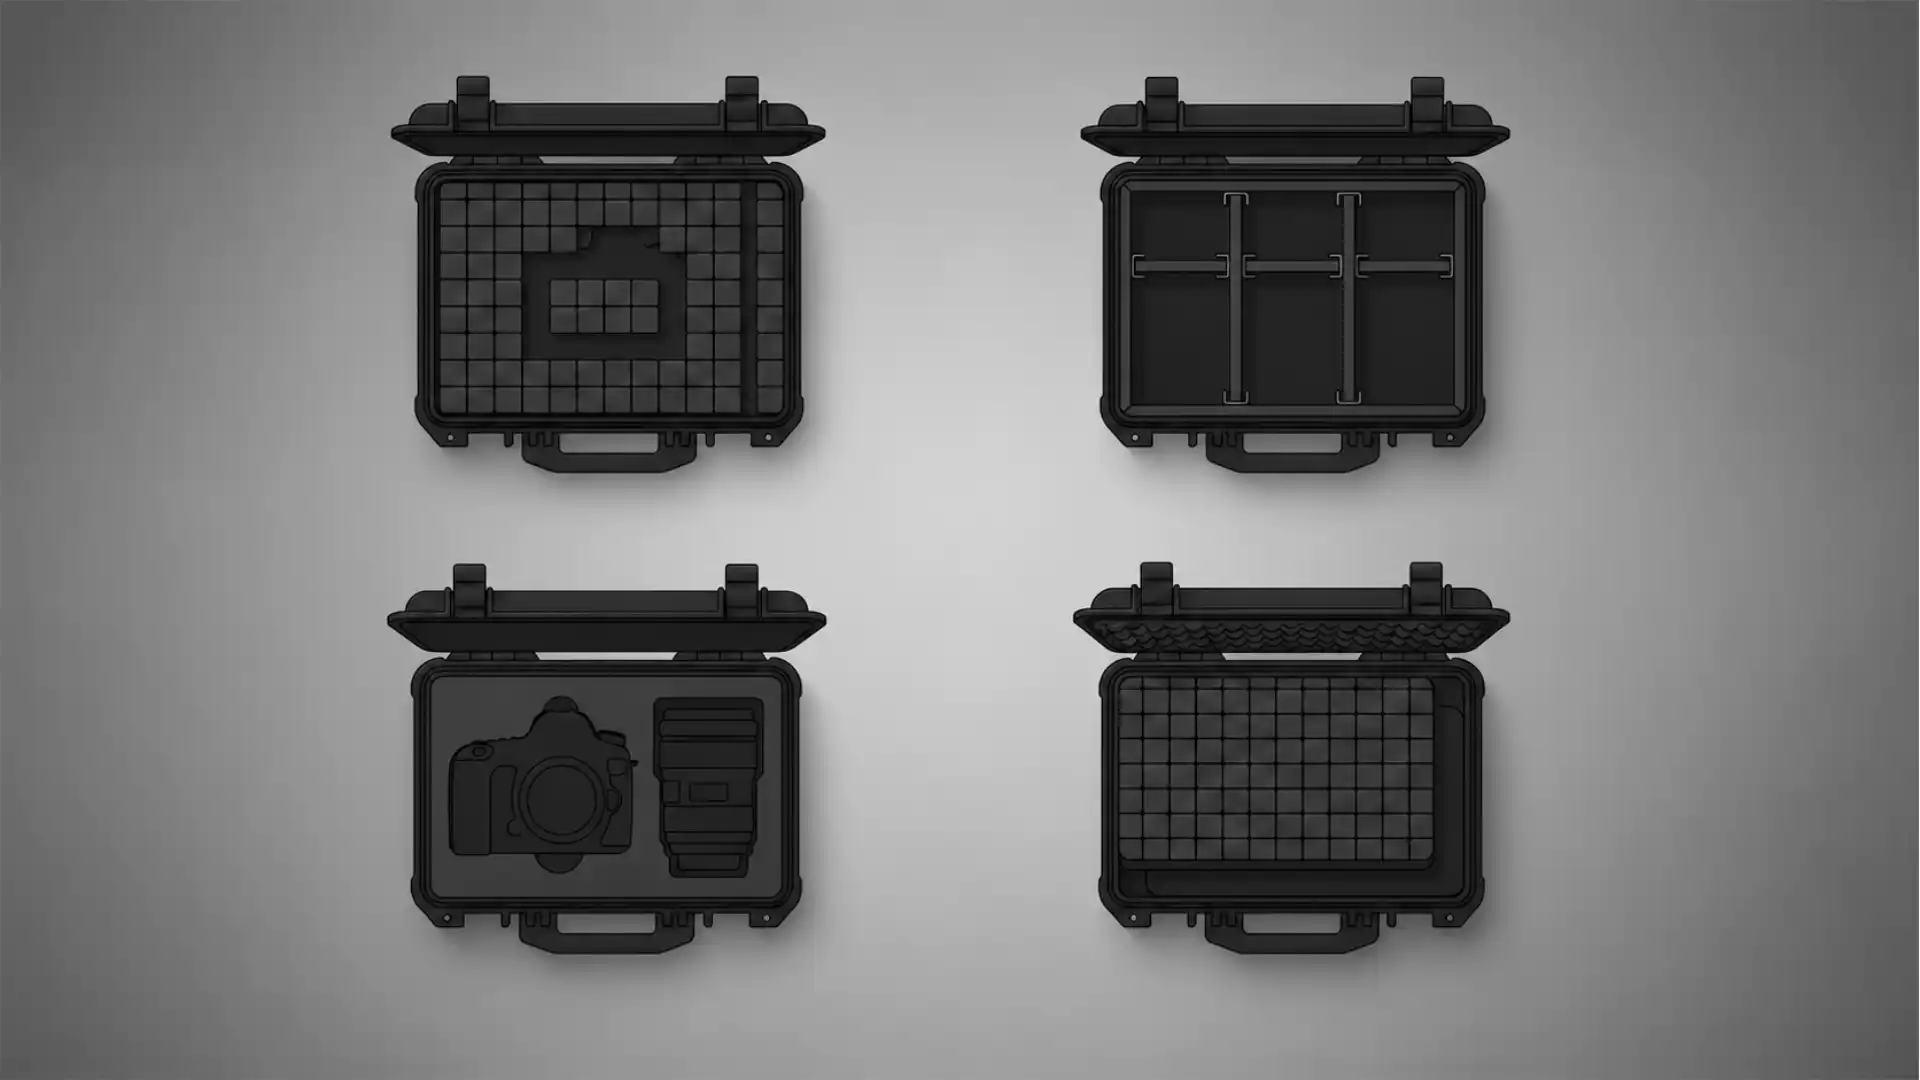
Pick and pluck is the familiar cubed foam that comes with most cases. The foam is pre-scored into small squares, and you remove cubes by hand to create a cavity roughly the shape of your gear. It is the cheapest and most accessible option, requires no tools or ordering, and lets you reconfigure by plucking a new layout, but it produces an imprecise fit with stepped, jagged edges rather than smooth contours. For a starting point, a light kit, or a case whose contents change often, pick and pluck is genuinely useful. Its weaknesses are that the fit is never truly snug, the plucked edges fray and shed over time, and a layout you pluck today is hard to change back if you want a different arrangement tomorrow, because removed cubes do not go back in cleanly.
Custom-cut foam is the premium approach, and for high-value or complex kits it is the right one. Here the foam is cut by machine, either laser-cut for tight tolerances and clean edges on intricate multi-cavity layouts, or CNC-routed for thicker blocks and deeper cavities common in cases for large audio-visual gear. Because the cutting is controlled by a digital template, every case in a run is identical with no hand-cutting variation, and the cavities match the exact dimensions of each item. Custom foam produces a snug, contoured fit that holds each item precisely, absorbs shock properly, and looks professional, at the cost of money and lead time. Specialist foam houses will design a layout from the dimensions and weights of your gear, select the right density, match it to a case, and send a proof for approval before cutting, and they work with all the major case brands. For a kit that stays fairly stable and is worth protecting properly, custom foam is money well spent.
The third approach abandons foam for reconfigurable dividers. Systems such as Nanuk’s TrekPak use rigid panels wrapped in foam and held by pins, which can be cut and rearranged to build compartments of any size and rebuilt whenever the kit changes. Padded fabric dividers with hook-and-loop attachment do the same job more flexibly if less rigidly. The peg-board style GRID systems borrowed from other industries take this furthest, with movable dividers on a pegged base. Divider systems trade the perfect cradle of custom foam for infinite reconfigurability, which is the right trade for anyone whose gear list changes constantly, such as a rental house or a shooter who swaps kits between jobs. The compromise is that a divider holds an item securely from the sides but does not cradle its exact shape or cushion it from below the way contoured foam does, so for the most fragile items foam still wins.
Choosing between them comes down to how often your layout changes and how much the fit matters. A stable, high-value kit rewards custom foam. A constantly changing kit rewards dividers. A light or occasional kit is fine on pick and pluck. Many working operators use more than one approach across their cases: custom foam for the camera case that always holds the same bodies and lenses, dividers for the accessories case whose contents shift job to job. The systems are not rivals so much as tools for different packing problems, and matching the interior to the way you actually repack is what keeps gear both protected and quick to find.
Moisture, fungus and the silica gel most people forget
The threat that ruins more lenses than any drop is invisible and slow. Humidity trapped against glass and electronics, given time and warmth, grows fungus and corrodes contacts, and it does its damage inside cases and bags that look perfectly clean and dry. Understanding it changes how you store and transport gear as much as any case choice.
Lens fungus is the classic failure. Fungal spores are everywhere in the air, and they settle on lens elements as a matter of course. What lets them grow is moisture and stillness: a humid environment, no airflow, and no light, which is precisely the condition inside a closed camera bag left in a warm room after a damp shoot. Once fungus establishes on an internal element, it etches the coating and eventually the glass, and a serious bloom can render a lens worthless or require an expensive strip-down to clean. The gear does not have to get wet for this to happen; it only has to sit in humid air long enough, which is why fungus is common in humid climates and in gear that lives permanently sealed in a bag.
The material of your interior matters here. Closed-cell foams such as polyethylene are naturally water-resistant and do not absorb moisture from the air, which reduces the humid micro-environment around the gear. Open-cell polyurethane foam absorbs moisture and can hold it against the equipment, making a damp case worse. This is a real, if secondary, reason to prefer closed-cell foam for gear that faces humid conditions, beyond its impact properties.
The simplest defence is silica gel desiccant, and it is the thing most people forget until they have already lost a lens. Silica gel packets absorb moisture from the enclosed air, keeping the environment inside a case or bag dry enough to discourage fungal growth and corrosion. For gear transported or stored in humid conditions, dropping fresh silica gel packets into every case and bag is a cheap, reliable habit that prevents an expensive, slow failure. Some foam suppliers will cut a small dedicated cavity for desiccant packets into a custom layout, which keeps them from rattling loose. The one thing to remember is that silica gel saturates over time and stops working when full; the indicating type changes colour when spent, and it can be dried out in a low oven and reused, or simply replaced.
For high-value kits or humid climates, the next step up is a dry cabinet, an electronically controlled storage box that holds gear at a low, stable humidity between jobs. This is base storage rather than transport, but it addresses the same threat, and for a business with a lot of glass it pays for itself against a single prevented fungus repair. Between jobs, the worst thing you can do is seal damp gear in a closed bag and leave it warm; the better habit is to open cases and bags to air out after a damp shoot, let everything reach room temperature and dry before sealing, and keep fresh desiccant in the containers.
None of this is dramatic, and that is exactly why it gets neglected. There is no moment of failure to respond to, only a gradual loss that shows up months later as a hazy lens or an unreliable contact. Building moisture control into your transport and storage routine, through closed-cell foam, silica gel, airing out, and dry storage for high-value glass, is one of the highest-return, lowest-cost habits in protecting a kit.
Camera backpacks built around fast access
Once gear reaches a location, the hard case has done its job and the working carry begins. For most solo shooters and small crews, the working carry is a backpack, and the current generation of camera backpacks has become genuinely good at the difficult balance of protection, comfort, and speed.
The defining feature of a good camera backpack is access, because access is what a hard case cannot offer and what a working shoot demands. The best packs are built around how fast you can reach a body or lens without putting the bag down or unpacking it, and different designs answer this differently. Rear-panel access, where the pack opens against your back, keeps the straps clean of mud and offers security because the opening faces your body, and it suits trail and travel use. Side access, through a zip on the flank, is fastest on city streets and event work because you can swing the bag to one side and reach a body in seconds without fully stopping. Top access adds a quick grab for the item you use most. Many packs combine several, and the right combination depends on whether you shoot on the move in crowds or hike to a spot and work from a base.
The market has clear leaders. Peak Design’s Everyday line built its reputation on clean urban carry with fast dual side access and a distinctive origami divider system, and the brand’s camera cubes let its travel packs convert to camera use. Shimoda’s Explore and Action lines are built for adventure and travel photographers, with adjustable torso lengths, proper hip belts that put weight on the hips rather than the shoulders, and a modular core-unit system that lets you size the camera storage to the job. WANDRD’s PRVKE range is the stylish travel hybrid, with clamshell and quick side access and real weather resistance. Lowepro’s ProTactic is the event and wedding workhorse, prized for getting you to the camera fastest through multiple access points and a modular interior built to be knocked around. Think Tank, Manfrotto, Tenba, Vanguard, and PGYTECH round out a deep field, each with strengths in specific niches.
Fit is where backpacks succeed or fail, and it is the thing spec sheets cannot convey. A pack that carries twenty kilograms of gear needs to put that weight on your hips through a real hip belt, not hang it off your shoulders, or a full day of shooting becomes a day of back pain. Torso adjustment, load-lifter straps that pull the top of the pack in toward your body, and a hip belt that actually bears weight are the features that separate a pack you can wear all day from one that punishes you when loaded. A backpack that pinches when empty will be misery when full, and the only reliable way to know is to load one up and wear it before buying.
Weather resistance is the last consideration, and it is usually partial rather than absolute. Most camera backpacks use water-resistant fabrics and weatherproof zips that shed light rain, and many include a separate rain cover for heavier weather. This is protection against being caught out, not against submersion, and it is the correct level for a bag whose real job is carrying and access rather than surviving as cargo. A backpack is not a hard case and should not be asked to be one. Its job is to get gear from the vehicle to the shot and back, comfortably and fast, which the good ones now do very well.
Rolling cases and the overhead bin problem
For photographers and small crews who fly regularly, the rolling camera case sits in a specific and useful niche: heavier protection than a backpack, but light and compliant enough to keep with you in the cabin rather than surrendering it to the hold. The whole category is organised around one number, the overhead bin, and getting that number right is the difference between a smooth boarding and a gate-checked kit.
The appeal is straightforward. A rolling case carries the weight on its wheels rather than your back, which matters when a kit runs to fifteen or twenty kilograms, and it protects gear better than a soft backpack through a more structured, padded body. Crucially, a well-designed roller is sized to fit airline overhead bins, which keeps your gear in the cabin under your control instead of checked into the hold where it faces the real cargo abuse. For anyone who has watched a checked case disappear down a belt, keeping the camera package in the cabin is worth a great deal, and the roller is the tool that makes it possible for a kit too heavy to carry comfortably on your back.
Think Tank owns much of this category, and its Airport and International lines are the reference. The design fundamentals are simple and few brands nail all of them: a smooth telescoping handle that does not wobble, wheels that roll quietly and true, clean access to the gear inside, and, above all, dimensions that comply with overhead bin size restrictions. The International is named for exactly that, complying with the tighter overhead limits of international as well as domestic flights, which is the harder standard to meet because international carriers generally allow smaller cabin bags than large domestic aircraft. Peak Design’s Roller Pro brings the brand’s design language to the category with a weatherproof shell and four-wheel spinner mobility, and other makers offer roller options, but the fundamentals of a good handle, quiet true wheels, and bin compliance remain the test.
The overhead bin problem is real and getting harder. Cabin size limits vary by airline and by aircraft, and international carriers tend to be stricter than large domestic flights, so a roller that fits an American domestic bin may not fit a European regional jet. A roller is only useful if it fits the specific bins on the flights you actually take, which means checking your carriers’ cabin dimensions before buying rather than trusting a generic carry-on approved label. Some of the best rollers deliberately sit at the smaller end of the range to stay compliant across more airlines, trading a little capacity for the confidence of keeping the bag in the cabin anywhere.
There is a hybrid worth noting: the rolling backpack, which adds wheels and a handle to a bag you can also wear. Think Tank and others make these, and they suit the shooter who rolls through the airport but needs to carry on their back once at a location without pavement. The compromise is that combining both functions makes the bag heavier and neither function as good as a dedicated version, but for a specific travel pattern the flexibility earns its place.
The limits of a roller are worth stating plainly. It protects better than a soft backpack but not as well as a sealed hard case, because its structured padding is not a rigid shell or a watertight seal. It is a cabin-carry tool, and it assumes the gear stays with you; a roller checked into the hold offers far less protection than a proper Pelican-class case would. The roller’s whole value proposition is keeping the kit in the cabin, and it collapses the moment the bag is gate-checked, which is why bin compliance is not a nice-to-have but the entire point. Used correctly, as a cabin bag sized to your actual flights, a rolling camera case is one of the most practical pieces of transport gear a flying photographer can own.
Sling bags and the run-and-gun compromise
Between the full backpack and no bag at all sits the sling, and for a certain kind of fast, light shooting it is the most practical carry there is. The sling trades capacity and back comfort for speed of access, and understanding that trade is the key to knowing when it is the right tool.
A sling is a single-strap bag worn across the body that swings around to the front for access without being taken off. Its defining virtue is that you can reach your camera in a second, from a standing position, without stopping or setting anything down, which is exactly what street, event, and documentary shooters need when the moment will not wait. The bag rides on your back or hip when not in use and rotates to your chest when you need the camera, and the best examples make that motion smooth and one-handed. For a body and a lens or two, plus the small necessities, a sling is faster than any backpack.
The range spans from tiny to surprisingly capable. WANDRD’s Rogue slings come in several sizes up to nine litres, Peak Design’s Everyday sling offers a ten-litre option, and various makers cover the space between a minimal one-camera pouch and a bag that holds a body with two or three lenses. The larger slings blur into backpack territory in capacity while keeping the single-strap quick-access design, which suits a shooter who wants more than a minimal kit but still values speed over the even weight distribution of a two-strap pack.
The compromise is physical and unavoidable. A single strap puts all the weight on one shoulder, which is fine for a light kit over a few hours but becomes uncomfortable and eventually harmful as weight and time increase. A sling is a light-carry tool, and asking it to carry a heavy kit for a full day is asking for a sore shoulder and a bad back, which is why slings top out at capacities well below what a backpack handles comfortably. The honest boundary is roughly a body and a couple of lenses; beyond that, the sling’s speed advantage is outweighed by the discomfort of one-shoulder loading.
Protection in a sling is modest and appropriate to its role. Padded dividers cushion the gear against knocks, and the fabric sheds light rain, but a sling is even less of a protective container than a backpack, because it is smaller, more exposed, and worn in a way that invites the occasional knock against door frames and crowds. It is a bag for carrying and using gear, not for protecting it in transit, and it should never be the thing a high-value kit travels in over any distance.
The right way to think about a sling is as the last stage of a transport chain, the bag you actually work out of once the hard cases have delivered the gear to the location. A documentary shooter might fly with a Pelican case, drive to a location, and then work the streets from a sling holding one body and two lenses while the case sits in the vehicle. In that role, as a fast, light working bag for a minimal kit, the sling is unmatched. Asked to do more, it stops being the right tool, and the operator who overloads a sling because it is convenient learns the limit through their shoulder.
Camera cubes and the modular carry approach
The most flexible answer to carrying gear is not a dedicated camera bag at all, but a padded insert that turns any bag into one. Camera cubes have quietly become the smartest choice for a large share of shooters, because they separate the two jobs a camera bag does and let you optimise each independently.
A camera cube is a padded, divided box that holds your camera gear and drops into a regular backpack, travel bag, or even a duffel. The insert protects and organises the gear; the outer bag handles carrying, comfort, and everything else you travel with, and because the two are separate, you can mix and match. A small cube in a daypack for a light day, a large cube in a travel pack for a full kit, or the cube lifted out entirely when you want the bag for non-camera travel. Peak Design built much of its system around this idea, with cubes sized to its packs, and Vanguard’s inserts and many third-party cubes do the same job in bags you already own.
The advantages compound for anyone who travels. A single good travel backpack plus a cube costs less and does more than a drawer full of dedicated camera bags, because the one bag serves as camera carry, general travel bag, and everyday pack depending on whether the cube is in it. For a shooter who is a photographer some days and a traveller others, this flexibility is genuinely useful, and it is why the insert-plus-bag approach is often the recommendation for people starting out or trying to own fewer bags. You buy protection once, in the cube, and carrying capacity separately, in whatever bag suits the trip.
The modularity also solves the sizing problem that plagues dedicated bags. A fixed camera backpack is sized for one kit; carry less and the empty space is wasted, carry more and it does not fit. A cube system scales with the job: a small cube when you need little gear and space for other things, a large cube when the kit is the priority, all inside the same familiar outer bag. This is why the modular core-unit approach that Shimoda uses, and the cube approach that Peak Design uses, have spread across the market. They let one bag adapt rather than forcing you to own several.
There are limits. A cube inside a general bag rarely offers the fastest access, because reaching the gear usually means opening the outer bag and then the cube, without the dedicated side-access zips a purpose-built camera pack provides. The protection is good but bounded by the cube’s padding and the outer bag’s structure, so a cube in a soft daypack is not a hard case and not even as protective as a structured dedicated camera pack. And a poorly matched cube-and-bag combination can waste space or fit awkwardly, so the pairing matters.
For most audio-visual buyers, the cube approach deserves serious consideration before committing to a dedicated bag, especially if travel is part of the work. The practical recommendation many experienced shooters give is to start with a good travel backpack you would want anyway and add a camera cube, which gets you protected, organised camera carry plus a versatile travel bag for far less than a dedicated pack, and lets you learn what you actually need before spending more. The cube is not the most specialised solution for any single use, but as a flexible foundation for a working kit that travels, it is hard to beat, and it keeps the protective and carrying jobs in their proper, separate lanes.
Audio kits, wireless systems and field recorders in transit
Audio gear travels with a different set of vulnerabilities from cameras, and the transport solutions that protect a camera kit can fail an audio kit in specific ways. Anyone moving wireless systems, field recorders, microphones, and cabling needs to understand what makes audio equipment fragile in transit, because the failure modes are less obvious than a cracked lens.
The first vulnerability is connectors and cabling. Audio kits live and die by their connections, and the delicate points are the connectors, the cable strain reliefs, and the fine antennas on wireless systems. Cables crushed against hard edges, connectors bent under pressure, and antennas snapped off are the classic audio transport failures, and none of them require a dramatic drop. They come from packing gear loosely so cables get pinched, or from stuffing a bag so full that connectors take the load. Audio transport has to protect these points specifically, with routed channels for cables, cushioned cavities that support connectors rather than loading them, and protection for antennas that keeps them from catching and bending.
Wireless microphone systems are the audio gear most worth protecting well, because they are expensive, delicate, and central to a shoot. A wireless kit typically includes transmitters, receivers, antennas, and often a distribution and monitoring setup, and it benefits enormously from a fitted case with a cavity for each component. Custom foam or a fitted bag that holds each transmitter and receiver in place, protects the antennas, and keeps the small parts from migrating and getting lost is the right answer. The case makers who serve broadcast and film build fitted interiors specifically for wireless microphone systems, mixing consoles, and the associated gear, because a loose wireless kit in a general bag is a kit that arrives with a bent antenna or an intermittent connection.
Field recorders and mixers are the hub of a sound kit and deserve the protection that reflects it. A production mixer-recorder is a dense, expensive, connector-heavy device that a sound recordist depends on completely, and it should travel in a fitted case or a well-padded bag designed for it, not loose in a general bag. Many recordists build a bag setup for working use, an over-the-shoulder or harness-mounted bag that holds the recorder, wireless receivers, and cabling in a working configuration, but that working bag is for use on set, not for the abuse of transport, and the kit often travels in a separate hard case and moves into the working bag on location.
The moisture and dust threats apply to audio as much as to cameras, and arguably more in the outdoor conditions audio work often faces. Sound recordists work at outdoor festivals, on coastal locations, and in dusty venues, and moisture and debris shorten the life of connectors and delicate components. For audio gear used outdoors, dust and moisture protection is not optional, because the connectors and contacts that audio depends on are exactly what particulate and humidity attack. Sealed cases with good gaskets, closed-cell foam, and silica gel matter for audio the way they do for glass.
Microphones themselves, from delicate condensers to rugged dynamics, span a broad spectrum of fragility, and the most sensitive, such as large-diaphragm condensers and shotgun mics with fine capsules, need cushioned, fitted protection and, for some, humidity control, because a dropped or damp condenser can fail or drift out of specification. Batteries for wireless systems and recorders bring their own transport rules, covered later, and the small, easily lost accessories that a sound kit accumulates, adapters, windshields, clips, and spare parts, benefit from organised, compartmented storage so a shoot is not derailed by a missing thirty-cent part. Audio transport rewards fitted, organised, sealed protection more than almost any other category, precisely because its failures are small, quiet, and expensive to diagnose.
Lighting, stands and the awkward loads no bag fits
Lighting is the part of an audio-visual kit that defeats ordinary bags, and it is where transport planning most often breaks down. Lights, stands, modifiers, and their power gear are heavy, oddly shaped, and awkward to protect, and the solutions look different from the neat foam-lined cases that hold cameras.
The core problem is shape and length. A light stand is long and thin, a softbox folds to an awkward flat package, an LED panel is flat and fragile at the edges, and a large fixture is heavy and bulky. No single bag fits all of it, and the mistake is trying to force lighting into camera-style cases rather than accepting that lighting needs its own transport logic. The gear divides roughly into fixtures, which are fragile and expensive and need real protection, and support gear like stands and sandbags, which are tough but heavy and awkward and mostly need containment rather than cushioning.
Fixtures deserve protection proportional to their cost and fragility. Modern LED lighting, from compact panels to powerful point-source fixtures, contains sensitive electronics, diodes, and sometimes glass, and a good fixture costs as much as a camera body. For fixtures that travel or ship, a fitted hard case with custom foam is the right answer, the same logic as cameras, and the serious lighting brands and case makers offer purpose-built cases for popular fixtures. A bare fixture in a soft bag is fine for a short careful move in a vehicle but not for anything rougher, and an expensive light is exactly the kind of gear that justifies a proper case.
Stands, on the other hand, are the classic awkward load. They are long, they have protruding legs and knobs that catch and tear fabric, and they are heavy enough that carrying several is a real burden. The standard solution is a dedicated stand bag, a long padded or unpadded tube with a shoulder strap or wheels that contains a set of stands together, keeps their protruding parts from catching on everything, and makes them carriable as one unit. The protection is modest because stands are tough, but the containment and carriability are the point. A stand bag is about managing an awkward heavy load, not cushioning fragile gear, which is a different job from a camera case and calls for a different kind of bag.
Modifiers, softboxes, umbrellas, and grids fold to flat or tubular shapes that fit dedicated modifier bags, which protect the fabric and framing from tearing and crushing. These are light but bulky, and the transport challenge is volume rather than weight, so the bags are large and soft rather than rigid. Power gear, batteries, cables, and control units for lighting benefits from the same organised, cushioned, sealed storage as any electronics, and the batteries bring the transport rules covered later.
For a growing production business, lighting is often the point where fabricated flight cases start to make sense. A lighting package that travels to venues repeatedly, with fixtures, stands, modifiers, and control gear, is exactly the kind of kit that ATA-300 cases were built for, and a custom rolling flight case that holds a lighting package as a single wheeled unit transforms the logistics of moving it. The alternative, a scatter of separate bags loaded and unloaded by hand each time, is slower, less protective, and more likely to leave something behind. Lighting transport is where the discipline of building a system rather than buying individual bags pays off most, because the gear is heavy, awkward, and varied enough that a piecemeal approach fails. The operator who plans lighting transport as a system, with the right containment for stands, real protection for fixtures, and a way to move it all as coherent units, saves time and gear on every job.
Gimbals, drones and the gear that hates vibration
Two categories of modern audio-visual gear are unusually sensitive to the specific threat of vibration, and they need transport that addresses it directly. Gimbals and drones both contain precision assemblies that a rough journey can knock out of true, and protecting them is less about surviving a drop than about isolating them from the constant shaking of transport.
Gimbals are precision stabilisers, and their motors, sensors, and balance depend on fine calibration. A gimbal that has been shaken hard in transit can arrive out of calibration, with motors that hum, drift, or fail to hold a level horizon, and while recalibration often fixes it, a hard enough knock can damage the motors or the delicate mechanism permanently. The transport priority for a gimbal is holding it rigidly so it cannot shift and cushioning it against both impact and sustained vibration, which points to a fitted foam case rather than a loose bag. Many gimbals ship with a fitted case for exactly this reason, and using it rather than tossing the gimbal in a general bag is the single most important habit for keeping a stabiliser working. Locking the gimbal’s axes before transport, where the design allows, protects the motors from being forced during handling and should be standard practice.
Drones combine several fragile systems in one airframe: the gimbal-stabilised camera, the delicate arms and propellers, the sensors, and the batteries that bring their own rules. A drone is expensive, fragile, and awkward, and it rewards a fitted case that holds the airframe, the controller, the propellers, and the batteries each in a dedicated place. The drone makers and case builders offer fitted cases for popular models, and custom foam for a drone kit protects the airframe from the twisting and impact that cracks arms and the vibration that loosens connections. A drone in a fitted case with proper cavities for each part travels safely; a drone loose in a bag arrives with bent props at best and a cracked airframe at worst.
The batteries are a transport problem in their own right for both categories, and drones especially. Drone batteries are often large-capacity lithium packs that fall under the airline rules covered in the next sections, and they cannot simply be packed and forgotten. They must travel in carry-on with terminals protected, and the larger packs may need airline approval, which turns a drone kit’s transport into a planning exercise rather than a packing one. This is covered in detail shortly, but it is worth flagging here because drone operators are among the most affected by the current battery rules, given the size and number of packs a working drone kit carries.
Vibration protection deserves emphasis because it is the threat these categories share and the one most often underestimated. A gimbal or drone can survive a journey with no visible damage and still arrive subtly degraded, with a gimbal slightly out of calibration or a drone sensor knocked marginally off, and the operator blames the gear rather than the transport. Fitted cases that hold these items rigidly and cushion them against vibration are not overkill; they are the correct response to gear whose precision is exactly what transport threatens. For anyone whose work depends on stabilised or aerial footage, treating the gimbal and drone as the most transport-sensitive items in the kit, deserving the best fitted protection you own, is the approach that keeps them working shoot after shoot.
The 2026 lithium battery rules changed how crews pack
Transport planning for audio-visual gear used to be mostly about protection. As of 2026, it is also about compliance, because the rules for carrying the lithium batteries that power almost every modern device have tightened across the world’s airlines, and getting them wrong can cost you your gear at the gate or ground it entirely.
The framework itself is not new. The long-standing rule, in place for years, is that spare lithium batteries and power banks must travel in the cabin, never in checked baggage, and must be removed from any bag that gets gate-checked or planeside-checked. The reasoning is safety: checked baggage sits in a hold where a battery fault could start a fire with no one to intervene, while in the cabin a problem can be spotted and dealt with by trained crew. Spare lithium batteries are never permitted in checked luggage, under any circumstances, and this has been true for a long time; what changed in 2026 is a layer of new restrictions on top of it, aimed mainly at power banks.
The 2026 changes are driven by coordinated international action. ICAO specifications that took effect in late March 2026 were adopted across member states, and together with IATA operator guidance they limit passengers to two power banks, prohibit recharging a power bank onboard, and push carriers toward stricter rules on using a power bank to charge devices in flight, a restriction some carriers extend to a full in-flight ban. The IATA Dangerous Goods Regulations reached their 67th edition for 2026, with an addendum that took effect at the start of the year introducing updates affecting lithium batteries, tracking devices, documentation, and acceptance procedures. Individual airlines have layered their own rules on top: American Airlines, for instance, from the start of May 2026 limited each passenger to two power banks under 100 watt-hours, required them to stay accessible rather than in overhead bins, and barred charging them from the aircraft’s power.
For working crews, the reassuring news is that the core rules for camera and cine batteries did not change. The power bank crackdown targets portable chargers and suitcases with built-in charging ports, not the spare lithium-ion batteries used to power cameras. Spare lithium-ion batteries below 100 watt-hours remain permitted in carry-on in reasonable personal-use quantities, and a typical camera or cine battery loadout under 100 watt-hours per battery is still allowed, which covers the great majority of camera batteries and most V-mount, gold-mount, and B-mount cine bricks under that threshold. The practical impact on filmmakers is far smaller than the headlines suggest, provided the crew understands which rules apply to which gear.
The watt-hour thresholds are the numbers that matter, and they define three tiers. Batteries under 100 watt-hours travel freely in carry-on in personal quantities. Batteries between 100 and 160 watt-hours are allowed but usually limited to two per passenger and may require airline approval. Batteries over 160 watt-hours are generally not permitted as passenger baggage at all and must ship as cargo under dangerous-goods rules. This is why knowing the watt-hour rating of every battery in your kit is now part of transport planning, because a large cine battery or a big drone pack can cross the 100 or 160 watt-hour lines and change what you are allowed to carry.
Protecting spare batteries in transit is both a safety rule and a physical one. Spare batteries must be individually protected against short circuits, by keeping them in original packaging, taping over exposed terminals, or placing each in a separate pouch or plastic bag, and carried in carry-on only. A loose battery rattling against metal in a bag is a short-circuit and fire risk, which is why the rules are specific about terminal protection. A dedicated battery case or pouch that isolates each battery and protects the terminals is now necessary transport gear, not an optional accessory, and many case makers offer fitted battery cases for exactly this purpose. The habit of taping terminals and packing batteries in individual protected slots is both a compliance requirement and genuinely safer.
The gate-check trap catches crews who plan for the cabin and then get bumped. If your carry-on bag is taken at the gate to go in the hold because the cabin is full, you must remove all lithium batteries and devices first, because those items cannot legally travel in the hold. A crew that has packed batteries deep in a bag expecting it to stay in the cabin can find themselves unpacking on the jet bridge, or worse, surrendering batteries they cannot carry another way. The defence is to keep batteries in an accessible, clearly organised part of your carry-on that you can pull out in seconds if the bag is gate-checked, and to always assume a cabin bag might end up in the hold. The rules reward the crew that plans battery transport deliberately and punishes the one that treats it as an afterthought.
Power banks, watt-hours and the carry-on maths
The watt-hour has become the unit that governs what a crew can and cannot fly with, and turning the rules into a packing plan means doing a little arithmetic before you reach the airport. The maths is simple, but skipping it is how gear ends up confiscated.
Watt-hours measure a battery’s energy capacity, and they are what airline rules are written around rather than the milliamp-hours often printed on consumer batteries. If a battery lists only milliamp-hours and voltage, the watt-hour figure is the milliamp-hours divided by a thousand, multiplied by the voltage. A battery marked 10,000 mAh at 3.7 volts is 37 watt-hours, comfortably under the 100 watt-hour line; a large power bank marked 26,800 mAh at 3.7 volts is about 99 watt-hours, right at the limit. Most camera batteries and phone-sized power banks sit well under 100 watt-hours. The gear that pushes against the thresholds is the large stuff: cine batteries, big drone packs, and high-capacity power stations, which is exactly the gear a serious audio-visual crew carries.
The rules for power banks specifically tightened in 2026, and they are stricter than the rules for camera batteries. Power banks are treated as spare batteries, so they travel in carry-on only, and the new limits cap most passengers at two power banks, require them to stay accessible rather than stowed in overhead bins, and prohibit charging them onboard or, on some carriers, using them to charge devices in flight at all. A crew that relies on power banks to keep devices charged on long shoots needs to plan around a two-unit limit and the assumption that they cannot recharge those banks in the air, which changes how you provision power for a travel day.
The reference table below summarises the tiers that govern carriage, and it is worth committing to memory because it drives every battery packing decision.
Lithium battery carriage tiers for air travel in 2026
| Battery rating | Carry-on | Checked | Notes |
|---|---|---|---|
| Under 100 Wh | Yes, personal quantities | No spare batteries | Covers most camera and cine batteries; terminals must be protected |
| 100 to 160 Wh | Yes, usually max 2 | No | Airline approval commonly required; covers large cine and drone packs |
| Over 160 Wh | Not as passenger baggage | No | Must ship as cargo under dangerous-goods rules |
| Power banks | Carry-on only, typically max 2 | Never | No onboard recharging; must stay accessible, not in overhead bins |
These tiers are the baseline set by the international bodies, and individual airlines can and do impose stricter limits, so the final authority is always the specific carrier for your flight. Checking your airline’s dangerous-goods or restricted-items page before travel is the step that prevents an expensive surprise at the gate.
The planning consequence for a working crew is real. A shoot that needs a lot of power, many camera batteries, drone packs, and power banks to keep everything running, has to be planned against these limits rather than simply packed. The crew counts watt-hours, checks which batteries cross the 100 and 160 watt-hour lines, confirms the airline’s specific limits, secures approval for the 100-to-160 watt-hour packs where needed, and arranges cargo shipping or local rental for anything over 160 watt-hours. For large productions, the answer is often to ship the heavy power gear as cargo under proper dangerous-goods handling, or to rent batteries at the destination rather than fly them, which sidesteps the passenger limits entirely. The days of throwing every battery in a bag and heading to the airport are over for anyone carrying serious power, and the crew that does the watt-hour maths in advance is the one whose shoot is not derailed by a battery left at security.
Checked versus carry-on and the decision that protects the shoot
Every flying crew faces the same fork for every piece of gear: does it go in the cabin with you, or into the hold as checked baggage? The decision is not just about convenience, and getting it right is one of the highest-stakes transport choices in audio-visual work, because the hold is a fundamentally more hostile place than the cabin.
The case for carry-on is control and gentleness. Gear in the cabin stays with you, is handled by no one but you, faces no rough loading, and cannot be lost by the airline. The cabin is pressurised and temperature-controlled, and the physical treatment is mild. For the most expensive and irreplaceable gear, camera bodies, lenses, and anything you cannot shoot without, the cabin is the right place, full stop, and the whole point of a bin-compliant rolling case or a well-organised backpack is to keep that gear with you. Batteries have no choice: they must be in the cabin. The core kit, the gear a shoot cannot proceed without, belongs in carry-on wherever it physically can.
The case against relying on carry-on is capacity and weight. Cabin baggage is limited in both size and weight, often to a single bag of seven to ten kilograms on international carriers, which a camera kit can exceed before you have packed anything else. You physically cannot carry a full production kit into the cabin, so some gear has to be checked, and the decision becomes which gear can tolerate the hold. Checked baggage faces real abuse: rough handling, being thrown and stacked, an unpressurised or differently pressurised hold, temperature extremes, and the genuine possibility of being lost or delayed, which is why gear that goes into the hold needs the sealed, impact-rated, pressure-valved hard case that the earlier sections described.
The rule of thumb that experienced crews follow is a triage. The irreplaceable and the fragile, camera bodies, lenses, the primary recorder, go in the cabin in a bin-compliant bag. Batteries go in the cabin because they must. The tough, heavy, or bulky gear that can survive the hold in a proper case, stands, sandbags, rugged support gear, and duplicable items, gets checked in Pelican-class cases built for exactly that abuse. And anything you truly cannot afford to lose or damage never goes in the hold if there is any way to keep it with you. The logic is to match the transport environment to the gear’s value and fragility, keeping the crown jewels close and consigning to the hold only what can genuinely take it.
There is a psychological trap worth naming: the temptation to check a high-value item in a good case because carrying it is inconvenient. A great hard case genuinely protects gear in the hold, but it does not eliminate the risk of the bag being lost or delayed, and a lost case full of gear grounds a shoot as surely as a broken one. A hard case protects against damage in the hold, but only carry-on protects against the airline losing your gear entirely, and for a time-critical shoot the loss risk can matter more than the damage risk. This is why the most expensive and shoot-critical gear stays in the cabin even when it would fit in a checked case, and why crews on important jobs sometimes buy a seat for a case or ship gear ahead by a tracked freight service rather than trust it to the hold.
The decision compounds across a kit, and planning it deliberately is part of professional transport. Before a flight, a crew sorts the gear into cabin-critical, hold-acceptable, and ship-separately, checks that the cabin-critical fits within the airline’s cabin limits, and confirms that the hold-acceptable is in cases genuinely rated for the hold. Done well, this triage means the shoot can proceed even if a checked case is delayed, because the irreplaceable gear is in the cabin. Done carelessly, it means a single lost or crushed checked bag can take out the whole shoot. The checked-versus-carry-on decision is where transport planning becomes risk management, and treating it that way is what separates a crew that flies reliably from one that gambles every trip.
Airline weight limits and the number that catches photographers out
The constraint that surprises photographers most is not size but weight, and specifically the cabin weight limit, which a camera kit can blow past with astonishing ease. The number that catches people out is small, it is enforced unpredictably, and building a travel kit without knowing it is how a carefully packed bag gets turned away at the gate.
The problem is density. Camera gear is heavy for its volume, far heavier than the clothes and soft goods that cabin limits were designed around. A couple of camera bodies, two or three fast lenses, batteries, and a charger can push past a seven-kilogram cabin limit before you have packed a single other thing, and unlike a bulky sweater you cannot compress a lens or stuff it into a coat pocket to hide the weight. The gear that a working shoot needs is exactly the gear that is dense and heavy, so a photographer’s cabin bag hits the weight limit while still looking half empty, which is precisely the trap.
The limits themselves are mostly not new, but they are increasingly enforced. International carriers have capped cabin baggage at roughly seven to ten kilograms for years, and while enforcement used to be lax, it has tightened as airlines police cabin baggage more aggressively. A bag that sailed through unweighed for years can suddenly be weighed and rejected, and the photographer who built their entire travel strategy on never being checked is the one caught out. The weight limit has always been there; what changed is the likelihood of it being enforced, which means planning around the stated limit rather than around the hope of not being checked is now the only safe approach.
The tactics working photographers use to manage weight are worth knowing because they are legitimate and they work. Wearing heavy items rather than packing them, a jacket with large pockets holding lenses and bodies, moves weight off the bag and onto your body, where it is not weighed. Distributing weight between a carry-on and a personal item, where the airline allows both, spreads the load across two allowances. Choosing lighter gear where the work permits, and lighter cases such as the Pelican Air line that cut weight while keeping protection, reduces the baseline. And knowing the exact limit for your specific flight, because it varies by airline and route, lets you build the bag to the number rather than guessing.
The deeper lesson is that weight has to be designed into a travel kit from the start, not discovered at the gate. The photographers who fly reliably are not the ones with the lightest gear; they are the ones who know the number and the rules for their specific flight and build the bag around the rule rather than hoping it will not be enforced. This means treating the cabin weight limit as a hard design constraint, the same way you treat the bin dimensions for a rolling case, and making the packing decisions, what goes in the cabin, what gets worn, what gets checked, against that number. A kit planned this way is boring at the gate, which is exactly what you want. A kit planned on the assumption of leniency is a kit that eventually meets a strict agent on the worst possible day.
For heavy kits that genuinely cannot fit the cabin limits, the honest answer is often to stop fighting the cabin and use other channels: proper checked cases for hold-tolerant gear, cargo shipping for the heavy items, or local rental at the destination. Trying to force a full production kit into a cabin allowance is a losing game, and the crews that accept this and plan multi-channel transport, some in the cabin, some checked, some shipped, some rented, are the ones who arrive with working gear and no drama.
Crossing borders with an ATA Carnet
For crews that shoot internationally, transport involves a challenge that no case solves: customs. Carrying tens of thousands of euros of professional gear across a border can trigger import duties, taxes, and the risk of your equipment being held, and the tool that manages this is a customs document called the ATA Carnet, which is standard equipment for the film, television, and media industries.
The problem the Carnet solves is temporary import. When you bring professional gear into a foreign country for a shoot and then take it home, that gear is not being sold or left behind, but customs authorities do not know that, and in principle they can demand import duty and tax as if you were importing goods permanently. The ATA Carnet is an internationally accepted customs document that lets you temporarily import professional equipment into member countries without paying import duties or taxes, on the guarantee that you will take it back out, and it is often described as a passport for goods. It covers cameras, lenses, tripods, lighting, drones, monitors, hard drives, computers, batteries, and the full range of production gear.
The mechanics are worth understanding because the industry relies on them heavily. A Carnet is valid for up to one year and can cover multiple trips into multiple countries, across a large network of member countries and territories, which as of recent counts exceeds eighty. It is jointly administered internationally by the World Customs Organization and the International Chamber of Commerce, and in each country it is issued through a national chamber of commerce or authorised body. It works by listing your equipment in detail, so it also serves as a registration of your gear that proves it originated in your home country, sparing you additional customs paperwork on return. For a production crossing borders, the Carnet turns a potentially fraught customs process into a stamped-document formality.
The critical operational detail is the stamping. A Carnet only works if it is stamped correctly at every border: stamped out by customs when you leave your home country, stamped in by foreign customs when you arrive, stamped out again when you leave the shoot country, and stamped in on your return. Missing a stamp can void the guarantee and expose you to the very duties the Carnet was meant to avoid, and getting every stamp is the traveller’s responsibility, not the airline’s or the customs officer’s. Crews that use Carnets regularly treat knowing where the Carnet is and getting every stamp as a discipline, because a Carnet with a missing stamp is worse than no Carnet at all, since it implies gear was left in a country and can trigger a claim for duty.
There are limits and alternatives. A Carnet requires taking the same listed equipment into each country, so you cannot swap gear in and out mid-trip, which matters if your kit changes between legs of a shoot. There is a cost, both a fee and a security deposit or guarantee against the potential duties, which for a small kit on a short trip may not be worth it. For short shoots with minimal gear under a modest total value, professional visitor allowances or simply declaring gear as accompanied baggage often suffice, and for larger productions, temporary importation through a customs broker or renting equipment locally are common alternatives. The Carnet is the right tool for substantial gear crossing borders repeatedly, but for a small kit on a quick trip the cost and complexity may exceed the benefit, and weighing the Carnet fees and deposit against local rental or a broker is part of planning an international shoot.
For an audio-visual business expanding into international work, the Carnet is worth understanding before it is needed, because it is the difference between gear crossing a border smoothly and gear being held at customs while a shoot waits. The regional specifics vary, and within trading blocs such as the European Union, movement of gear between member states does not require a Carnet at all, which matters for crews working across European borders. Knowing when a Carnet is required, when a simpler route suffices, and when local rental beats carrying gear at all is part of the transport planning that serious international work demands, and it sits alongside the physical protection as a distinct discipline that the cases and bags cannot address.
Insurance, inventory and proving what you own
Physical protection reduces the chance of loss, but it never eliminates it, and the financial side of transport, insurance and inventory, is what determines whether a loss is a setback or a catastrophe. This is the least glamorous part of protecting a kit and the one most likely to be neglected until the day it is needed.
Equipment insurance for audio-visual gear is a specialised product, and the key detail is coverage in transit and away from base. A general contents policy may cover gear sitting in a studio but exclude it the moment it leaves, or cover it in a vehicle but not checked as airline baggage, or cover theft but not accidental damage. The coverage that matters for a working kit is all-risks cover that follows the gear wherever it goes, including in transit, checked as baggage, and on location worldwide, and reading the exclusions is as important as reading the cover, because the gap between what you assume is covered and what actually is tends to reveal itself at the worst moment. For gear flown internationally, confirming that the policy covers airline transit and the specific countries you work in is critical, because many policies have territorial limits.
The inventory is the foundation that makes insurance work and that most operators do badly. A claim requires proving what you owned, its value, and often its condition, and a shoebox of receipts or a vague memory is not enough. A proper equipment inventory, listing every item with its serial number, purchase date, value, and a photograph, is the document that turns a loss into a paid claim rather than a dispute, and it is also exactly the information an ATA Carnet requires, so maintaining it serves double duty. The inventory should live somewhere separate from the gear, in the cloud or on a device you carry, so that losing the gear does not also lose the proof of what you lost.
Serial numbers deserve particular attention because they are what links a recovered item to you and what an insurer and the police need. Recording the serial number of every body, lens, and major accessory, and keeping that list current as gear comes and goes, is a small habit with a large payoff if gear is stolen and later recovered or offered for sale. Some operators photograph the serial number alongside the item, which makes the record unambiguous. For a rental house or a business with a lot of gear, an inventory management system that tracks each item’s location, condition, and history is a working tool as much as an insurance document.
Proof of condition matters as much as proof of ownership for damage claims. A photograph of gear before a trip, showing it undamaged, supports a claim that damage occurred in transit, and for high-value items a documented service history establishes that the gear was working before the loss. The time to document your gear is before anything happens to it, because after a loss the documentation you wish you had is exactly the documentation you cannot create. This is the same logic as the physical protection: the work happens before the crisis, and the operator who has photographed, serialised, and valued their kit in advance is the one whose claim is straightforward.
The relationship between insurance and physical protection runs both ways. Good cases and careful handling reduce claims, which keeps premiums down and keeps you insurable, and some insurers ask about how gear is transported and protected when setting terms. Treating physical protection and insurance as one system, where the cases prevent most losses and the insurance covers the ones that get through, is the complete answer. Relying on either alone leaves a gap: cases without insurance leave you exposed to theft and total loss, and insurance without cases leaves you constantly claiming, which is expensive, slow, and eventually uninsurable. The professional position is both, backed by an inventory that makes the insurance actually pay when you need it.
Weight, mobility and the tradeoff no case escapes
Every transport decision runs into the same unavoidable tension, and no case, bag, or system escapes it: the more you protect gear, the heavier and less mobile it becomes, and the more mobile you make it, the less it is protected. Understanding this tradeoff clearly is what turns transport from a series of impulse purchases into a coherent set of choices.
The extremes make the tension obvious. A fabricated ATA flight case offers the best protection available, surviving a hundred round trips of freight abuse, and it is so heavy and bulky that you would never carry it any distance by hand. A minimal sling offers the fastest, lightest carry and almost no protection against anything beyond a knock. Between these poles sits every other option, each buying protection with weight or buying mobility with vulnerability, and there is no product that gives maximum protection and maximum mobility at once, because the two are physically opposed. Rigid shells and thick foam weigh; light, accessible carry cannot armour.
This is why the two-stage model recurs throughout this article, because it is the only real escape from the tradeoff, and it escapes it not by beating the tension but by separating the jobs in time. Heavy, protective transport for the journey, when protection matters and mobility does not because the gear is in a vehicle or hold. Light, mobile carry for the shoot, when mobility matters and heavy protection does not because you are handling the gear yourself with care. You cannot have protection and mobility in one bag, but you can have both in one system by using different tools at different stages, which is the insight that resolves the apparent impossibility of the requirement to both protect gear heavily and move it quickly.
Weight also compounds in ways that are easy to underestimate. Each protective case adds its own weight on top of the gear, so a kit in heavy cases can weigh far more than the gear alone, and that total is what you actually lift, carry, load, and pay airline fees on. The Pelican Air line and other lightweight cases exist precisely because case weight became the binding constraint for flying crews, and shaving kilograms off the cases can be the difference between fitting an airline allowance and not. For a crew that moves gear constantly, case weight is a recurring cost paid in physical effort, airline fees, and fatigue, and it is worth optimising rather than accepting.
Mobility has its own hidden costs when it is prioritised too far. A kit optimised purely for light, fast carry, minimal bags and no hard cases, is a kit that cannot be safely checked, shipped, or left in a hostile environment, which constrains how you can work and travel. The shooter who owns only soft bags is fine until a job requires flying with gear in the hold or shipping a kit ahead, at which point the lack of a proper case forces either buying one urgently or taking a risk. Over-optimising for mobility leaves you unable to handle the situations that demand real protection, just as over-optimising for protection leaves you unable to move quickly, and both extremes are traps.
The resolution is to accept the tradeoff and plan for both ends deliberately. A complete transport kit includes protective cases for the journey and mobile bags for the shoot, sized and chosen so that the system as a whole covers the range from freight abuse to fast street work. The mistake is trying to make one purchase do everything, which produces a compromise that does neither job well: a bag too heavy to carry comfortably and too soft to check safely. The operator who understands that weight and mobility are opposed, and who builds a system that puts the right tool at each stage, gets both protection and mobility across the whole journey without asking any single item to be what it cannot be.
Building a transport system instead of buying one case
The through-line of everything above is that protecting a working kit is a system design problem, not a shopping problem. The operators who transport gear reliably do not own the best single case; they own a coherent set of tools that covers every stage of how their gear actually moves, and they built it deliberately rather than accumulating it by impulse.
The starting point is mapping how your gear actually travels, because the system has to match your real movement pattern, not a generic one. A studio photographer who drives to nearby jobs needs a completely different system from a documentary team that flies into remote locations, and buying the wrong system for your pattern is how people end up with expensive gear they do not use. Map the stages: base storage, the journey to location, and the working carry on site. For each stage, identify the threats, the impact and vibration of the journey, the humidity of storage, the speed demands of the shoot, and choose the tool that answers those specific threats. The system falls out of the map.
The base layer is protective transport for the journey, sized to how you travel. For local vehicle work, solid foam-lined cases that survive being loaded and unloaded are enough, and full military ratings are overkill. For flying, the priority shifts to bin-compliant rollers for cabin-critical gear and genuine IP67, MIL-STD-810 hard cases for anything checked. For a business moving lighting and multiple kits to venues, fabricated flight cases enter the picture. The protective layer should be sized to the worst journey your gear regularly faces, not the average one, because it is the worst case, the rough flight, the long shipment, the exposed location, that damages gear, and a system built for the average fails at the extreme.
The working layer is mobile carry for the shoot, chosen for how you actually work on site. Event and wedding shooters need the fastest access, which points to sling and top-access backpack designs. Adventure and travel shooters need comfort over long carries, which points to backpacks with real hip belts. Studio shooters need little mobile carry at all. The camera cube approach deserves serious consideration here because it lets one outer bag serve multiple roles, which reduces the number of bags you own and maintain. The working layer connects to the protective layer at the vehicle or base camp, where gear moves from the hard case into the working bag.
The connective tissue is the small stuff that makes the system work: battery cases that isolate and protect terminals for both safety and compliance, desiccant in every container, an inventory that supports insurance and Carnets, and a habit of packing the same way every time so nothing gets lost. A transport system is only as reliable as its least-considered component, and the battery case, the silica gel, and the inventory are the components most often neglected, which is exactly why they fail. Building these in from the start, rather than adding them after a loss, is what makes the system dependable rather than merely impressive.
The economic logic favours the system over the single expensive case. A thousand euros spread across a solid checked case, a bin-compliant roller, a good working backpack or cube, battery protection, and desiccant protects gear across every stage of every journey. A thousand euros spent on one magnificent case protects gear beautifully during one stage and leaves the others exposed. The reliable transport setup is a distributed system matched to your movement pattern, not a single hero product, and the operators who understand this spend their transport budget on coverage across stages rather than on the most impressive case they can afford. Built well, the system disappears into the background, which is the highest compliment transport gear can earn: gear that arrives ready to work, every time, without the operator having to think about how it got there.
Buying decisions for solo shooters, small crews and rental houses
The abstract principles become concrete only when applied to a real operation, and the right transport system looks genuinely different depending on the scale and pattern of the work. Three broad profiles cover most audio-visual operations, and mapping the principles onto each gives a practical starting point rather than a generic list.
The solo shooter, a photographer or videographer working alone with a compact kit, is best served by a light, flexible system built around mobility with protection available when needed. For a solo shooter, the smart core is a good travel backpack with a camera cube, which serves as both camera carry and general travel bag, plus one solid hard case for the times gear must be checked or shipped. This covers the everyday working carry cheaply and flexibly through the cube-and-bag combination, and adds real protection for the occasional flight or shipment through the single hard case. A battery case, desiccant, and a basic inventory complete it. The solo shooter’s constraint is usually budget and the desire to own fewer things, and the cube approach answers both by making one bag do several jobs. The mistake to avoid is buying a heavy dedicated system sized for a crew when a light flexible one fits the actual work.
The small crew, two to four people running multiple cameras, audio, and some lighting, needs a more structured system because the gear volume and value have crossed a threshold. Here the case-per-function approach makes sense: a case for camera bodies and lenses, a case or fitted bag for audio, a case for lighting fixtures, and containment for stands and support gear. A small crew benefits from standardising on one or two case brands and sizes so cases stack, fit vehicles predictably, and share accessories, which turns loading and transport into a repeatable routine rather than an improvisation each time. Bin-compliant rollers for the cabin-critical camera gear, checked hard cases for the hold-tolerant gear, and a deliberate checked-versus-carry-on triage matter more at this scale because the crew flies with more and can lose more. Battery compliance becomes a genuine planning task with multiple kits’ worth of batteries. The small crew’s constraint is coordination, and a standardised, systematic set of cases is what keeps a multi-person load manageable.
The rental house or larger production business faces a different problem entirely: gear that goes out and comes back constantly, handled by many different people, in kits that change composition job to job. For a rental operation, reconfigurable divider systems beat custom foam because the kit changes constantly, and durability across many round trips matters more than the perfect cradle for one fixed layout, which points toward divider and GRID interiors, ATA-300 cases for the heavy repeated transport, and an inventory system that tracks every item’s location and condition as a core business tool. The rental house also cares about cases that survive careless handling by clients and staff, so build quality and warranty terms carry more weight than for an owner-operator who treats their own gear gently. At this scale, transport gear is infrastructure, and it is specified and budgeted as such.
Across all three profiles, the constants hold. Match protection to the worst journey the gear regularly faces. Separate the protective and working layers. Never neglect battery protection, moisture control, or inventory. Buy a system matched to the movement pattern rather than the most impressive single item. What changes is the emphasis: the solo shooter optimises for flexibility and cost, the small crew for standardisation and coordination, and the rental house for durability and reconfigurability. The right transport system is the one that matches your scale and your movement pattern, and there is no universal best kit, only the best kit for how you actually work, which is why copying another operator’s setup without matching it to your own pattern is a common and expensive error.
Mistakes that keep costing working professionals
The failures in gear transport are not exotic. They repeat, across operators and years, because they come from the same handful of misjudgements, and naming them plainly is more useful than any product recommendation, because avoiding them costs nothing and prevents most losses.
The first and most common is asking one bag to do two jobs. An operator buys a single bag hoping it will both protect gear as checked luggage and carry comfortably on a long shoot, and it does neither well, because those are opposed requirements. The gear that fails most often is the gear packed in a bag being asked to do a job it was never built for, whether that is a soft backpack checked into the hold or a hard case carried on the shoulder all day. The fix is the two-stage system: separate tools for the journey and the shoot, chosen for their actual jobs.
The second is treating foam as an afterthought. Buyers spend on the case and accept whatever stock foam it ships with, then wonder why gear was damaged inside an intact case. Gear that moves inside its case is being damaged even when the case is fine, and a loose fit in generous foam is a slow damage machine. The fix is to treat foam as a working component, specifying custom foam or a proper divider system for high-value gear rather than accepting a rough plucked layout with too much margin.
The third is neglecting moisture until a lens has fungus. Because the failure is slow and silent, it gets no attention until it is too late, and a hazy lens or a corroded contact appears months after the neglect that caused it. The fix is trivially cheap: silica gel in every container, closed-cell foam for humid conditions, airing gear out after damp shoots, and dry storage for high-value glass. The cheapest habit in gear protection, dropping desiccant in every case, is the one most often skipped, and it prevents one of the most expensive slow failures.
The fourth is ignoring the battery rules until the airport. Crews pack batteries the way they always have and discover the current limits at security, where the options are surrender the batteries or miss the flight. The fix is to count watt-hours in advance, protect terminals, keep batteries accessible in carry-on, and check the specific airline’s limits before travelling, treating battery transport as the planning task it has become rather than an afterthought.
The fifth is checking irreplaceable gear to save the inconvenience of carrying it. A good case protects gear in the hold, but it cannot protect against the airline losing the bag, and a lost case of gear grounds a shoot regardless of how well the case would have protected it. The fix is the triage discipline: the irreplaceable and the shoot-critical stay in the cabin, and only genuinely hold-tolerant gear goes below.
The sixth is having no inventory, which turns any loss into a dispute and any claim into a struggle. The fix is a current inventory with serial numbers, values, and photographs, stored separately from the gear, which supports both insurance claims and customs Carnets and costs nothing but a little discipline to maintain.
The seventh, subtler than the rest, is buying transport gear by reputation or catalogue appeal rather than by matching it to an actual movement pattern. The most expensive transport mistakes are not cheap gear that failed but expensive gear bought for a use pattern the operator does not have, the heavy pro system bought by a solo shooter who drives to local jobs, or the light minimal setup relied on by a crew that flies with gear in the hold. The fix runs through this entire article: map how your gear actually moves, identify the threats at each stage, and buy the system that matches, rather than the one that impresses. Every one of these mistakes is avoidable with knowledge rather than money, which is the encouraging truth: reliable transport is mostly a matter of understanding the problem clearly and refusing the shortcuts that seem convenient until the day they cost a shoot.
The direction transport gear is taking next
The pressures shaping audio-visual transport gear are clear, and they point toward a few directions that are worth watching for anyone planning purchases over the next several years. None of this is speculation about exotic technology; it is the visible response of the market to the constraints that already dominate transport decisions.
The strongest pressure is weight, driven by airline enforcement, and it is pushing the whole hard-case market toward lighter construction. The Pelican Air line was the first major answer, cutting substantial weight while keeping the full watertight seal, and competitors have followed with lighter resins and smarter structures. The clear direction is protection at lower weight, because case weight has become the binding constraint for flying crews, and the makers that shave kilograms without sacrificing the seal and impact rating win the flying-professional market. Expect the lightweight lines to keep improving and the weight penalty of a genuinely protective case to keep falling, which is unambiguously good for anyone who flies with gear.
The second direction is reconfigurability, driven by kits that change composition constantly. The move from fixed pluck foam toward modular divider and peg-board systems reflects a working reality: gear lists change, and a fixed foam layout that was perfect last year fits nothing this year. Divider systems, the GRID-style peg-board interiors borrowed from other industries, and modular cube systems all answer this, and the trend is toward interiors that adapt without being recut. For rental houses and multi-kit operators especially, reconfigurable interiors are becoming the default rather than the exception.
The third direction is the tightening regulatory environment around batteries, which is not a product trend but a planning reality that transport gear is adapting to. The 2026 rules are unlikely to loosen, and the pressure on lithium batteries in air transport is more likely to increase than ease as the volume of battery-powered devices in the air keeps rising. Transport gear is responding with better dedicated battery cases that protect terminals and organise packs for quick removal at gate-check, and the direction is toward battery transport being a designed part of the kit rather than an afterthought. Crews that build battery compliance into their systems now are ahead of where the rules are heading.
The fourth direction is integration between the protective and working layers, the systems that let gear move smoothly from hard case to working bag without repacking. Cube systems that drop from a travel bag into a hard case, core units that transfer between a backpack and a case, and standardised sizing that lets components stack and interchange are all moves toward treating transport as a designed system rather than a collection of separate bags. The operators buying into a single maker’s ecosystem, where the cubes, cases, and bags are designed to work together, are betting on this integration, and the makers are responding by building broader interoperable ranges.
For a buyer planning ahead, the practical guidance is to favour lighter protective cases, reconfigurable interiors, deliberate battery protection, and components that integrate across the journey, because those are the directions the constraints are pushing the whole market. The gear that will serve you for years is the gear aligned with where the real pressures point: lower weight, more adaptability, battery compliance built in, and a system that connects the journey to the shoot. The fundamentals do not change: gear must survive impact, vibration, moisture, and dust to arrive able to work, and it must then be carried comfortably and accessed fast on site. What changes is how well the market lets you meet those fundamentals, and it is getting better at it, which means the operator who understands the underlying problem can keep building a lighter, smarter, more reliable transport system with each replacement cycle. The shot depends on the gear, and the gear depends on getting there intact, which is the whole quiet, unglamorous, necessary job that cases and bags exist to do.
Recorded footage is often worth more than the camera that shot it
There is a category of transport risk that no case for a camera body addresses, and it carries the highest stakes of all: the recorded footage. A camera can be replaced overnight, but the only copy of a day’s shoot cannot, and the memory cards and drives holding that footage travel through the same hostile journey as the gear while getting a fraction of the attention.
The asymmetry is stark. A camera body has a market value and a lead time to replace, but its value is bounded and recoverable. Unrecovered footage from a shoot that cannot be repeated, a wedding, a live event, a documentary moment, a client production on a deadline, has a value that is practically unbounded and a replacement time of never, because the moment is gone. Treating the storage media as the most precious thing in the kit, worth more than the camera, is the correct mental model, and it changes how you handle cards and drives in transit.
The physical vulnerabilities of storage media are specific. Memory cards are small, easily lost, and sensitive to physical damage, static, and moisture. Portable drives, whether spinning hard disks or solid-state, are sensitive to impact and, for spinning drives, to vibration and shock while in use. A spinning hard drive is far more fragile in transit than a camera, and a solid-state drive, while more shock-resistant, is still a single point of failure for irreplaceable data, which is why data protection in transit is a distinct discipline from gear protection. A crushed card or a dropped drive can lose everything with no dramatic external damage.
The foundational defence is redundancy, and it is non-negotiable for irreplaceable footage. The principle that professionals follow is to never let footage exist in only one place, which means offloading cards to at least two separate drives before wiping or reusing the cards, and keeping those copies physically separate so a single loss, a stolen bag, a dropped case, cannot take out every copy at once. The single most important rule for footage in transit is that at least two copies exist in two physically separate places before any card is reused, and a crew that reuses a card before the footage is backed up in two places is gambling the entire shoot on nothing failing. On location, this often means offloading to a laptop and a separate drive, or to two drives, before the cards go back into rotation.
Physical protection for the media follows the same logic as gear but at a smaller, more careful scale. Memory cards belong in a proper card case that protects them from physical damage, moisture, and loss, not loose in a pocket or bag where they migrate and disappear, and organising cards so that shot cards are visibly separated from empty ones prevents the catastrophe of formatting a card that was not yet backed up. Drives holding footage deserve cushioned, protected transport, and the copies should travel separately where possible, one with you and one checked or shipped, so that losing one bag does not lose the footage.
The distribution of copies across the journey matters as much as the copies themselves. Carrying both backup drives in the same bag defeats the purpose of having two, because a single loss takes both. The footage copies should travel in different bags, ideally different transport channels, so that no single failure, loss, theft, or damage can destroy every copy, and for the most critical work, uploading footage to cloud or remote storage as a third copy the moment a connection is available adds a copy that no physical loss can touch. A crew shooting something genuinely irreplaceable treats getting a copy off-site, whether by upload or by shipping a drive separately, as a priority as soon as the footage exists.
The data threats extend beyond loss to security, which matters for client and sensitive work. Footage in transit can be stolen along with a bag, and for confidential productions, encrypting the drives means a stolen drive is useless to whoever takes it, protecting both the client’s material and your liability. This is a smaller concern than loss for most work but a real one for sensitive productions, and encryption is a cheap insurance against a stolen drive becoming a leaked production.
The habit that ties it together is disciplined media management as part of the transport routine: cards protected and organised, footage offloaded to redundant copies before cards are reused, copies distributed across separate bags and channels, and a third off-site copy for the irreplaceable. The gear transport protects the tools that make the footage; the media transport protects the footage itself, and of the two, the footage is the one that cannot be replaced, which is why the small, careful discipline around cards and drives is arguably the highest-return protection habit in the entire kit. A crew can lose a camera to a dropped case and still recover; a crew that loses the only copy of the footage has lost the job.
Common questions about protecting and transporting production gear
They solve two different problems and most working crews need both. A hard case is armour for the worst part of the journey: checked baggage, freight, a car boot, a location where gear is dropped and stacked. A soft bag is built for the human part: carrying gear on your back for a day, moving fast, reaching a camera in a second. A hard case protects; a bag carries. Buying only one means either sacrificing protection to stay mobile or carrying an armoured box you cannot comfortably work out of.
No, and reading it that way is a common and expensive mistake. An IP rating measures only dust and water ingress. The 6 means dust-tight and the 7 means it survives immersion to one metre for thirty minutes. It says nothing about impact, drop survival, vibration, or temperature. A case can be fully IP67 rated and still crack on a hard drop, because the rating is silent on mechanical shock. That is why serious cases quote military test standards alongside the IP number.
On its own, nothing specific, because it is not a single pass-or-fail test. MIL-STD-810 is a collection of environmental test methods for shock, vibration, temperature, humidity, altitude, and more, and a maker chooses which methods to run. A case tested to the shock and vibration methods has meaningfully proven something; a case that vaguely claims to meet the standard without saying which methods has proven little. The right question is always which methods were run and to what levels.
For most camera and cine batteries, yes, in carry-on. Spare lithium-ion batteries under 100 watt-hours are allowed in personal quantities in the cabin, which covers the great majority of mirrorless, DSLR, and small cine packs. Batteries between 100 and 160 watt-hours are usually limited to two and often need airline approval. Anything over 160 watt-hours cannot travel as passenger baggage at all and must ship as cargo. Spare batteries are never allowed in checked luggage, only installed in a device or carried in the cabin.
Yes, but under tighter 2026 rules. Power banks must travel in carry-on only, never checked, and are commonly limited to two per passenger. New rules bar recharging them from onboard USB ports during the flight and require them to stay accessible, which in practice means not buried in an overhead bin. Treat a power bank as a spare battery for packing purposes, because that is how the rules classify it.
Because a lithium battery fire in the hold is far harder to detect and fight than one in the cabin. A short circuit or thermal runaway in checked luggage develops unseen, while the same event in the cabin is visible to crew who can act immediately. That single safety logic drives the whole rule set: batteries and power banks stay in the cabin, terminals get taped or capped to prevent shorting, and packs travel protected from crushing and contact with metal.
If the case is sealed and you fly with it, yes. A fully sealed case that is closed at ground level and then taken to altitude, or vice versa, develops a pressure difference across its walls that can make it hard or impossible to open and can stress the seal. A pressure-equalisation valve, sometimes called a purge valve, lets air pressure equalise without letting water or dust in, so the case opens easily after a flight and the seal is not strained. Most quality waterproof cases include one as standard.
It depends on how often your kit changes. Pick-and-pluck, the pre-cubed foam you tear out by hand, is cheap, immediate, and reconfigurable, but the torn cubes fray over time and the fit is approximate. Custom-cut foam, laser or CNC cut to your exact gear, gives a precise, professional fit and lasts longer, but it is fixed and costs more. For a stable kit, custom foam is worth it; for a kit that changes often, a divider system that reconfigures without recutting usually serves better than either.
Density and how they handle moisture. Polyurethane, PU, is soft open-cell foam that cushions delicate items gently and is what most cases ship with pre-cubed, but it absorbs moisture and breaks down over time in humid conditions. Polyethylene, PE, is firmer closed-cell foam that resists water and supports heavier gear, holding its shape far longer under load. Light, sensitive items suit PU; heavy or moisture-exposed gear suits PE, and premium cross-linked polyethylene sits at the top of the range.
Control humidity and airflow. Fungus grows on the glass and internal elements of lenses in warm, damp, still conditions, and it can etch coatings permanently. Storing gear with silica gel desiccant in the case, keeping it out of prolonged damp, and letting it breathe rather than sealing damp air inside all reduce the risk. In humid climates a dry cabinet for storage between shoots is the reliable defence, and never sealing a warm, damp lens into an airtight case is the simplest habit that prevents it.
For professional gear crossing into many non-EU countries, usually yes. An ATA Carnet is an international customs document that lets you temporarily import professional equipment into more than eighty countries without paying duties or taxes, valid for up to a year, and it is standard practice for film and broadcast crews. It must be stamped by customs on every exit and entry. Within the EU single market you do not need one, and for very small kits some crews use a customs broker or rent locally instead, but for a serious kit crossing borders the Carnet prevents being taxed on your own equipment.
Sometimes, if it fits the airline’s cabin dimensions, but never assume it. Rolling camera cases sized to airline carry-on limits let heavy kit move through an airport without being carried and keep fragile gear in the cabin rather than the hold, which is a real advantage. The catch is that cabin size and weight limits vary by airline and aircraft, and a case that boards one flight may be gate-checked on the next. Checking the specific carrier’s limits before travel, and having a plan for gate-check, is the difference between smooth boarding and a scramble.
Separate the working layer from the transport layer. A production recorder-mixer is dense, connector-heavy, and depended on completely, so it should travel in a fitted case or well-padded bag, not loose. Many recordists work out of an over-the-shoulder or harness-mounted bag on set, but that working bag is for use, not for the abuse of transport, and the kit often travels in a hard case and moves into the working bag on location. The small accessories a sound kit accumulates, adapters, windshields, and clips, reward compartmented storage so a shoot is not stopped by a missing part.
For anyone who owns more than one bag, usually yes. A camera cube is a padded insert that turns any bag into protective gear storage and, more usefully, lets a packed kit move between bags without repacking each item. The same cube drops from a daypack into a roller into a hard case, so the gear stays organised and protected while the outer carry changes to suit the journey. That modularity is the real argument for cubes, more than the protection of any single one.
Redundancy first, distribution second. Never let footage exist in only one place: offload cards to at least two separate drives before reusing them, and keep those copies in physically separate bags so a single loss cannot take every copy. For irreplaceable work, add a third copy to cloud or remote storage as soon as a connection allows. Carrying both backup drives in the same bag defeats the purpose, because one stolen bag then loses everything.
Often not, and the gap tends to appear at the worst moment. A general contents policy may cover gear in a studio but exclude it in transit, or cover a vehicle but not checked baggage, or cover theft but not accidental damage. Professional audio-visual work needs specialist all-risks cover that follows the gear in transit, checked as baggage, and on location worldwide, with the territorial limits and exclusions read carefully. Confirming the policy covers the countries you actually work in matters as much as the headline sum insured.
Immobilise the moving parts and cushion against sustained vibration, not just impact. Gimbals have delicate motors and balance mechanisms that suffer from the constant low-level vibration of a long drive or flight, so they travel best locked or in a fitted case that holds them still. Drones carry sensitive gimbals, sensors, and folding arms, plus batteries that bring their own transport rules, and a fitted case that stops everything moving protects them far better than a general bag. For both, the enemy in transit is as much prolonged vibration as a single drop.
Several smaller cases usually beat one large one for a working crew. A single big case hits airline weight limits fast, is awkward for one person to move, and concentrates risk so a single loss or damaged case can take out the entire kit. Splitting gear across smaller cases keeps each within a manageable weight, lets a critical case ride in the cabin while bulkier gear is checked, and means a single mishap costs part of the kit rather than all of it. The exception is freight and touring, where large fabricated cases built to ATA-300 are handled as designed units and the economics favour fewer, bigger cases.
Protecting the camera and neglecting everything else that decides whether the shoot happens. Crews spend on a good case for the body and then let batteries, cards, cables, and footage travel carelessly, when a dead battery, a lost card, or a corrupted drive stops a shoot as surely as a broken camera. The footage in particular is the one thing that cannot be replaced, and a crew that reuses a card before it is backed up in two places is gambling the whole job. Treating the kit as a system, where the weakest link decides the outcome, is what separates reliable crews from lucky ones.
Author:
Jan Bielik
CEO & Founder of Webiano Digital & Marketing Agency
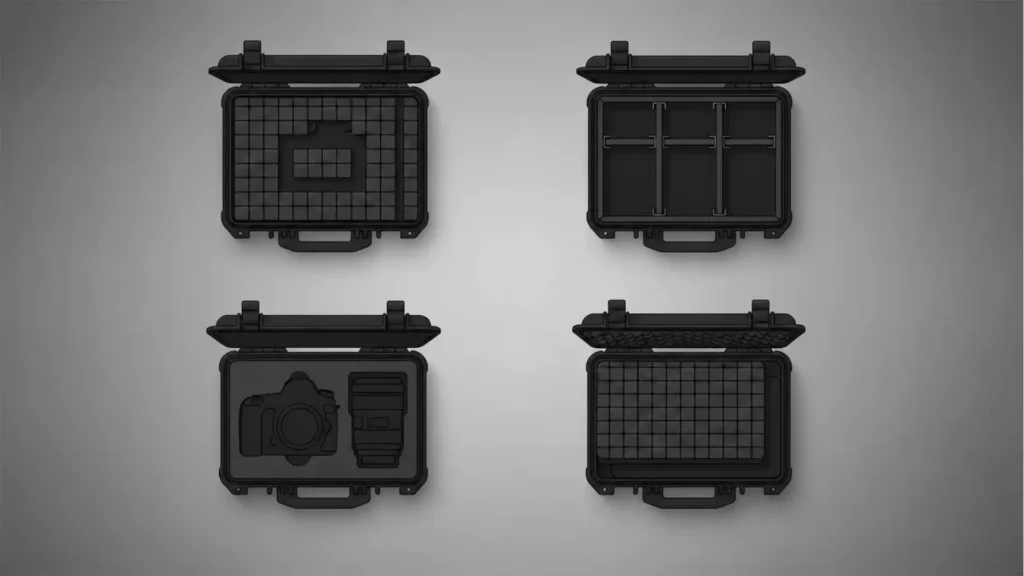
This article is an original analysis supported by the sources cited below
Safe travel with lithium batteries The International Air Transport Association’s passenger guidance on carrying lithium batteries and power banks, including the core packing and carry-on rules referenced throughout the battery sections.
New power bank restrictions will safeguard international aviation The International Civil Aviation Organization announcement limiting power banks to two per passenger and prohibiting in-flight recharging, with the specifications taking effect on 27 March 2026.
Passengers travelling with lithium batteries IATA’s detailed operator and passenger reference on watt-hour thresholds, terminal protection, and the requirement that spare batteries and power banks travel only in the cabin.
What’s new in the 2026 IATA DGR A summary of the changes in the 67th edition of the Dangerous Goods Regulations that became mandatory on 1 January 2026, including revised state-of-charge and power bank provisions.
Ingress protection (IP code) testing A certification lab explanation of what IP ratings measure under IEC 60529, including the meaning of the dust-tight 6 and the one-metre immersion 7 in IP67.
IP and MIL-STD-810 ratings explained A clear breakdown of how IP and MIL-STD-810 differ, why the military standard covers shock and vibration that IP ratings ignore, and why quoting a standard is not the same as passing every test in it.
MIL-STD-810 cameras A technical overview of the specific MIL-STD-810 shock and vibration test methods, such as Methods 514 and 516, used to validate rugged imaging equipment.
What are IP and MIL-STD ratings A manufacturer explanation of the broad environmental conditions MIL-STD-810 addresses, from altitude and temperature shock to humidity and fungus, alongside the complementary role of IP sealing.
Nanuk 910 waterproof hard case A product listing showing how a working camera case combines an IP67 seal, NK-7 resin shell, MIL-STD-810 immersion testing, and ATA-300 impact testing in a single carry-on-sized unit.
Custom foam vs pluck foam for Pelican cases A practical comparison of pick-and-pluck, stock replacement, and custom-cut foam, including why closed-cell polyethylene suits heavy gear and open-cell polyurethane suits lighter items.
Pelican case foam: pluck vs TrekPak vs custom-cut A detailed look at how pluck foam is configured, where it frays under repeated load, and when divider systems or precision-cut inserts serve a changing kit better.
Pick N Pluck foam insert The maker’s own description of the pre-scored cubed polyurethane foam that ships with most protective cases and the do-it-yourself method of shaping it to gear.
A deep dive into foam inserts for gear safety An explanation of foam material selection from soft polyurethane to cross-linked polyethylene, matched to gear weight and moisture exposure, and the role of automatic pressure-equalisation valves.
The best camera bags and backpacks in 2026 A current review round-up covering rolling cases sized for overhead bins, the Think Tank International, and leading backpacks and slings for different shooting styles.
The best camera backpacks and bags of 2026 A tested comparison of load-carrying comfort and gear protection across major packs, including Shimoda’s core-unit system and hip-belt load transfer for heavy kits.
Peak Design’s new modular camera backpack Coverage of the modular travel bag direction the market is moving toward, including the Roller Pro carry-on and interchangeable pack components.
Best camera bags for travel photography A working guide to matching bag type to shooting need, covering slings for fast access, the camera-insert approach, and modular core units that move between bags.
Rental equipment and ATA Carnets for film and TV production An industry explanation of the ATA Carnet as a passport for gear that allows duty-free and tax-free temporary import across many countries for up to a year.
ATA Carnet and temporary imports The US government trade authority’s overview of temporary importation options for professional equipment, including the ATA Carnet and its alternatives.
ATA Carnet FAQs US Customs and Border Protection guidance on how carnets work, what categories of goods they cover, and the consequences of disposing of listed items abroad.
ATA Carnet: what it is and how it works A logistics explanation of the carnet system administered through the ICC World Chambers Federation and accepted across roughly eighty countries and customs territories.
Creator backup workflow and the 3-2-1 rule A workflow guide to protecting footage with three copies on two media types and one off-site, and to keeping cards in labelled cases as a durable field archive.
What is a 3-2-1 backup strategy for photographers A photographer-focused explanation of the redundancy principle, with common mistakes such as confusing a RAID array with a true second copy.
The 3-2-1 backup rule explained A data-recovery perspective on the backup standard originally coined by photographer Peter Krogh, covering separate media types and physically off-site copies.
| Citing this article? Brief excerpts are welcome. Please credit Webiano.digital, name the author where stated, and include a link to https://webiano.digital and to this original article. Full or substantial republication requires prior written permission. Read our Copyright and Content Use Policy. |
This article was prepared with the assistance of artificial intelligence tools. The content underwent expert human review, and Webiano Digital & Marketing Agency assumes editorial responsibility for its final version and publication.